メインコンテンツにスキップ

Motorola Moto Z2 Force ディスプレイと指紋センサーの交換

注意:あなたは必要条件ガイドを編集しています。あなたが行なう変更は、この手順を含む全ての6個のガイドに反映されます。

英語
日本語

手順 7を翻訳中

手順7
Motorola Moto Z2 Force Display and Fingerprint Sensor Replacement: 手順 0、 3の画像 1 Motorola Moto Z2 Force Display and Fingerprint Sensor Replacement: 手順 0、 3の画像 2 Motorola Moto Z2 Force Display and Fingerprint Sensor Replacement: 手順 0、 3の画像 3
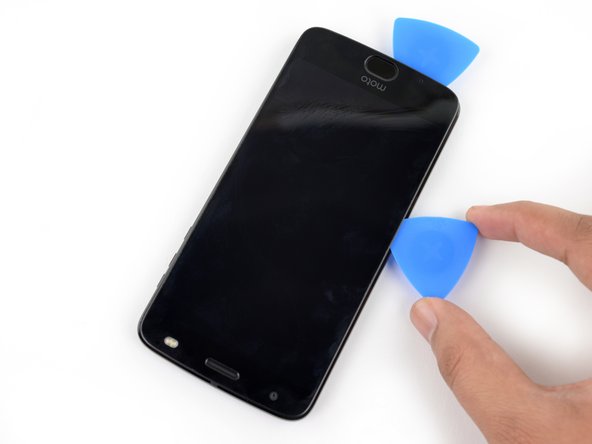
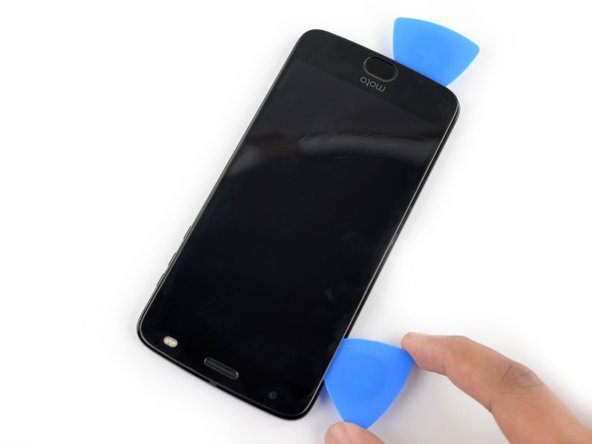
  • Insert another opening pick underneath the bottom edge of the screen assembly and slide it around the bottom left corner of the device so it is underneath the assembly's left edge.

  • Slide your tool all along the left edge of the phone to separate the metal clips and adhesive securing the screen assembly.

  • Like before, ensure you are separating the entire assembly by identifying the three metal clips on the right edge of the device.

スクリーン・アセンブリ下端に別のオープニング・ピックを挿入し、アセンブリの左端のとデバイスの左下コーナー周辺をスライドさせます。

デバイス左端に沿ってツールをスライドさせ、スクリーン・アセンブリを固定している金属クリップと接着剤を切り離します。

前回同様、デバイスの右端にある3つの金属クリップを確認し、アセンブリ全体を分離することを確認します。

クリエイティブコモンズのオープンソース著作権のもと、あなたの投稿は著作権の対象となります