メインコンテンツにスキップ

iRulu AX760 Motherboard Replacement

必要な工具と部品

  1. iRulu AX760 Motherboard Replacement, Battery: 手順 1、 3の画像 1 iRulu AX760 Motherboard Replacement, Battery: 手順 1、 3の画像 2 iRulu AX760 Motherboard Replacement, Battery: 手順 1、 3の画像 3
    • Use a plastic opening tool or metal spudger to free the rear cover.

    • Insert your spudger into the side of your tablet.

    • Crack open each edge and remove the cover.

  2. iRulu AX760 Motherboard Replacement: 手順 2、 1の画像 1
    • Open your tablet.

  3. iRulu AX760 Motherboard Replacement: 手順 3、 1の画像 1
    • Take your plastic flat head tool and insert it under the battery.

    • Lift the battery up.

    • Make sure to remove any tape from the battery.

  4. iRulu AX760 Motherboard Replacement: 手順 4、 2の画像 1 iRulu AX760 Motherboard Replacement: 手順 4、 2の画像 2
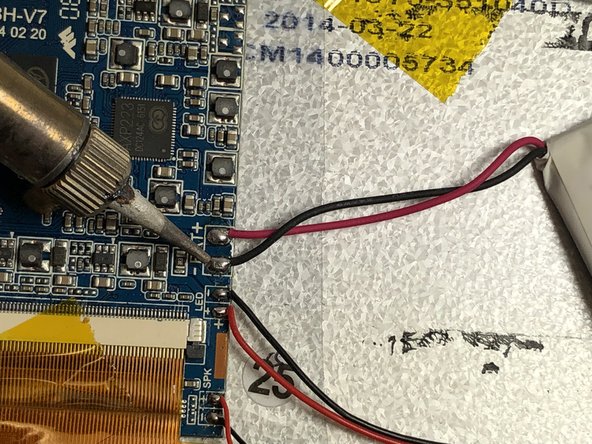
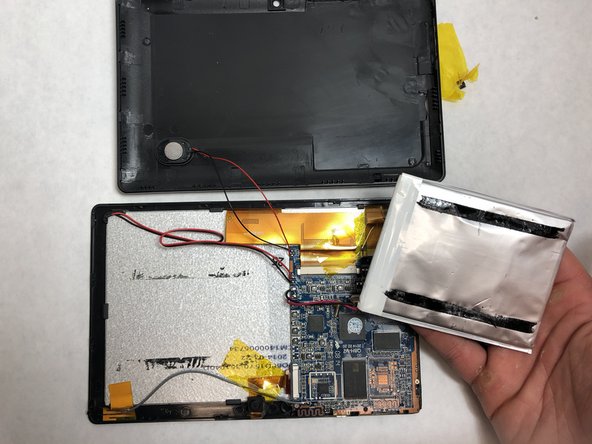
    • Use a soldering iron to remove the solder that connects the black and red wires of the battery to the motherboard.

    • Keep the wires of the battery taught.

    • The iron should only be pressed to the solder for 2-3 seconds max.

    • Be very carful, the soldering iron will be very hot!

    • Visit this link for information about soldering. はんだ付けとはんだ除去の作業ガイド

  5. iRulu AX760 Motherboard Replacement: 手順 5、 1の画像 1
    • Remove your old battery and replace it with the new battery.

  6. iRulu AX760 Motherboard Replacement, Motherboard: 手順 6、 2の画像 1 iRulu AX760 Motherboard Replacement, Motherboard: 手順 6、 2の画像 2
    この手順で使用する道具:
    Plastic Cards
    $2.99
    購入する
    • There are two thin adhesive strips under the battery that run vertically along the left and right side.

    • Carefully wedge a plastic card or spudger under the battery and along both adhesive strips. Gently work the card or spudger up and down to free the battery.

    • Do not use metal tools, and do not bend or puncture the battery.

  7. iRulu AX760 Motherboard Replacement: 手順 7、 3の画像 1 iRulu AX760 Motherboard Replacement: 手順 7、 3の画像 2 iRulu AX760 Motherboard Replacement: 手順 7、 3の画像 3
    • WARNING: SOLDERING IRONS BECOME EXTREMELY HOT. DO NOT TOUCH

    • For information on soldering and desoldering, check this link.

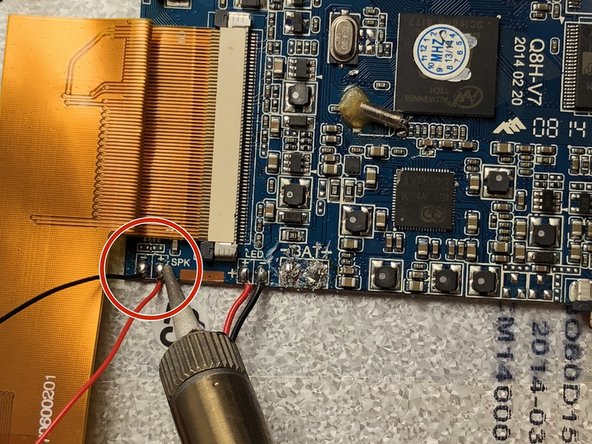
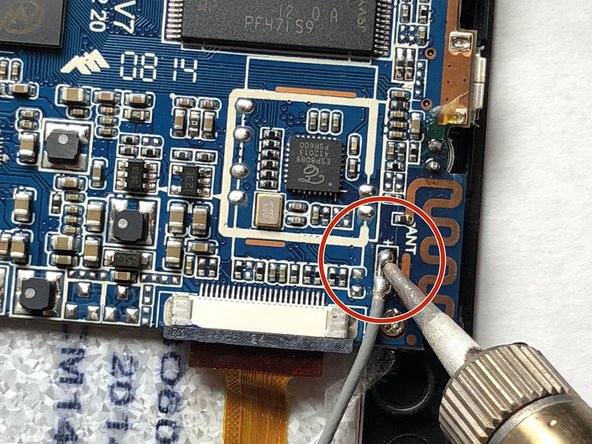
    • You must desolder several sets of contacts before attempting to remove the motherboard.

    • You must desolder the BAT (battery), LED, SPK (speaker), and ANT (antenna) contacts.

  8. iRulu AX760 Motherboard Replacement: 手順 8、 2の画像 1 iRulu AX760 Motherboard Replacement: 手順 8、 2の画像 2
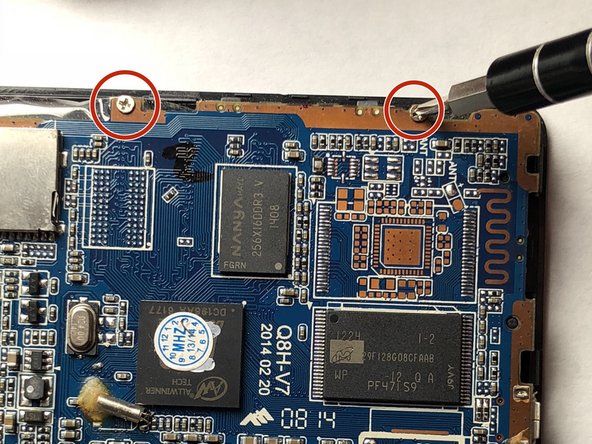
    • Unscrew the motherboard from the screen with the JIS #000 Screwdriver, a Phillips-head type screwdriver

  9. iRulu AX760 Motherboard Replacement: 手順 9、 2の画像 1 iRulu AX760 Motherboard Replacement: 手順 9、 2の画像 2
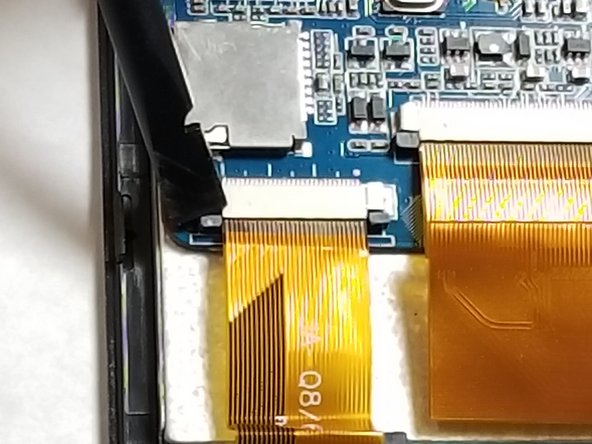
    • Use a plastic spudger to push the tab, releasing the motherboard from the screen. You can now remove the old motherboard.

    • You will not need a metal spudger in order to re-place the motherboard

終わりに

To reassemble your device, follow these instructions in reverse order.

作成者

5人の作成者と共同で作成されました。

Adam Schubach

メンバー登録日: 03/20/18

123 ポイント

1ガイドが承認済み

チーム

IUPUI, Team S6-G4, Baechle Spring 2018 IUPUI, Team S6-G4, Baechle Spring 2018人のメンバー

IUPUI-BAECHLE-S18S6G4

4 メンバー

8のガイドは作成済み

0 件のコメント

コメントを追加

統計データ:

過去 24時間: 0

過去 7 日: 3

過去 30 日: 5

今までの合計 320