メインコンテンツにスキップ

iRobot Roomba 655 Pet Series Brush Motor Replacement

必要な工具と部品

  1. iRobot Roomba 655 Pet Series Brush Motor Replacement, Removing the Side Brush: 手順 1、 2の画像 1 iRobot Roomba 655 Pet Series Brush Motor Replacement, Removing the Side Brush: 手順 1、 2の画像 2
    • Flip the device over onto its back.

    • Find the side brush, and unscrew the single screw that connects to brush motor by using the Phillips head #2 screwdriver.

    • This screw doesn't completely come out of the yellow side brush.

  2. iRobot Roomba 655 Pet Series Brush Motor Replacement, Removing the Back Panel: 手順 2、 2の画像 1 iRobot Roomba 655 Pet Series Brush Motor Replacement, Removing the Back Panel: 手順 2、 2の画像 2
    • Using a Phillips #1 screwdriver, remove the four screws on the back panel.

    • Once the screws are loose gently pry the back plate away from the body by using the spudger tool.

    • The screws don't completely come out of the panel, but it will still come apart once unscrewed.

  3. iRobot Roomba 655 Pet Series Brush Motor Replacement, Removing the Battery: 手順 3、 3の画像 1 iRobot Roomba 655 Pet Series Brush Motor Replacement, Removing the Battery: 手順 3、 3の画像 2 iRobot Roomba 655 Pet Series Brush Motor Replacement, Removing the Battery: 手順 3、 3の画像 3
    • Grab the two pieces of green tape with your thumb and index finger

    • Pull up on the battery in an upwards direction to remove it

  4. iRobot Roomba 655 Pet Series Brush Motor Replacement, Battery Contact Points: 手順 4、 2の画像 1 iRobot Roomba 655 Pet Series Brush Motor Replacement, Battery Contact Points: 手順 4、 2の画像 2
    • These are the contact points on the Roomba for the battery

    • These are the contact points on the battery

    • If these contact points are dirty, they can be cleaned with a moist microfiber cloth (distilled water recommended)

  5. iRobot Roomba 655 Pet Series Brush Motor Replacement, Brush Motor Removal: 手順 5、 3の画像 1 iRobot Roomba 655 Pet Series Brush Motor Replacement, Brush Motor Removal: 手順 5、 3の画像 2 iRobot Roomba 655 Pet Series Brush Motor Replacement, Brush Motor Removal: 手順 5、 3の画像 3
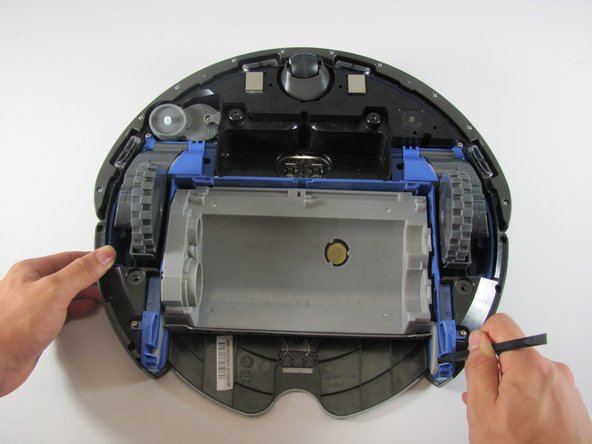
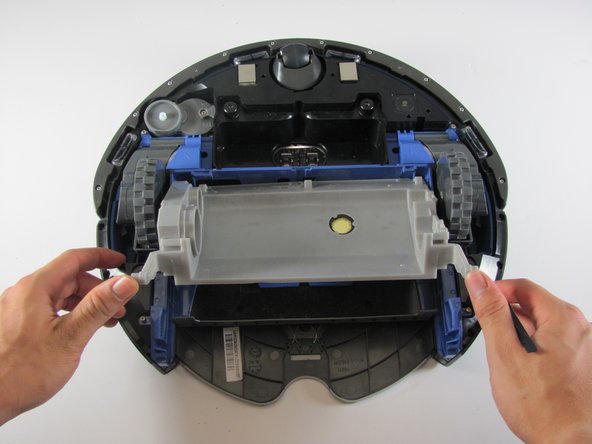
    • Insert a spudger into the side to pop out one side of the brush holder.

    • Repeat the same step, but now on the other side of the brush holder.

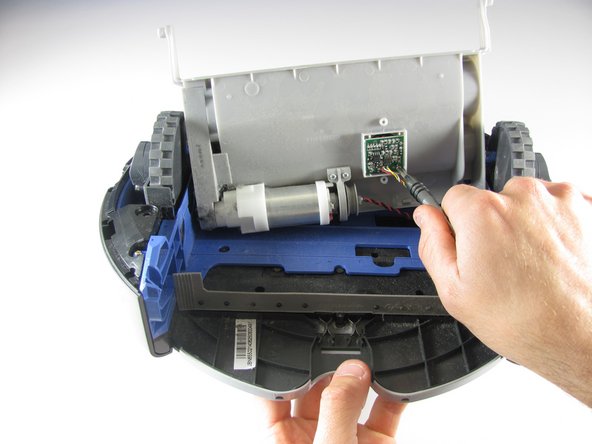
    • Lift the gray plastic piece up carefully to expose the motor.

    • Do not pull up too hard because you could snap a wire attached to the motor or motor circuit board.

  6. iRobot Roomba 655 Pet Series Brush Motor Replacement: 手順 6、 2の画像 1 iRobot Roomba 655 Pet Series Brush Motor Replacement: 手順 6、 2の画像 2
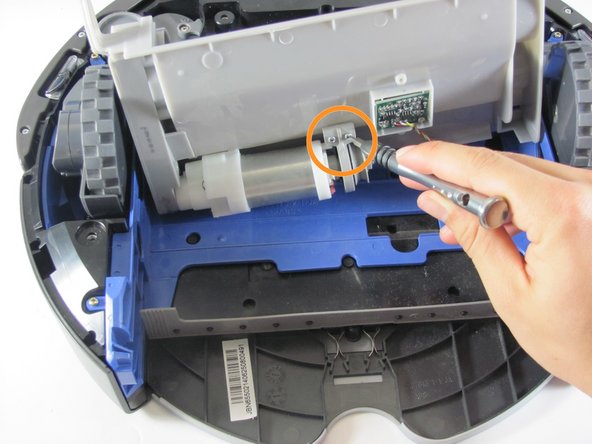
    • Use a Phillips #0 to remove the two 6 mm screws securing the green circuit board protector.

    • Remove the 6mm Phillips screw attaching the circuit board. Doing so should give you access to the circuit board.

  7. iRobot Roomba 655 Pet Series Brush Motor Replacement: 手順 7、 2の画像 1 iRobot Roomba 655 Pet Series Brush Motor Replacement: 手順 7、 2の画像 2
    • These rubber rings protect the motor circuit board from dust accumulated in the Roomba.

    • Do not lose these rubber rings.

    • Remove the two - 7mm screws that connect the motor to the grey plastic protector. Use a Phillips head #0 this time.

  8. iRobot Roomba 655 Pet Series Brush Motor Replacement: 手順 8、 2の画像 1 iRobot Roomba 655 Pet Series Brush Motor Replacement: 手順 8、 2の画像 2
  9. iRobot Roomba 655 Pet Series Brush Motor Replacement: 手順 9、 3の画像 1 iRobot Roomba 655 Pet Series Brush Motor Replacement: 手順 9、 3の画像 2 iRobot Roomba 655 Pet Series Brush Motor Replacement: 手順 9、 3の画像 3
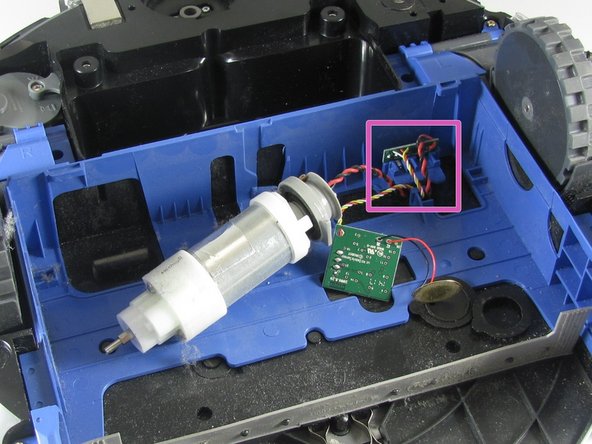
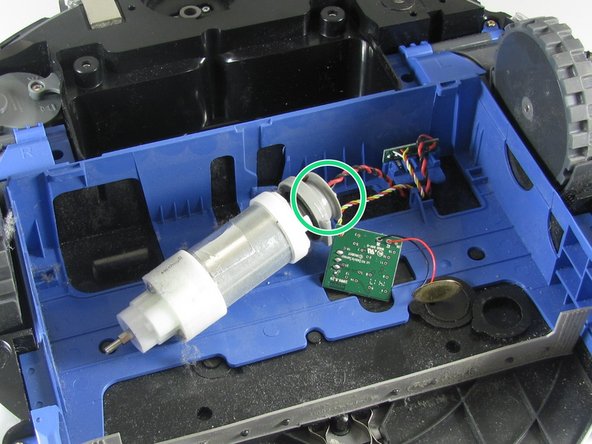
    • Option A: Some motors can unclip from the wiring harness. Use the spudger to pry the white colored base of the motor from the gray piece on the end.

    • Clip the new motor into the gray plastic in the same configuration you removed the original motor.

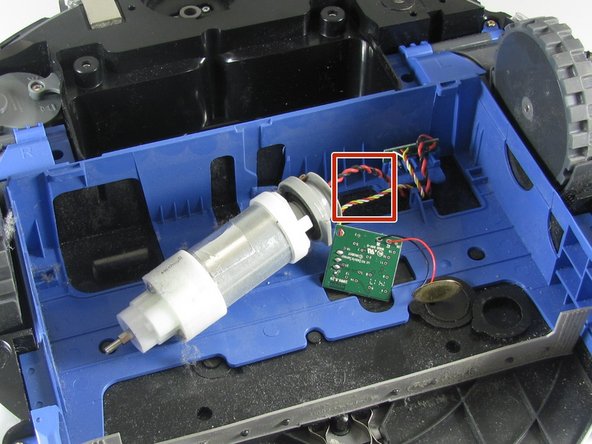
    • Option B: If your replacement motor does not have wires pre-attached, snip the existing wires near the base of the motor.

    • Solder the snipped wires to the base of the new motor in the same configuration they were with the original motor.

    • Option C: If your new motor has wires pre-attached, splice the original wires with the respective wires from the original motor.

終わりに

To reassemble your device, follow these instructions in reverse order.

ある他の人がこのガイドを完成しました。

作成者

10人の作成者と共同で作成されました。

Matt Davis

メンバー登録日: 01/22/15

1,624 ポイント

7のガイドは作成済み

チーム

Cal Poly, Team 21-20, Maness Winter 2015 Cal Poly, Team 21-20, Maness Winter 2015人のメンバー

CPSU-MANESS-W15S21G20

4 メンバー

14のガイドは作成済み

0 件のコメント

コメントを追加

統計データ:

過去 24時間: 0

過去 7 日: 3

過去 30 日: 8

今までの合計 2,762