はじめに
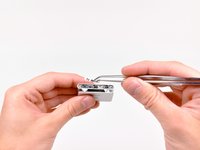
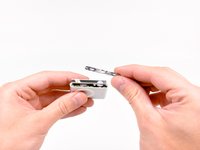
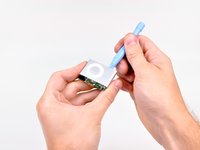
このガイドを参照して、お持ちのShuffleのバッテリーを交換しましょう。バッテリーを交換するには、精密プリント基板用半田ごてと表面実装はんだ付けの知識が必要です。
必要な工具と部品
-
-
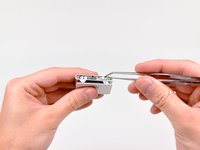
この手順で使用する道具:Tweezers$4.99


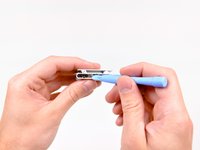


デバイスを再度組み立てるには、この説明書の逆の順番で組み立ててください。
デバイスを再度組み立てるには、この説明書の逆の順番で組み立ててください。
78 の人々がこのガイドを完成させました。

20 件のコメント
Followed your clear instructions and made a successful battery change. It would be helpful to explain that both cover plates are held ond by double sided sticky tape and to give caution on the location of the miniclips on the control cover - I cut through 2 of them by mistake. Thanks for the help.
Regards, Frank, North yorkshire, UK
I rarely find instructions so detailed and foolproof. I ended up with a "new" iPod saving a bunch of money.
Read on about the incidents I encountered.
The working end of the plastic pry tool snapped off rendering it useless, but not before it irreparably bent the pink housing. The suggested screwdriver for which I paid extra did not undo the tiny screws, and I eventually tapped them out with a miniscule eyeglass-repair screwdriver. (Is it a coincidence I did not see a screwdriver in any of the photos?)
Ditto on the suggestion that the super-sticky adhesive presents itself as an obstacle. A suggestion to apply pressure slowly as the adhesive releases would have been helpful.
I loved that the instructions were really easy to follow. It would be helpful to mention that the logic board ought to be really carefully pushed out. It was difficult in my case and I had to apply a considerable amount of force to slowly push it out.
Despite taking care to control my strength and push it out, part of the protective yellow tape got torn and one of the components was dislodged and broken. It must've been pretty important cuz unfortunately my iPod didn't work after I put it together in one piece. I'm sure the fault lies in my carelessness, the instructions were great. I hope you guys have better luck with yours (:
just to add what Frank said: the white plastic control cover has 6 tiny clips; two either side of the sliding switches and two in the middle. I found that gently levering the cover up by inserting the tip of an Xacto blade through the holes the sliders ride in avoids damaging the clips. Be careful not to turn the iPod on when you do this or scratch the green paint next to the on/off slider.
Does anyone have what the best approach to removing the resin from the solder points?