はじめに
ご注意:単純にフロントパネルを交換するための完全版ガイドです。フロントパネルアセンブリの交換用パーツをお持ちの場合は、古いフロントパネルからホームボタンを取り外す手前で作業を止めてください。そして新しいフロントパネルアセンブリをインストールするための手順を逆の順番に従います。
このガイドの一部分はWi-Fiモデルを使用して撮影されています。内部パーツが若干異なる部分がありますが、基本的に作業は同じです。
必要な工具と部品
-
-
鍋を十分な量のお湯で満たして、iOpener を完全に沈めます。
-
お湯を沸かして熱くなったら火を止めます。
-
iOpenerを熱湯の中に約2−3分間沈めます。iOpener全体が完全に浸かっているか確認してください。
-
トングなどを浸かって、温まったiOpenerをお湯から取り出します。
-
タオルでiOpener全体を拭き取ります。
-
iOpenerの準備は整いました。iOpenerを再度温める必要がある場合は、お湯を沸騰させて、火を止めてからiOpenerを2-3分間浸してください。
-
-
-
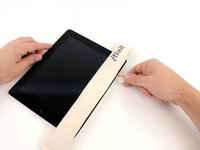
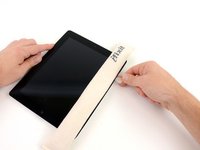
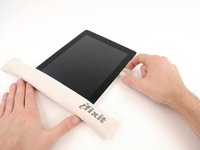
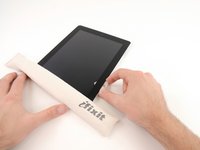
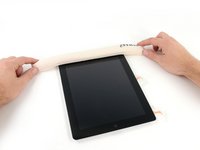
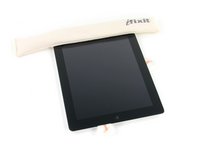
液晶画面に割れがある場合、画面がさらに割れるのと破片によって怪我するのを防ぐため、画面にテープなどを貼って保護してください。
-
iPadの液晶画面全体に透明なテープを端を重ねるようにして貼ります。
-
この修理ガイドの記述通りに作業を進められるようベストを尽くしてください。しかしガラスが壊れてしまった場合、作業を続けるに従ってひび割れは広がっていきます。ガラスを取り出すために、メタル製のこじ開け用ツールを使用してください。
-
-
-
iOpenerをiPadの画面の右の端に沿って平らに、iPadとiOpenerが隙間なく接触するようにおきます。
-
iPad上にiOpenerのバッグを約90秒間載せてください。接着剤が温まって、柔らかくなったらフロントパネルを開いてください。
-
-
-
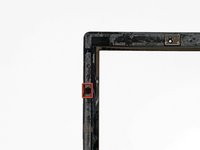
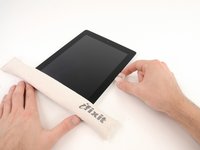
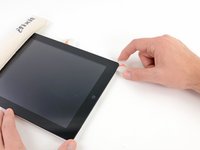
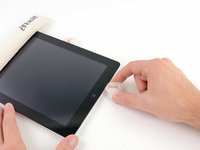
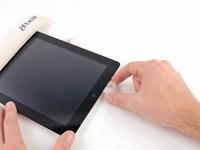
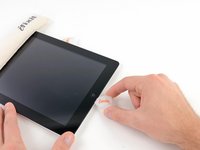
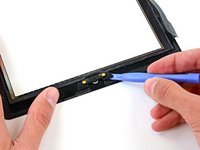
iPadの右上隅(iPad上部から約5cm以内の場所)にある接着リングには、小さな隙間があります。 この小さな隙間をこれから利用します。
-
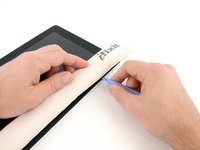
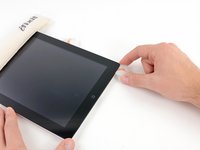
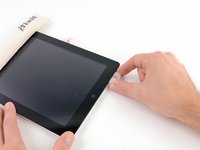
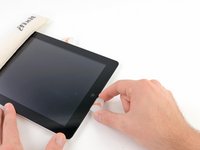
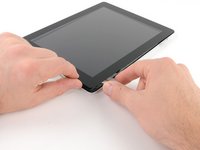
ツールをミュートボタンと位置を揃えます。 プラスチックの開口ツールの先端をフロントガラスとプラスチックのベゼルの間の隙間に挿入します。隙間を広げるのに十分なだけ、開口ツールの先端を差し込んでください。
-
-
-
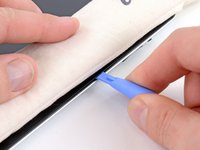
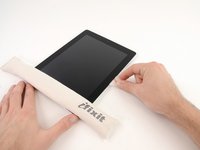
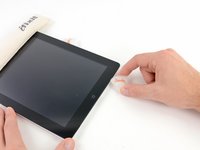
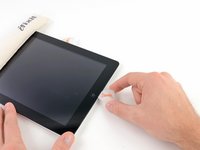
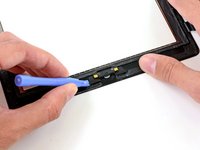
フロントガラスとプラスチック製ベゼルの間にプラスチック製開口ツールの先端を差し込んだまま、プラスチック開口ツールの右側の溝にプラスチック製開口ピックをスライドします。
-
-
-
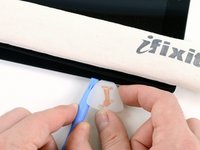
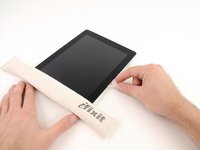
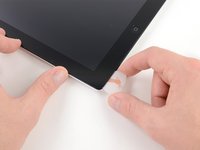
iPadの底部角から1つ目の開口ピックを取り外す前に、2つ目のピックをフロントガラスの右端に差し込み、接着剤が再接着しないよう防止します。
-
iOpenerを再度温めて、iPadの上端に置きます。
-
-
-
-
アンテナをiPad底部に固定している脆いパーツにダメージを与えないように、アンテナをフロントパネルに留めている接着剤を解放する必要があります。次の手順を注意深く参照してください。
-
-
-
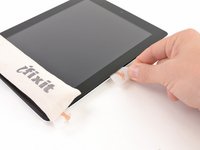
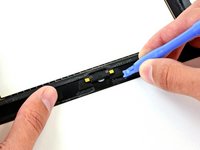
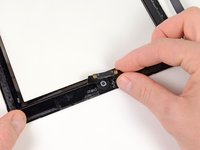
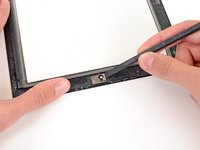
Wi-FIアンテナ(デバイス右端から約75 mm、またはホームボタンのすぐ隣)を通過したら、開口ピックを奥まで完全に差し込みます。
-
ピックを右にスライドさせ、フロントガラスに固定している接着剤を剥がして、Wi-Fiアンテナを解放します。
-
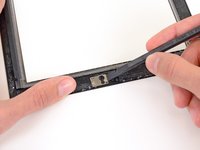
アンテナは、ネジとケーブルで、iPadの底面に取り付けられています。 この手順では、アンテナをフロントパネルから取り外し、パネルを取り外すときにアンテナが損傷しないようにします。
-
-
-
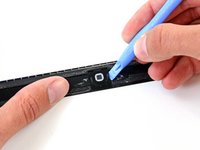
iPad下部に沿って接着剤を切開し、ホームボタンの周辺では開口ピックの大部分を引き抜いて、わずかな先端だけ差し込むようにします。ホームボタンを通過したら、10 mmの深さまで再挿入します 。
-
-
-
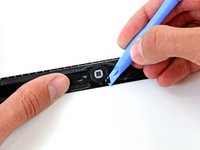
開口ピックをiPadの上端に沿ってスライドさせ、フロント向きカメラのブラケット周辺では少し引き抜いてください。
-
この部分の接着剤は非常に厚く、かなりの力が必要になる場合があります。 iPadが滑ったり損傷したりしないように注意して、慎重に作業してください。
-
-
-
iPad左端に沿って開口ピックをスライドさせ、接着剤を切開します。 左側全体に沿ってデジタイザが搭載されているため、接着剤は薄くなっています。 デジタイザの損傷を防ぐために、ピックを浅く(最大10 mm以下)差し込んでください。
-
-
この手順で使用する道具:Microfiber Cleaning Cloths$3.99
-
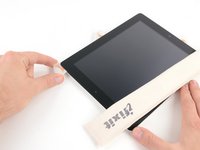
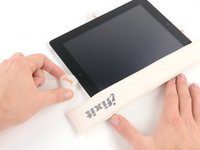
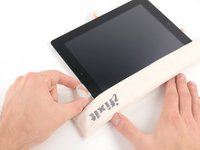
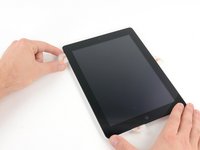
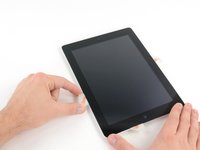
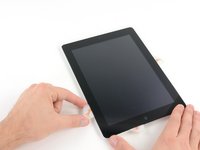
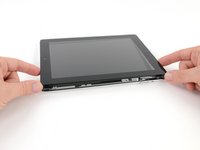
iPadの右上角と右下角を掴んで、iPadからフロントガラスを回転させて外します。
-
-
-
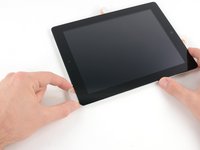
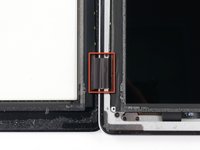
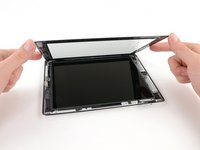
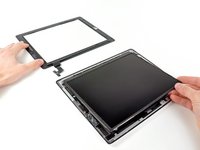
フロントパネルのリボンケーブルがLCD下に繋がっています。これにアクセスするには、LCDカバーを一時的に持ち上げて作業の邪魔にならない位置に保管してください。
-
LCDを音量ボタンに一番近い長辺側の端より持ち上げて、慎重にリアケースから外して、本をめくるように反対側に裏返します。
-
フロントパネル上にLCDをうつ伏せにして保管します。
-
-
-
プラスチックの開口ツールの先端を使って、ロジックボード上のシールドからデジタイザーケーブルを剥がします。
-
慎重にデジタイザーケーブルを、リアケース横に固定している接着剤から剥がします。
-
-
-
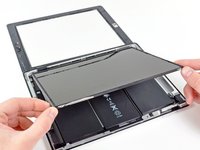
本を閉じるときのように、デジタイザケーブルから最も離れた長辺側からLCDを持ち上げて、慎重に背面ケースの側に返します。
-
LCDを持ち上げたまま、フロントパネルをiPadから静かにスライドします。 背面ケースまたはLCDのデジタイザケーブルを引っ掛けないように注意してください。
-
LCDをデバイス本体に戻します。
-
-
-
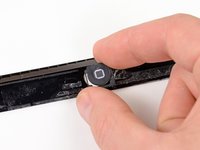
ホームボタンマウンティングブラケット端の下にプラスチック製開口ツールの先端を差し込みます。
-
固定スプリングブラケットに沿ってプラスチック製開口ツールをスライドし、接着剤から解放します。
-
フロントパネルからマウンティングブラケット付きのホームボタンを取り外します。
-


デバイスを再組み立てするには、これらのインストラクションを逆の順番に従って作業を進めてください。フロントパネルを再装着するには、iPad 2 CDMAフロントパネル接着ストリップの装着方法を参照してください。
95 の人々がこのガイドを完成させました。
以下の翻訳者の皆さんにお礼を申し上げます:
100%

これらの翻訳者の方々は世界を修理する私たちのサポートをしてくれています。 あなたも貢献してみませんか?
翻訳を始める ›

10件のガイドコメント
I would recommend that in cases of replacing shattered screens, that you tape the front panel glass with clear packing tape using overlapping strips, before you begin. This helps to ensure that the panel stays intact, and reduces the chances of puncturing the digitizing layer, and damaging the LCD upon removal.
You want to use clear tape so that you are able to see how any of the glass remnants are shifting during removal.
i used a hair drier instead of the microwave thing and it worked fine, also the replacement kit i bought on ebay for $22 did not come with the new adhesive, so be sure you get everything you need if not ordering from ifixit. I did get 2 small smudges on the LCD, these came off very easily with a q-tip and rubbing alcohol. My glass was shattered completely, so the guitar pick was of little use. I mostly had to scrape the tiny shards off with a 3/32" standard screwdriver. superb guide!!
algore2016 - 返信 共有
Very good Guide, I wanted to thank you very much. I didn't have to buy a new iPad - saved a lot of money here!! Keep up the good work folks.
Note to self: Broken screens suck with these. Once you remove all the little pieces and get through that, it's very easy to pull apart from there. Like other people said, use tape to prevent glass pieces from flying at you and to keep the glass together during the prying process. Don't need to damage the product or your eyes.
this is a great guide !!! i just want to share a little trick with getting the glass off with the right temps. Heat guns are good but keep the temp no higher the the 150 to the 200 C mark max at about 3 to 6 inches away and never directly on the lcd as it might leave a patch. the iOpener is a great tool aswell. but the problem with both the heat gun and other heat type tool is that they tens not to be consistent through out, like one side is hot but the other has now gone cold. Try to find a sunny day, turn the iPad off and just leave the iPad in a window under the sunlight, it does get hot enough and not only that, the heat is uniform throughout the device so it easier to remove the glass. Good luck
Reboot Gozo - 返信 共有