はじめに
iMac Intel 21.5インチのHDDドライブを交換します。
このガイドではiMacのHDDドライブをSSDにアップグレードするための手順です。SSDの温度センサーを導入する方法も併記していますから、Macのファンが正しいスピードで作動するでしょう。
iMacの作業を開始する前にコンピューターの電源を抜いて、電源ボタンを10秒間長押しして、電源のキャパシタを放電します。
警告:電源の裏側にあるキャパシタのリード線や露出したはんだ部分に接触しないでください。
必要な工具と部品
-
この手順で使用する道具:Heavy-Duty Suction Cups (Pair)$14.95
-
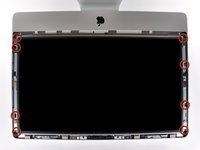
ガラスパネルの上部コーナーの2箇所に吸盤カップを取り付けます。
-
吸盤カップがうまく装着しない場合は、ガラスパネルと吸盤カップを中性洗剤などで綺麗に拭き取ってください。
-
-
-
-
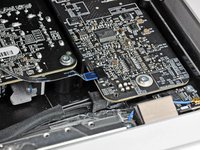
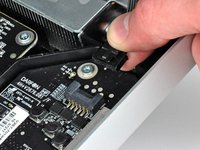
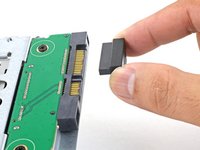
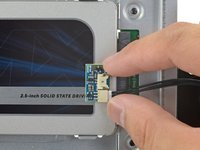
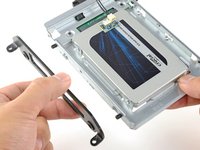
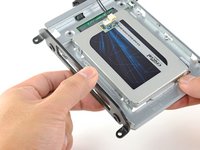
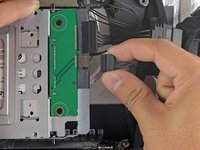
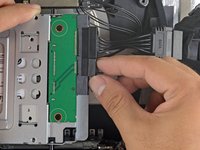
SSDコネクタをメタル製エンクロージャーのソケットの位置に揃えます。
-
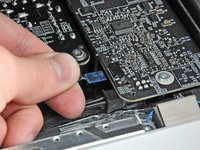
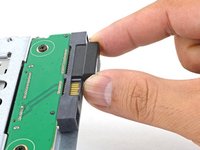
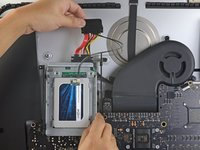
SSDがしっかりと固定されるまで、ドライブをエンクロージャーソケットに押し付けます。
-


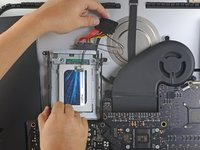


デバイスを再組み立てする際は、これらの説明を逆の順番行ってください。
384 の人々がこのガイドを完成させました。
以下の翻訳者の皆さんにお礼を申し上げます:
100%


これらの翻訳者の方々は世界を修理する私たちのサポートをしてくれています。 あなたも貢献してみませんか?
翻訳を始める ›

67件のガイドコメント
Make sure the hard drive is of the same producer and it has a temp sensor connector. It's the only way to ensure that the heat sensor connector will fit into the hard drive's socket. If you don't plug in the temp sensor iMac's HDD Fan will rotate at its maximum speed, ie. over 6000 rpms - the noise is extraordinary!!!
I replaced my internal HDD on my 215" iMac, but the iMac can't get access to the new hard disk's (Seagate Barracuda Green) temperature sensor. The HDD fan in the iMac steps up the RPM, and over about 15min reaches 6000RPM (VERY loud) and stays there until machine is shutdown or put to sleep.
I found a fix for this: http://hddfancontrol.com/HDDFanControl/H... - this tiny piece of shareware software allows the iMac to see the temperature of the drive via S.M.A.R.T., and therefore the fans react according to the correct temperature again!
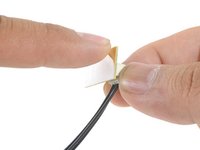
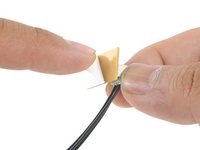
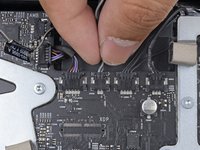
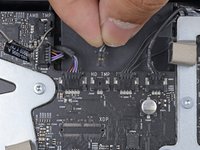
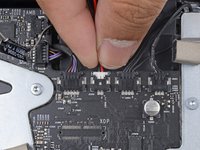
One thing Andrew left out here, which I discovered on my own, is that even if you have the temperature sensor connected to the correct pins, you ALSO have to make sure that it is 'oriented' properly.
On the sensor connector (the little head that plugs into the hard drive) I saw a little white dot on one side, which it turns out, indicates that's the 'top'. So on my iMac, you have to make sure when you connect the temp sensor connector with the white dot showing.
Otherwise, I got the 6000 rpm fans.
Success. For any interested people, it's about an hour - going slowly. Now that I've done it, I assume I could do it again in 15 minutes if I had to.
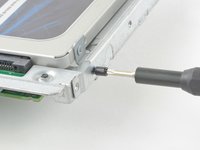
Just have the right tools handy, the T 8 and T 10 bits in particular. Getting off the display screen is easy. The screws are harder than you'd think because of the magnets, but they're not that bad. I recommend having tweezers to help pull them and place them later on.
Overall, the thing that worried me most was the fan issue. And, so far... it's not an issue. I had a seagate 500 gb, and I replaced it with a seagate barracuda 3 tb hhd. Everything fit right into it, just as it did into the original. No optical sensor needed. No new sensor needed, period. No software needed. Nothing. Just put in the new hd, and it works. I'm very pleased, and very proud of myself. Good luck to anyone considering doing this upgrade. You can do it, really.
It's a pretty straightforward procedure. Took less than an hour. I replaced the 500GB Seagate Barracuda with a Seagate Barracuda 2TB, model ST2000DM001. So far, after about 30 minutes of use, it's working great, and I haven't had the fan problem, but we'll see what happens.
Kevin's advice about the tweezers for extracting and inserting the screws that attach the display to the case was right on (although I used a small pliers instead).
Before you begin the replacement procedure, I highly recommend putting the new drive into a hard drive dock, and restoring to it from a Time Machine backup. Try booting off the new drive once to make sure it works. Then, when you swap the new drive for the existing internal drive, it'll be ready to go with no further effort needed.