はじめに
このガイドを使ってハードドライブを交換したりアップグレードできます。
必要な工具と部品
-
-
-
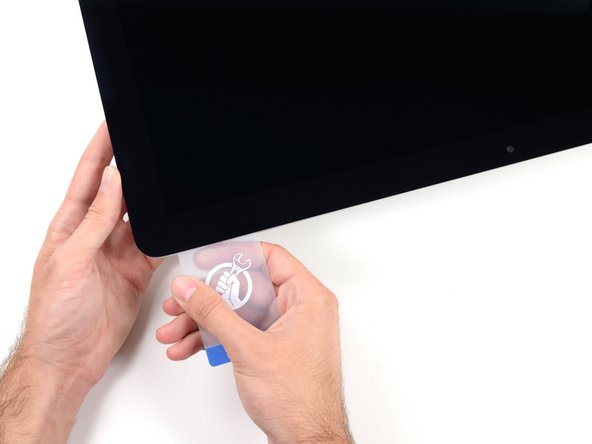
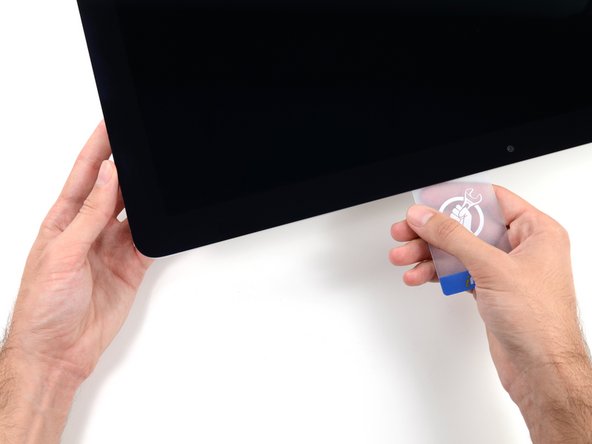
ディスプレイをフレームから持ち上げて、iMacから外します。
-
片一方をゆっくりと持ち上げて、接着剤を剥がしながら外してください。
-
再組み立ての際は、古い接着剤の残りを綺麗に拭き取り、接着ストリップの使用方法を参照してください。iMac Intel 21.5インチ EMC 2544 の接着ストリップの交換ガイドです。
-
-
-
リア筐体にハードドライブブラケットを固定している次のネジを外します。
-
左側ハードドライブブラケットから21 mm T10トルクスネジー2本
-
9 mm T10トルクスネジー1本
-
27 mm T10 トルクスネジー1本
-


デバイスを再組み立てする際は、これらのインストラクションを逆の順番に従って作業を進めてください。ディスプレイガラスを再装着するには接着ストリップの使用方法を参照してください。
デバイスを再組み立てする際は、これらのインストラクションを逆の順番に従って作業を進めてください。ディスプレイガラスを再装着するには接着ストリップの使用方法を参照してください。
349 の人々がこのガイドを完成させました。
以下の翻訳者の皆さんにお礼を申し上げます:
100%

これらの翻訳者の方々は世界を修理する私たちのサポートをしてくれています。 あなたも貢献してみませんか?
翻訳を始める ›


42 件のコメント
I used the iMac Opening Tool just as shown in this guide to separate the tape. DISASTER! The screen cracked! I used the tool slowly and carefully and despite this, the screen cracked. I should have simply used a guitar pick. That said, while I was inside my iMac replacing the Harddisk with a SSD, which was pretty easy to do, I decided to also see if I could replaced the 8GB RAM with 16GB RAM WITHOUT removing the logic board, as shown in other instructions on this site. I found that by simply removing the fan assembly, this makes enough room to reach behind the logic board and unclip the 2 memory modules. I installed 2 8GB modules (1600MHz DDR3L SO-DIMM PC12800 204 Pin) without much trouble. I used a plastic stick to reach behind the logic board and unclip the existing memory modules, then carefully inserted the new ones and clipped them into place. This is much easier than removing the power supply and logic board and all of the associated connectors and screws.
I had to replace the HD as it failed after less than two years. It was a good opportunity to increase the RAM from 8 to 16 GB. So I ordered the RAM chips from Kingston and a 256 GB SSD from Angelbird.
The repair went smoothly: to anyone trying this, please carefully follow the iFixit step-by-step guide. I recommend reading at least twice the whole procedure *before* beginning. Check all the photos. During the operation itself, I had the guide open before my eyes on my iPad and followed it step by step. The opening tool is a bit fragile, the wheel got damaged after the operation, but I guess it was designed to be used only once. After all, the adhesive strips can also be used only once!
For those replacing the hard-disk with an SSD: I highly recommend the Angelbird model "SSD wrk for Mac" (http://www.angelbird.com/en/prod/ssd-wrk...), for several dollars more you spare yourself the need to use additional software to enable TRIM or persuade the fans of your Mac that the HD's temperature is Ok.
Thanks for the tip on the Angelbird, working smoothly so far!
Elling -
Hi! Thanks for the tip! Do you know if can I put an SSD on an imac 21.5 in late 2012 ?