メインコンテンツにスキップ

iHome IH11 Control Buttons Replacement

必要な工具と部品

  1. iHome IH11 Control Buttons Replacement, Outer Case: 手順 1、 1の画像 1
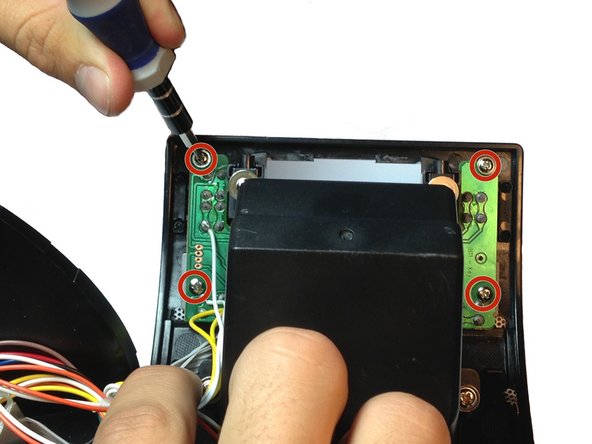
    • Unscrew the two 9.0 mm screws with the Phillips #1 screwdriver.

    • Remove the translucent bottom case.

  2. iHome IH11 Control Buttons Replacement: 手順 2、 2の画像 1 iHome IH11 Control Buttons Replacement: 手順 2、 2の画像 2
    • Remove the two 9.0mm screws on the back of the iHome with the Phillips #1 screwdriver.

    • Repeat the previous step for the two screws on the bottom.

  3. iHome IH11 Control Buttons Replacement: 手順 3、 1の画像 1
    • Remove the two 9mm screws from the top of the iHome with a Phillips #1 Screwdriver.

  4. iHome IH11 Control Buttons Replacement: 手順 4、 1の画像 1
    • Pop the dock connector out of the iHome and gently pull the white plastic plug from the dock connector.

  5. iHome IH11 Control Buttons Replacement: 手順 5、 1の画像 1
    • Carefully pull apart the device.

    • Remove the four screws that hold the circuit board for the buttons.

  6. iHome IH11 Control Buttons Replacement: 手順 6、 1の画像 1
    • Desolder the four connections for the broken button.

    • Solder the new button in the place of the old one.

    • For more information about soldering, refer to the soldering device page. Soldering Skills

終わりに

To reassemble your device, follow these instructions in reverse order.

ある他の人がこのガイドを完成しました。

作成者

6人の作成者と共同で作成されました。

Courtney Steinberg

メンバー登録日: 04/19/13

35 ポイント

3のガイドは作成済み

チーム

Cal Poly, Team 14-9, Maness Spring 2013 Cal Poly, Team 14-9, Maness Spring 2013人のメンバー

CPSU-MANESS-S13S14G9

5 メンバー

5のガイドは作成済み

0 件のコメント

コメントを追加

統計データ:

過去 24時間: 0

過去 7 日: 0

過去 30 日: 0

今までの合計 330