手順 2を翻訳中
手順2


-
Remove the six 2mm screws located around the maouse pad cover.
-
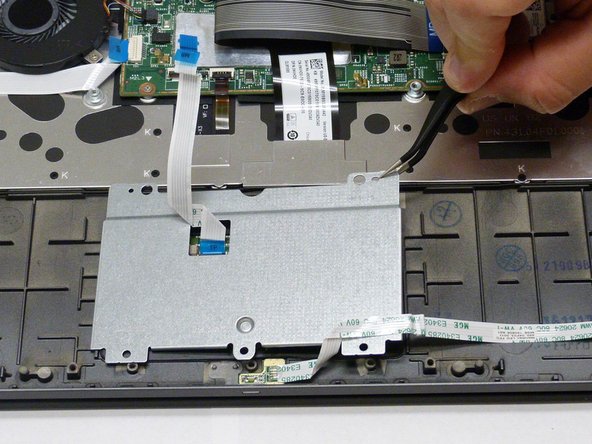
Using either fingernails or tweezers, lift the black cover on the ribbon cable and pull the cable loose from he motherboard.
-
Once the ribbon cable is disconnected lift up on the back cove to remove it and expose the mouse pad.
クリエイティブコモンズのオープンソース著作権のもと、あなたの投稿は著作権の対象となります。