手順 1を翻訳中
手順1


-
The battery must be removed to access the mouse pad. To remove the battery, undo the two, 2mm screws located on each side.
-
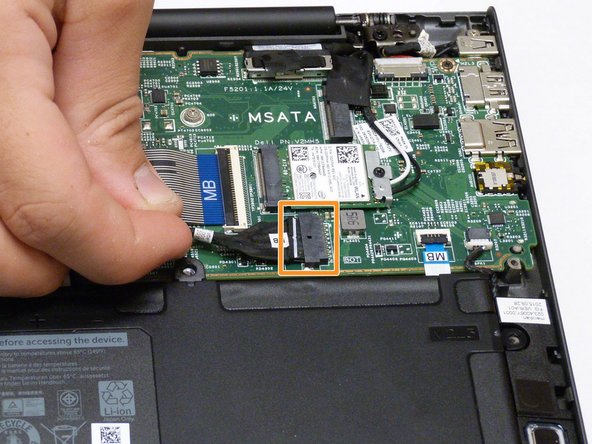
Once all four screws are removed, unplug the battery connection cable by hand to disconnect the battery from the motherboard.
-
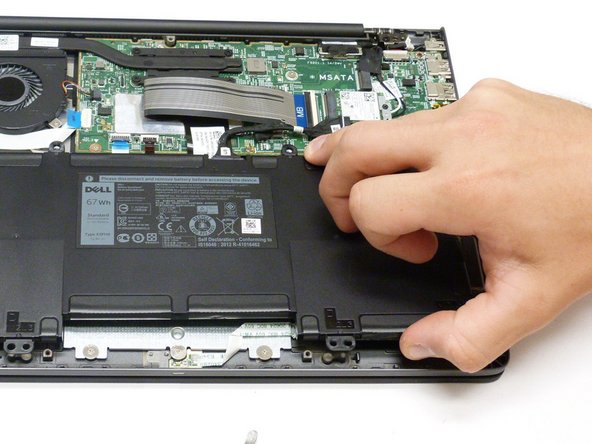
To remove the battery, lift up on one side to get you fingers underneath and lift away.
クリエイティブコモンズのオープンソース著作権のもと、あなたの投稿は著作権の対象となります。