手順 3を翻訳中
手順3


-
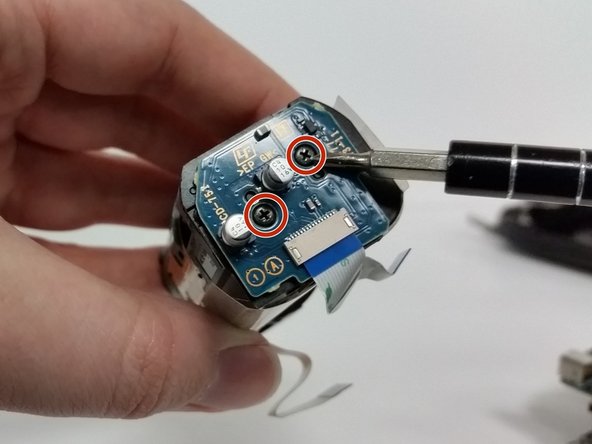
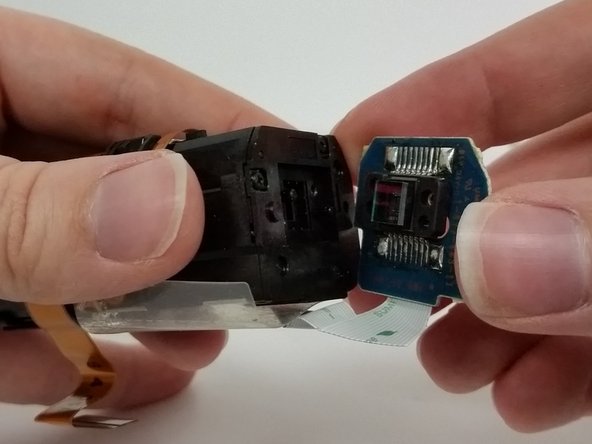
You've reached the optical assembly.
-
Depending on the part you've received to replace the optical assembly, you may need to remove the circuit panel on the back of the assembly.
-
Unscrew the two screws (5mm, Phillips #00) from the circuit board and separate the board from the assembly.
クリエイティブコモンズのオープンソース著作権のもと、あなたの投稿は著作権の対象となります。