注意:あなたは必要条件ガイドを編集しています。あなたが行なう変更は、この手順を含む全ての4個のガイドに反映されます。
手順 11を翻訳中
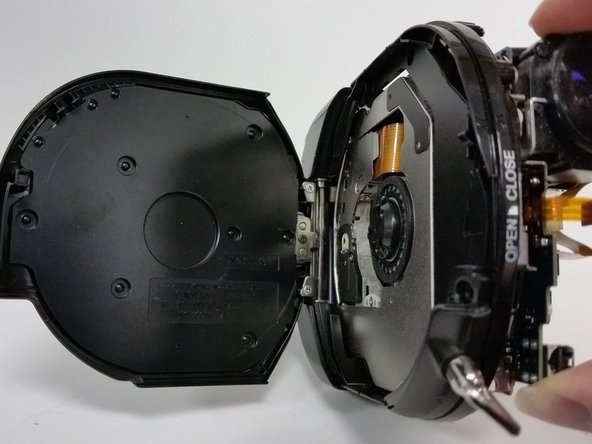
手順11


-
Now that all of the cables are disconnected, remove the two bronze screws (2mm, Phillips #00) on the lens housing.
-
Next we'll need to remove some screws from inside the disc housing.
-
If the disc door has closed at some point, turn the camcorder lens toward you and locate a small cylindrical lever to the left of the lens.
-
Pushing down on this lever will manually release the door.
クリエイティブコモンズのオープンソース著作権のもと、あなたの投稿は著作権の対象となります。