メインコンテンツにスキップ

Sony Handycam DCR-DVD650 Disk Door Replacement

注意:あなたは必要条件ガイドを編集しています。あなたが行なう変更は、この手順を含む全ての4個のガイドに反映されます。

英語
日本語

手順 8を翻訳中

手順8
Sony Handycam DCR-DVD650 Disk Door Replacement: 手順 0、 3の画像 1 Sony Handycam DCR-DVD650 Disk Door Replacement: 手順 0、 3の画像 2 Sony Handycam DCR-DVD650 Disk Door Replacement: 手順 0、 3の画像 3
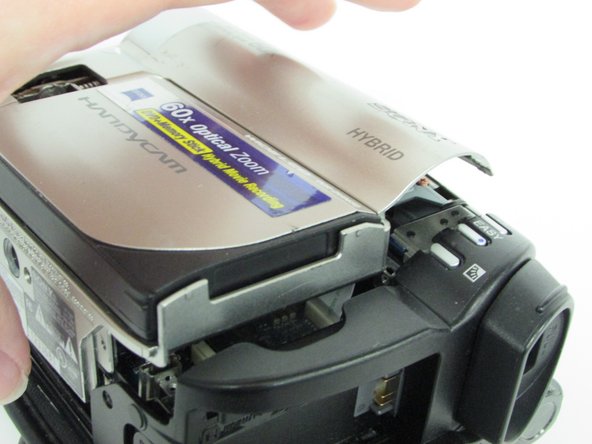
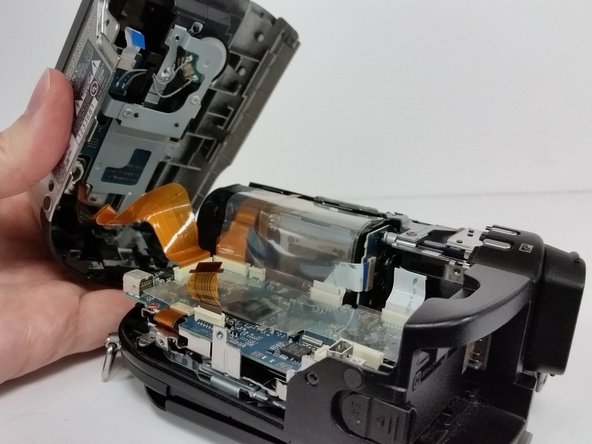
  • With the screws removed, the black and silver housing pieces should be able to shift apart from one another.

  • Caution: do not pull the device apart willy-nilly. There is an internal ribbon cable attached to both halves of the housing that can easily be damaged by doing so. Slow and steady wins the race.

  • Gently work the black and silver housing pieces away from one another.

  • If the housing is a bit resistant to separating, it may help to use a pry tool along the bottom of the device where the two colors meet.

ここに翻訳を挿入する

ここに翻訳を挿入する

ここに翻訳を挿入する

ここに翻訳を挿入する

クリエイティブコモンズのオープンソース著作権のもと、あなたの投稿は著作権の対象となります