メインコンテンツにスキップ

Samsung Galaxy A51 ディスプレイ交換

ご注意:あなたは前提となるガイドを編集しています。あなたが行なう変更は、この手順を含むガイド全体に反映されます。

英語
日本語

手順 9を翻訳中

手順9
Samsung Galaxy A51 Screen Replacement: 手順 0、 3の画像 1 Samsung Galaxy A51 Screen Replacement: 手順 0、 3の画像 2 Samsung Galaxy A51 Screen Replacement: 手順 0、 3の画像 3
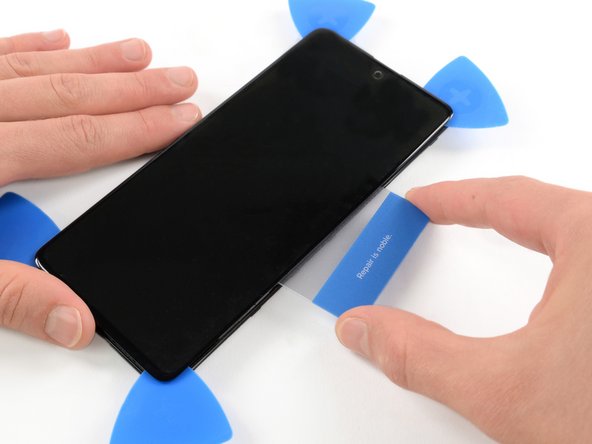
  • Insert a plastic card on the left edge into the gap between display and the phone assembly.

  • Press the plastic card in and slide it back and forth until you cut through the entire adhesive.

  • Once you are sure you cut through the adhesive, remove the four opening picks from the corners.

  • Do not remove the screen completely yet. The display cable is still threaded through the frame.

ディスプレイと本体左側端に出来た隙間に、プラスチックカードを挿入します。

プラスチックカードを押し込んで、接着剤全体が切り開くまで前後にスライドします。

接着剤全体を切開したことを確認したら、四隅にあるオープニングピックを外します。

まだスクリーンを完全に取り外さないでください。ディスプレイケーブルはまだフレームに繋がったままの状態です。

クリエイティブコモンズのオープンソース著作権のもと、あなたの投稿は著作権の対象となります