メインコンテンツにスキップ

Xiaomi Redmi Note 9T Back Cover Replacement

必要な工具と部品

  1. Xiaomi Redmi Note 9T Back Cover Replacement, Eject the SIM card tray: 手順 1、 3の画像 1 Xiaomi Redmi Note 9T Back Cover Replacement, Eject the SIM card tray: 手順 1、 3の画像 2 Xiaomi Redmi Note 9T Back Cover Replacement, Eject the SIM card tray: 手順 1、 3の画像 3
    • Insert a SIM card eject tool into the small hole in the SIM card tray, located on the upper left edge edge of the phone.

    • Press firmly to eject the tray.

  2. Xiaomi Redmi Note 9T Back Cover Replacement, Remove the SIM card tray: 手順 2、 2の画像 1 Xiaomi Redmi Note 9T Back Cover Replacement, Remove the SIM card tray: 手順 2、 2の画像 2
    • Remove the SIM card tray from the phone.

    • When reinserting the SIM card, make sure it's in the proper orientation inside the tray.

    • A thin rubber gasket around the SIM tray provides water and dust protection. If this gasket is damaged or missing, replace the gasket or the entire SIM tray to protect your phone's internal components.

  3. Xiaomi Redmi Note 9T Back Cover Replacement, Insert an opening pick: 手順 3、 3の画像 1 Xiaomi Redmi Note 9T Back Cover Replacement, Insert an opening pick: 手順 3、 3の画像 2 Xiaomi Redmi Note 9T Back Cover Replacement, Insert an opening pick: 手順 3、 3の画像 3
    • The back cover of the Redmi Note 9T is held in place by plastic clips and mild adhesive around the camera cut-out. It might require some force to release the plastic clips.

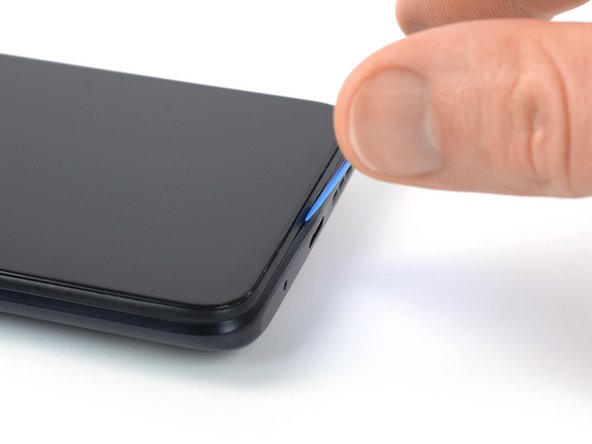
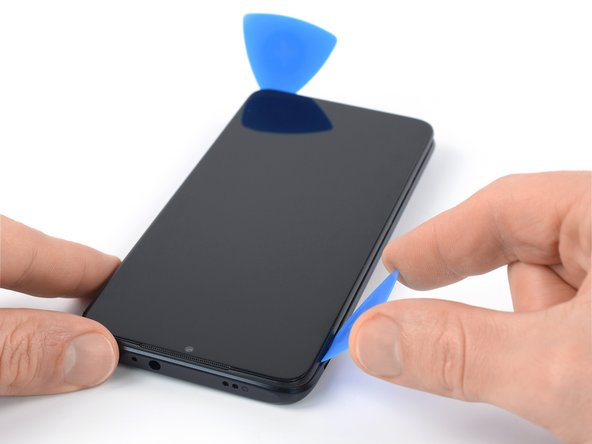
    • Insert an opening pick in a steep angle between the display assembly and the back cover where the charging port is located. This might require some force.

    • Make sure to insert the opening pick between the back cover and the display frame to avoid separating the screen from the frame.

  4. Xiaomi Redmi Note 9T Back Cover Replacement, Release the bottom edge plastic clips: 手順 4、 2の画像 1 Xiaomi Redmi Note 9T Back Cover Replacement, Release the bottom edge plastic clips: 手順 4、 2の画像 2
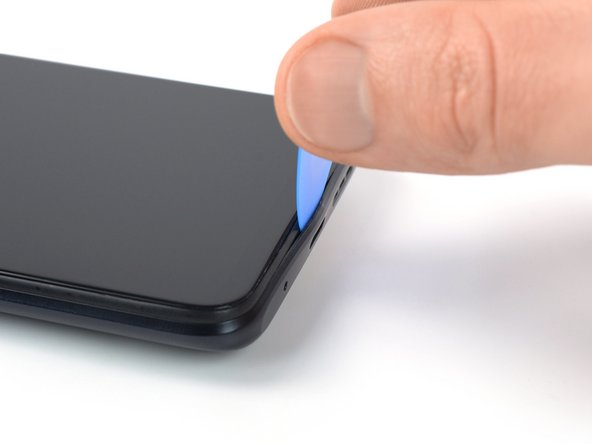
    • Slide the opening pick to the bottom right corner to release the plastic clips holding the back cover in place.

    • Leave the opening pick in the bottom right corner to prevent the clips from snapping back into place.

  5. Xiaomi Redmi Note 9T Back Cover Replacement: 手順 5、 2の画像 1 Xiaomi Redmi Note 9T Back Cover Replacement: 手順 5、 2の画像 2
    • Insert a second opening pick in a steep angle at the bottom edge of your phone.

    • Slide the opening pick to the bottom left corner to release the plastic clips.

    • Leave the opening pick in the bottom left corner to prevent the clips from snapping back into place.

  6. Xiaomi Redmi Note 9T Back Cover Replacement, Release the left edge plastic clips: 手順 6、 3の画像 1 Xiaomi Redmi Note 9T Back Cover Replacement, Release the left edge plastic clips: 手順 6、 3の画像 2 Xiaomi Redmi Note 9T Back Cover Replacement, Release the left edge plastic clips: 手順 6、 3の画像 3
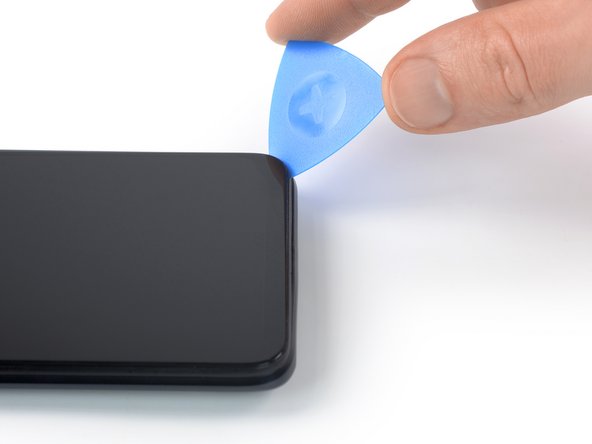
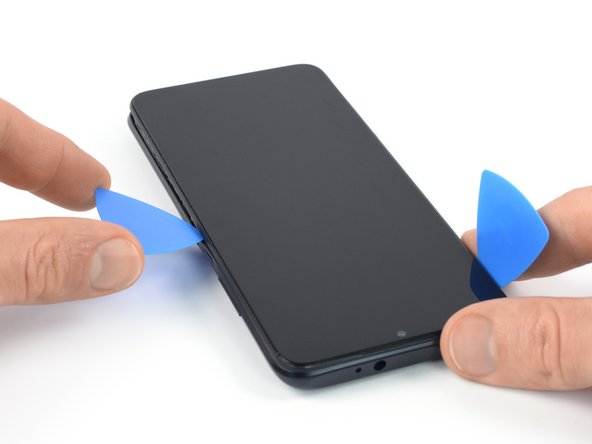
    • Slide the bottom left opening pick along the left edge of your phone to release the plastic clips.

    • Leave the opening pick in the top left corner to prevent the clips from snapping back into place.

  7. Xiaomi Redmi Note 9T Back Cover Replacement, Release the right edge plastic clips: 手順 7、 3の画像 1 Xiaomi Redmi Note 9T Back Cover Replacement, Release the right edge plastic clips: 手順 7、 3の画像 2 Xiaomi Redmi Note 9T Back Cover Replacement, Release the right edge plastic clips: 手順 7、 3の画像 3
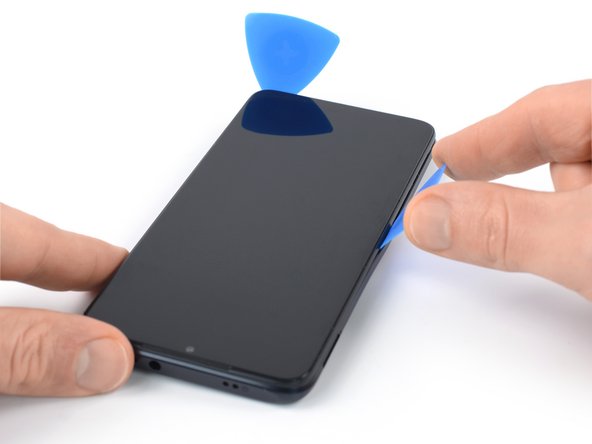
    • Slide the bottom right opening pick along the right edge of your phone to release the plastic clips.

    • Leave the opening pick in the top right corner to prevent the clips from snapping back into place.

  8. Xiaomi Redmi Note 9T Back Cover Replacement, Release the top edge plastic clips: 手順 8、 2の画像 1 Xiaomi Redmi Note 9T Back Cover Replacement, Release the top edge plastic clips: 手順 8、 2の画像 2
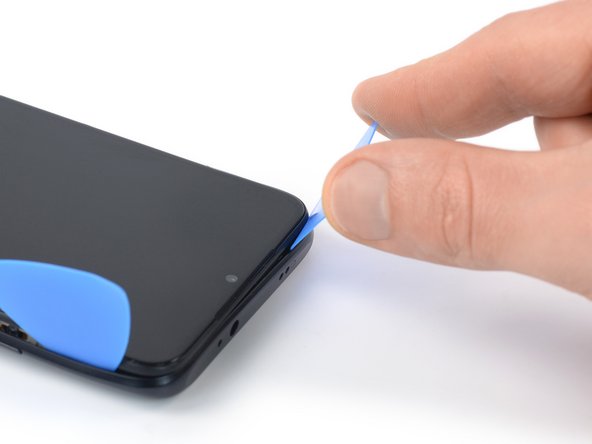
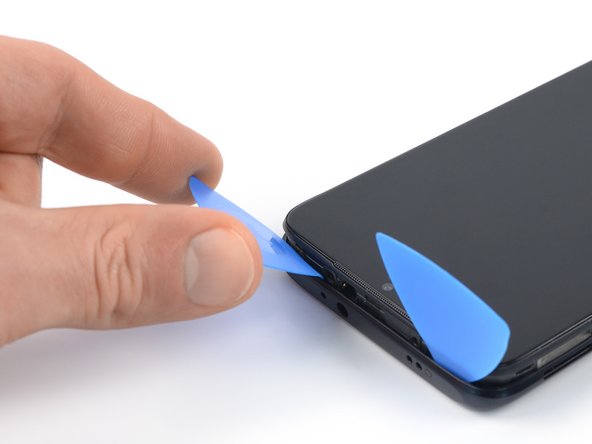
    • Slide the left opening pick around the top left corner to release the top edge plastic clips.

  9. Xiaomi Redmi Note 9T Back Cover Replacement: 手順 9、 2の画像 1 Xiaomi Redmi Note 9T Back Cover Replacement: 手順 9、 2の画像 2
    • Slide the right opening pick around the top right corner to release the remaining plastic clips.

    • Don't try to separate the phone assembly from the back cover all the way yet – the power and volume button cable is still connected to the motherboard.

  10. Xiaomi Redmi Note 9T Back Cover Replacement, Open the phone assembly: 手順 10、 3の画像 1 Xiaomi Redmi Note 9T Back Cover Replacement, Open the phone assembly: 手順 10、 3の画像 2 Xiaomi Redmi Note 9T Back Cover Replacement, Open the phone assembly: 手順 10、 3の画像 3
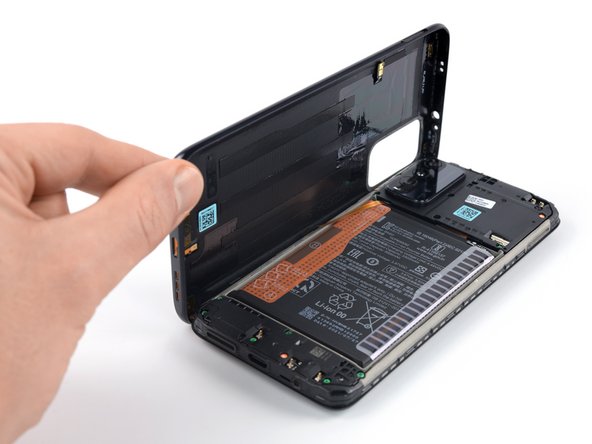
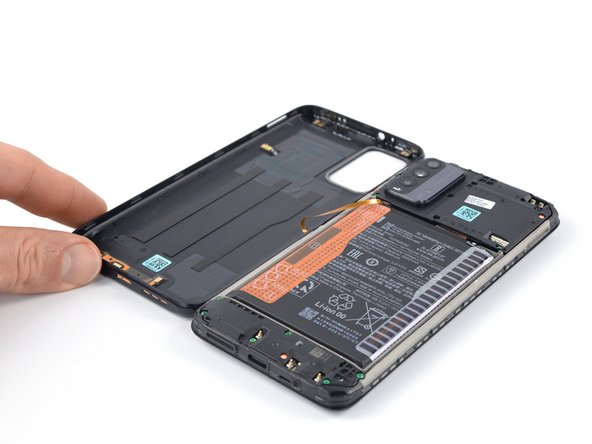
    • Carefully fold the back cover to the left side of the phone assembly like you would open the cover of a book.

    • Take care not to strain or tear the power or volume button flex cable during this procedure.

    • During reassembly align the back cover with the phone assembly and snap it back in its original position.

  11. Xiaomi Redmi Note 9T Back Cover Replacement, Unfasten the motherboard cover screws: 手順 11、 1の画像 1
    • Use a Phillips screwdriver to remove the ten 3.9 mm-long screws securing the motherboard cover.

  12. Xiaomi Redmi Note 9T Back Cover Replacement, Pry up the motherboard cover: 手順 12、 3の画像 1 Xiaomi Redmi Note 9T Back Cover Replacement, Pry up the motherboard cover: 手順 12、 3の画像 2 Xiaomi Redmi Note 9T Back Cover Replacement, Pry up the motherboard cover: 手順 12、 3の画像 3
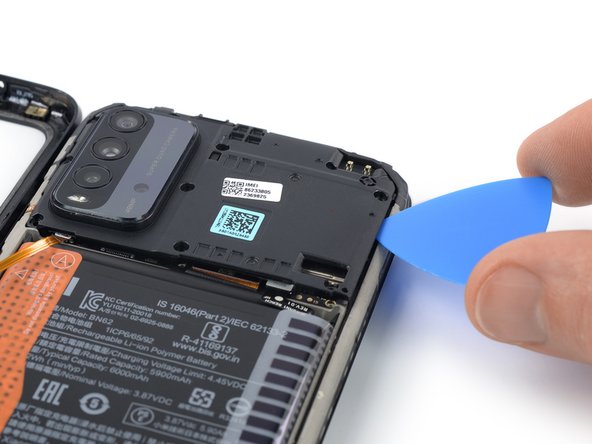
    • Insert an opening pick underneath the bottom right edge of the motherboard cover.

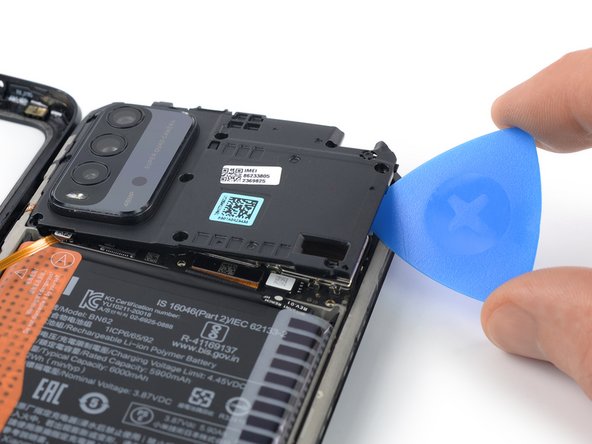
    • Slide the opening pick along the right edge of the motherboard cover to release its plastic clips.

    • Twist the opening pick sideways to pry up the motherboard cover.

  13. Xiaomi Redmi Note 9T Back Cover Replacement, Remove the motherboard cover: 手順 13、 2の画像 1 Xiaomi Redmi Note 9T Back Cover Replacement, Remove the motherboard cover: 手順 13、 2の画像 2
    • Remove the motherboard cover.

  14. Xiaomi Redmi Note 9T Back Cover Replacement, Disconnect the home and volume button cable: 手順 14、 2の画像 1 Xiaomi Redmi Note 9T Back Cover Replacement, Disconnect the home and volume button cable: 手順 14、 2の画像 2
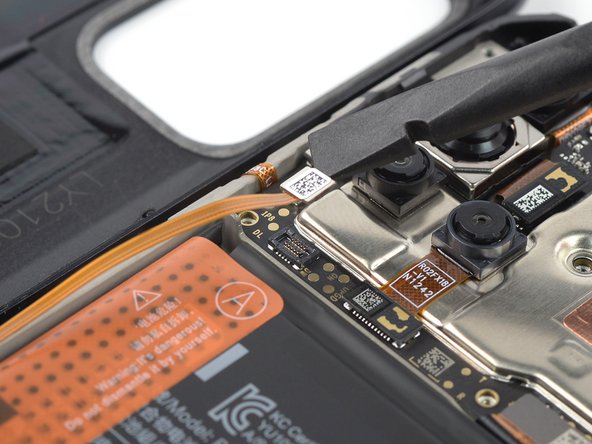
    • Use a spudger to disconnect the home and volume button cable by prying the connector straight up from its socket.

    • To re-attach press connectors like this one, carefully align and press down on one side until it clicks into place, then repeat on the other side. Don't press down on the middle. If the connector is misaligned, the pins can bend, causing permanent damage.

  15. Xiaomi Redmi Note 9T Back Cover Replacement, Remove the back cover: 手順 15、 1の画像 1
    • Separate the back cover from the phone assembly.

終わりに

Compare your new replacement part to the original part—you may need to transfer remaining components or remove adhesive backings from the new part before you install it.

To reassemble your device, follow these instructions in reverse order.

During reassembly, apply new adhesive where it's necessary after cleaning the relevant areas with isopropyl alcohol (>90%).

Take your e-waste to an R2 or e-Stewards certified recycler.

Repair didn’t go as planned? Try some basic troubleshooting, or ask our Xiaomi Redmi Note 9T answers community for help.

2 の人々がこのガイドを完成させました。

Dominik Schnabelrauch

メンバー登録日: 11/23/16

211,788 ポイント

682のガイドは作成済み

チーム

iFixit iFixit人のメンバー

Staff

140 メンバー

18,077のガイドは作成済み

0 件のコメント

コメントを追加

統計データ:

過去 24時間: 1

過去 7 日: 11

過去 30 日: 46

今までの合計 841