メインコンテンツにスキップ

Xbox One Wi-Fi Board Replacement

アーカイブされたガイド
このガイドは将来的な使用のためにのみ保存されてます。ご自身の修理作業には更新バージョンをご利用ください。

必要な工具と部品

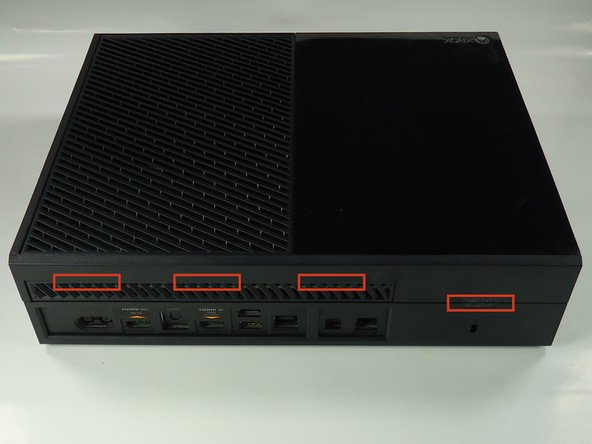
  1. Xbox One Wi-Fi Board Replacement, Side Vent: 手順 1、 3の画像 1 Xbox One Wi-Fi Board Replacement, Side Vent: 手順 1、 3の画像 2 Xbox One Wi-Fi Board Replacement, Side Vent: 手順 1、 3の画像 3
    • With a plastic opening tool, pry the side vent from the console.

    • Start from the back edge and work towards the front of the console.

  2. Xbox One Wi-Fi Board Replacement, Wi-Fi Board: 手順 2、 2の画像 1 Xbox One Wi-Fi Board Replacement, Wi-Fi Board: 手順 2、 2の画像 2
    • Slide the black angled tab behind the silver button toward the back of the console and set it aside.

  3. Xbox One Wi-Fi Board Replacement: 手順 3、 3の画像 1 Xbox One Wi-Fi Board Replacement: 手順 3、 3の画像 2 Xbox One Wi-Fi Board Replacement: 手順 3、 3の画像 3
    • Rotate the Xbox and remove the warranty sticker from the back. Removing this seal and opening the case of the Xbox voids your warranty with Microsoft.

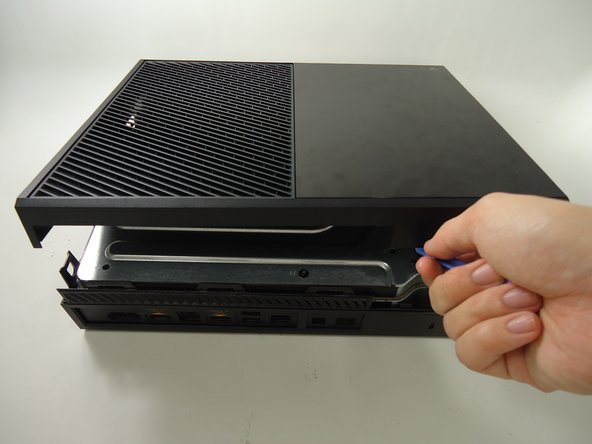
    • Use a plastic opening tool on the back to pry the top of the case from the bottom. Use an up and out motion to dislodge the clips. There are multiple clips to release on the back and two on the sides.

    • This step may take up more time than the others, keep prying with the plastic opening tool and when you release one clip, wedge something underneath it so it doesn't close again.

  4. Xbox One Wi-Fi Board Replacement: 手順 4、 2の画像 1 Xbox One Wi-Fi Board Replacement: 手順 4、 2の画像 2
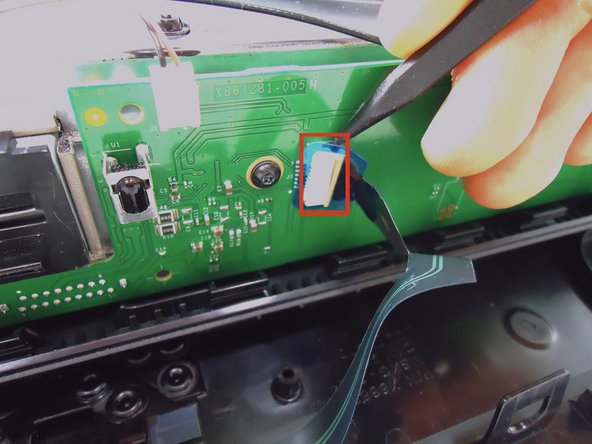
    • Carefully lift the top of the case, note that there is a wire connecting the front panel to the motherboard. Take care not to break this.

    • Using a spudger, release the ribbon wire from the front panel.

    • The top case is now free, set it aside.

  5. Xbox One Wi-Fi Board Replacement: 手順 5、 3の画像 1 Xbox One Wi-Fi Board Replacement: 手順 5、 3の画像 2 Xbox One Wi-Fi Board Replacement: 手順 5、 3の画像 3
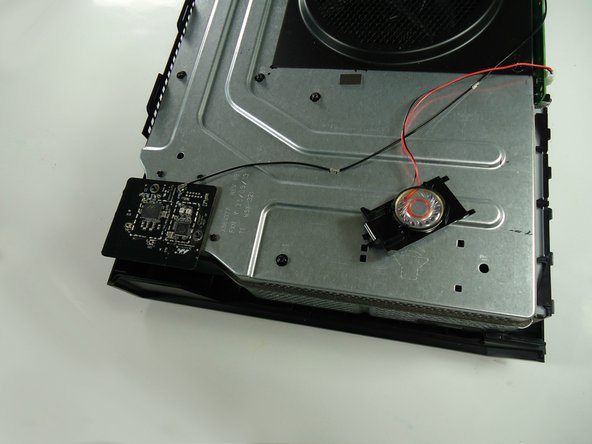
    • Remove the speaker by squeezing the the tab on the black plastic mounting piece and lifting it up.

    • Carefully unplug the connector from the green front panel board.

    • The speaker is now free, set it aside.

  6. Xbox One Wi-Fi Board Replacement: 手順 6、 2の画像 1 Xbox One Wi-Fi Board Replacement: 手順 6、 2の画像 2
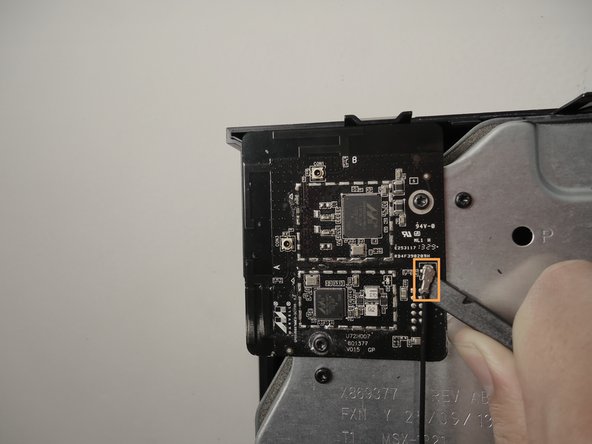
    • Unscrew the two 8.2mm T-9 screws securing the Wi-Fi board to the chassis.

    • Using the spudger, gently lift the antenna connector from the Wi-Fi board.

  7. Xbox One Wi-Fi Board Replacement: 手順 7、 2の画像 1 Xbox One Wi-Fi Board Replacement: 手順 7、 2の画像 2
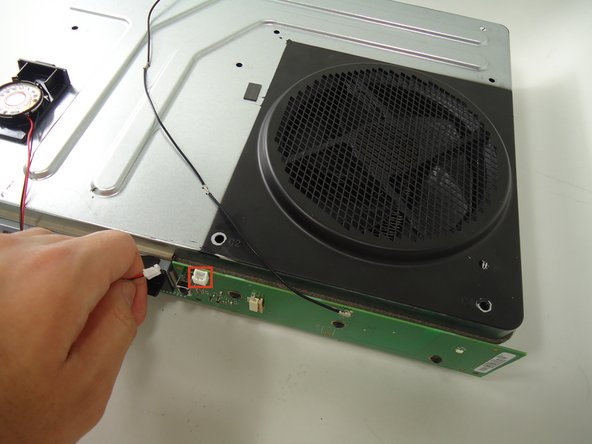
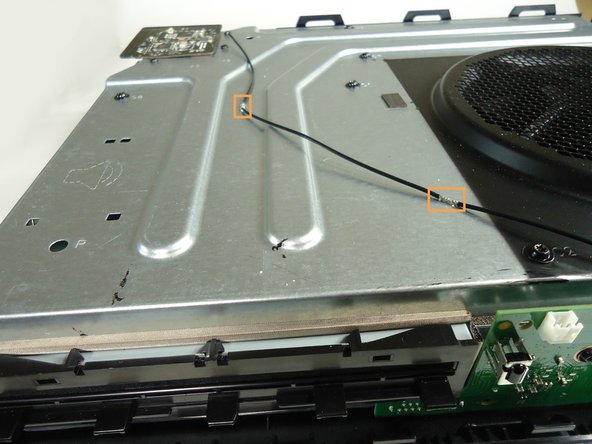
    • Using a spudger and a motion similar to the previous step, gently lift the antenna connector from the green board on the front.

    • Carefully pull out the clips securing the antenna wire to the chassis, releasing the wire.

  8. Xbox One Wi-Fi Board Replacement: 手順 8、 1の画像 1
    • Carefully pull the Wi-Fi board straight up to release it from the chassis. The Wi-Fi board is now free.

終わりに

To reassemble your device, follow these instructions in reverse order.

8 の人々がこのガイドを完成させました。

作成者

4人の作成者と共同で作成されました。

Gwendolyn Church

メンバー登録日: 01/27/14

1,500 ポイント

6のガイドは作成済み

チーム

Cal Poly, Team 6-22, Maness Winter 2014 Cal Poly, Team 6-22, Maness Winter 2014人のメンバー

CPSU-MANESS-W14S6G22

4 メンバー

11のガイドは作成済み

コメント 1 件

My wireless work ,But my WIFI is not working .It say my network passwork don't work . I have put all my password and nothing work. What else can I do to fix it . Or Can I get someone else to come can fix it for me.

rosahoneybee - 返信

コメントを追加

統計データ:

過去 24時間: 0

過去 7 日: 1

過去 30 日: 7

今までの合計 7,909