メインコンテンツにスキップ

このバージョンは誤った内容を含んでいる可能性があります。最新の承認済みスナップショットに切り替えてください。

必要な工具と部品

  1. , ハードドライブ: 手順 1、 1の画像 1
    • Xboxの電源が安全に抜かれていることを確認し、水平で安定した場所に寝かせてください。

  2. : 手順 2、 1の画像 1
    • Xboxを裏返すと、4つのゴム足が見えます。

    • メタル製スパッジャーを使って、4つのゴム足を外します。

  3. : 手順 3、 2の画像 1 : 手順 3、 2の画像 2
    • ケース底面の2つのラベルの下に、さらに2本のネジが隠れています。

    • ラベルを剥がすか、ラベルを貫通するネジ穴を手で触って感じ取り、穴を開けるだけで十分です。

  4. : 手順 4、 1の画像 1
    • 底面カバーを上部カバーに固定している6本のT20トルクスネジを外します。

  5. : 手順 5、 2の画像 1 : 手順 5、 2の画像 2
    • 底面シェルと上部ケースが外れたら、慎重にXboxのトップカバーを持ち上げて外します。

  6. : 手順 6、 2の画像 1 : 手順 6、 2の画像 2
    • ハードディスクをXboxに固定している3本の3mmT10ネジを外します。

    • IDEリボンケーブルを持ち上げたときにだけ見えるネジが、ハードディスクドライブの後部左側に1つあります。他の2つはハードディスクドライブの前面右側と左側にあります。

    • ディスクドライブの左下にあるネジは、ちょうど角に近いところにあります。

  7. : 手順 7、 2の画像 1 : 手順 7、 2の画像 2
    • ハードドライブの電源ケーブルをキャリアから外し、ハードドライブを持ち上げて取り出すのに十分な弛みを持たせます。

    • プラスチック製のハードドライブキャリアを持ち上げて、Xboxケースから取り出します。

  8. : 手順 8、 3の画像 1 : 手順 8、 3の画像 2 : 手順 8、 3の画像 3
    • プラスチック製ハードドライブキャリアから4本の3.4mmT15トルクスネジを取り外します(片側2本ずつ)。

    • プラスチック製のキャリアからハードディスクを慎重に取り外します。優しく揺らすと、ハードディスクが簡単に出てきます。

  9. : 手順 9、 2の画像 1 : 手順 9、 2の画像 2
    • ハードドライブデータリボンケーブルと電源ケーブルの両方を、ハードドライブからまっすぐ上に引き上げます。

    • しっかりと固定されている場合がありますので、注意して取り外してください。ケーブルアセンブリを損傷する可能性があるので、ワイヤーを引っ張らないでください。

  10. , ディスクドライブ: 手順 10、 3の画像 1 , ディスクドライブ: 手順 10、 3の画像 2 , ディスクドライブ: 手順 10、 3の画像 3
    • ディスクドライブを外します。すぐに外れるはずです。

    • ディスクドライブの裏側から黄色のケーブルとリボンケーブルの接続を外します。

  11. : 手順 11、 1の画像 1
    • ディスクドライブの周りにある黒いプラスチックのタブをこじると、ディスクドライブを筐体から取り外すことができます。取り外したら、ドライブを脇に置いてください。

    • コンソールが使えない状態にのみ外します!

  12. この手順は未翻訳です。 翻訳を手伝う。

    : 手順 12、 3の画像 1 : 手順 12、 3の画像 2 : 手順 12、 3の画像 3
    • Remove 4 PH1 Screws

    • Once screws are removed, lift the bottom half of the case up and away from the drive.

    • Flip the drive over and remove the top half of the case.

  13. この手順は未翻訳です。 翻訳を手伝う。

    : 手順 13、 3の画像 1 : 手順 13、 3の画像 2 : 手順 13、 3の画像 3
    • Gently press back on the ribbon retention tab and pull back on the ribbon cable

  14. この手順は未翻訳です。 翻訳を手伝う。

    : 手順 14、 2の画像 1 : 手順 14、 2の画像 2
    • Press outwards on the 2 plastic retaining tabs

    • Gently lift PCB over tabs

    • Only remove these ribbon cables if you need to remove the entire PCB. These are friction fit ribbon cables. In my case, they have a piece of tape holding the ribbon to the connector

    • If your drive is "dead" this is where I would suggest replacing the electrolytic capacitors on the board. The Samsung [Ver. B] has 13 (9 Radial/4 SMD)

  15. この手順は未翻訳です。 翻訳を手伝う。

    : 手順 15、 3の画像 1 : 手順 15、 3の画像 2 : 手順 15、 3の画像 3
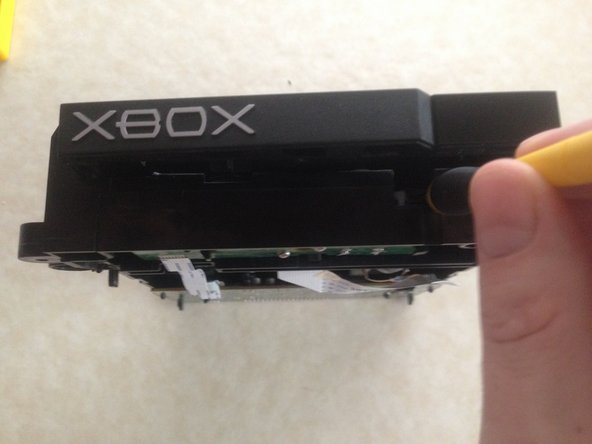
    • Using your screwdriver, or anything slim enough to fit, gently push the white lever back. Put your object on the right hand side of the lever, slightly pushing right as you push back.

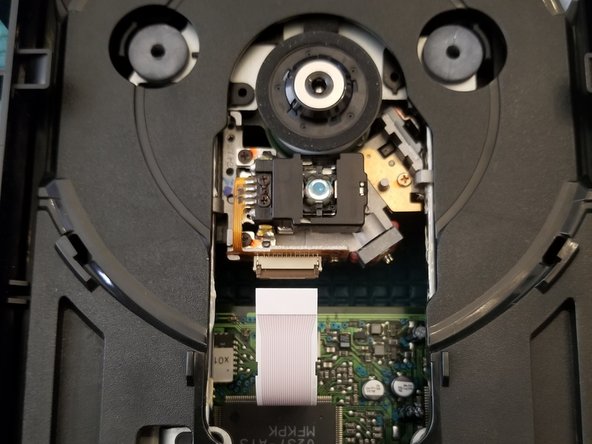
    • The lens will drop down and your drive door will open about a quarter inch.

    • Gently pull the tray to its open position. If you have a game stuck in your drive, this would be the ideal time to remove it.

    • If your drive door sticks when pressing the eject button now is the ideal time to replace the drive belt.

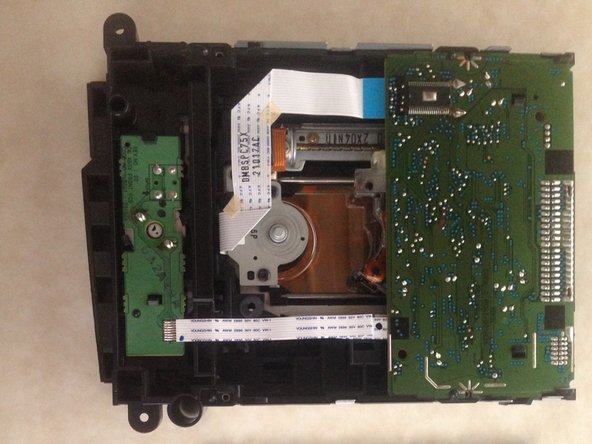
    • Remove the drive belt and replace it with a new one. Belts approximate location highlighted.

    • Don't forget to reset the white lever during reassembly.

ゴール

6 の人々がこのガイドを完成させました。

作成者

2人の作成者と共同で作成されました。

Navy Vet 2015

メンバー登録日: 06/25/15

7,296 ポイント

15のガイドは作成済み

3 件のコメント

What is the easiest way to clean the laser in the original xbox?

Brayan Hernandez - 返信

Hit it with a can of air duster. If further cleaning is required apply a small amount of rubbing alcohol on a Q-tip and gently clean the lens. I hope this helps.

Navy Vet 2015 - 返信

It there any trouble shooting guide for this drive or similar. I replaced the laser on mine but it still will not read disks. Not sure if it is a bad part.

maddigor - 返信

コメントを追加

統計データ:

過去 24時間: 4

過去 7 日: 32

過去 30 日: 161

今までの合計 20,791