はじめに
X box 360Sの外側パネルを交換して、ピカピカの状態に蘇らせましょう。
必要な工具と部品
-
-
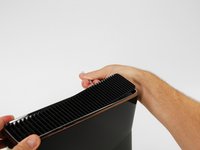
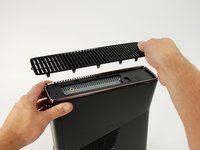
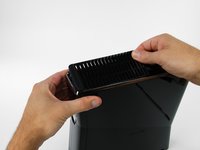
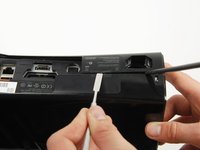
本体側面の「XBOX 360」の文字が右側、フェイスプレートが左側になるように配置します。
-
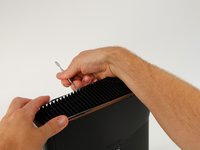
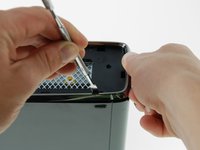
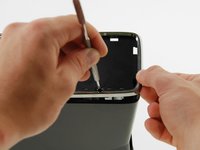
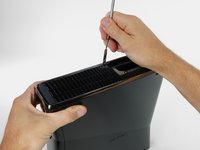
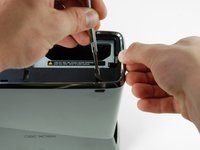
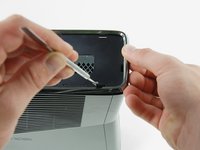
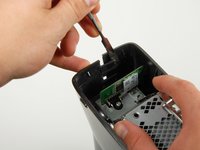
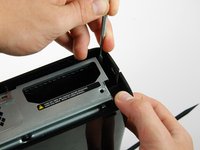
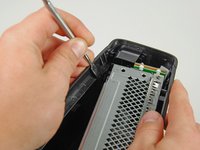
メタル製スパッジャーをXbox背面側付近の上部ベントと上部ベゼルの間に差し込みます。
-
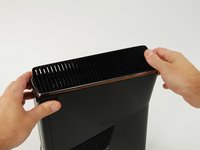
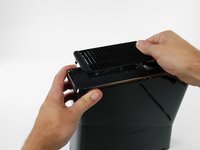
コンソールから離れるようにスパッジャーを回転させ、2つのプラスチッククリップが外れるまでファンベントの端をこじ開けます。
This step is and the others following are to rough and not needed, simply put smth in between the lamellar and push it up with littlebit pressure thats better for the plastic parts.
TheSupport - 返信
-
-
-
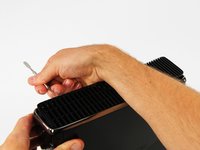
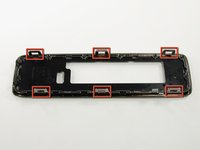
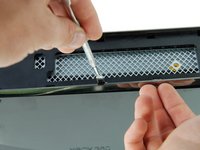
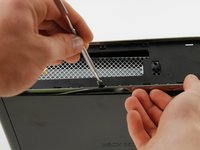
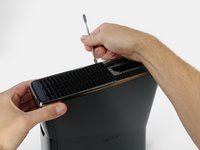
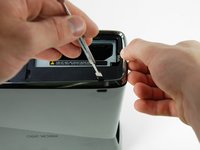
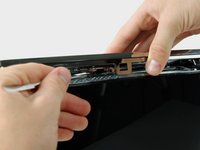
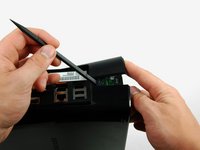
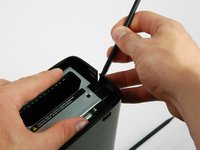
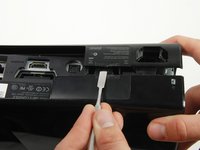
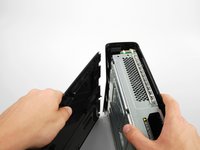
上部ベゼルの左端にある一番手前のスリットから、上記のようにクリップ下端と左ケースの間にメタル製スパッジャーを差し込みます。
-
同時にスパッジャーをコンソールから離して回転させ、上部ベゼルを引き上げると、クリップがフリーになります。
So I got the fan filter thing off, but the black edge plate thing isn't coming off. All I did was warp my flathead screwdriver and scratch the console.
HumidTater - 返信
-
-
-
-
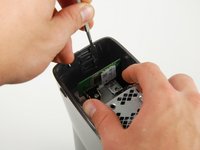
ハードディスクドライブに取り付けられている、ハードディスクドライブのサイズ(例:「250 GB」)と書かれたファブリック製のタブをしっかりとつかみます。
-
ハードドライブをコンソールからまっすぐ引き抜きます。
If i buy a new xbox 360 and replace the hardrive inside with my own, will i have my account and saves? or will i have to recover my account and start over?
You will still have your saves and account if you replace your hard drive in the new xbox
hola tengo un disco de laptop y quiero ponerle 100 juegos como puedo hacer la xbox me reconose el disco y todo lo configuro pero cuando conecto a mi pc para pasar los juejosel emulador no me deja
-
-
-
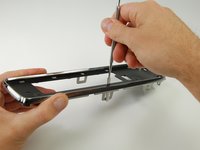
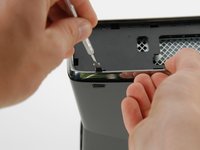
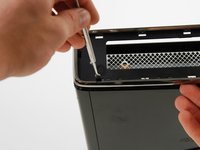
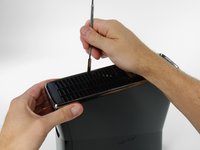
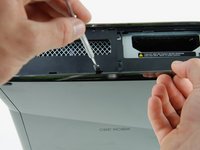
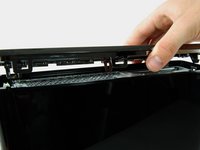
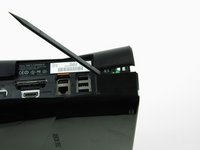
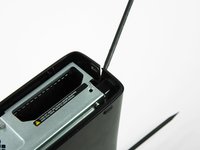
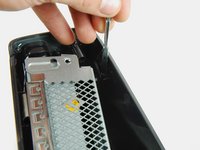
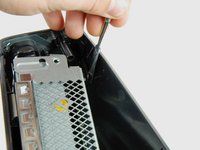
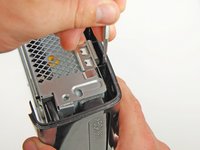
底部ベゼル左側後方のコーナー付近のスリットからメタルスパッジャーを差し込みます。
-
片方の手でリアベゼルを持ち上げながら、スパッジャーをデバイスから遠ざけるように回転させます。
These are pretty awkward to remove, but once you understand how they work its easy enough. The goal here is to slot the spudger THROUGH the gap of the silver tabs (visible in previous steps image, circled) and then pry. Put pressure against the wall of the Xbox case and push downwards, once you feel the spudger slot in, then apply force away from the Xbox and pull up a little with your free hand.
-
-
-
-
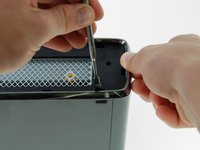
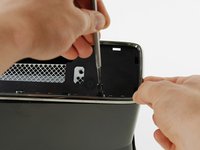
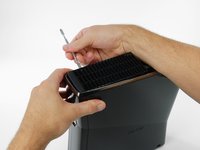
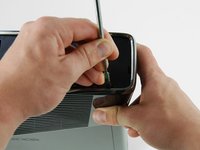
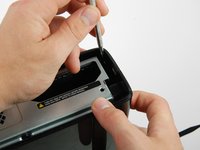
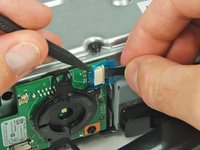
Wi-Fiカードの裏側、コンソールの上端に沿って、左右のケースをつなぐ2つのクリップを確認します。
-
片手で左右のケースを押しながら、メタル製のスパッジャーを使ってクリップをこじ開けて外します。
-
-
-
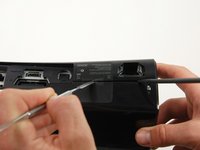
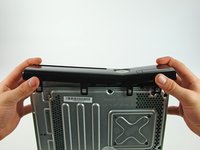
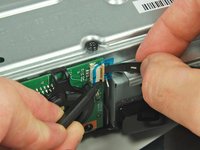
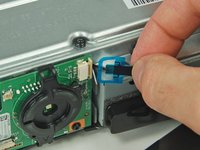
保証書が貼られていた左右のケースの間に、メタル製スパッジャーの平面側を差し込みます。
-
左のケースを上にひねって隙間を作り、スパッジャーを左のケースに向かってスライドさせます。
-
スパッジャーを上方向に回転させると、最後のクリップが外れます。
if you make a hole right here like the link`s picture you can boot the lock
As the user above me said, please avoid doing it like shown in the guide. It just didn’t work on my Xbox (unless your goal is to destroy the plastic case). Instead, pick some small needle like object (the spudger was too short for this, I used the SIM bit of my iFixit driver kit) and find the right spot on the big sticker which is on the left in the pictures shown in the guide. That spot is just between the text and the column of logos (Dolby Digital, etc.) (https://team-xecuter.com/slim/slim_secre..., picture not mine). Poke it (don’t be too gentle, you have to apply some force) and you will hear the clip release.
Both the above links are dead, i used this YouTube video which shows you the process of getting the hidden clip
I was able to open it by pushing on the sticker to unclamp the clip while another person helped me pull open the case.
Here is a Video that shows the small hole behind the sticker, ist in german but ist good to see how to open that hidden clip easiely.
None of the above options by the other commenters worked for me, but I found a video that points out there's a little hole right in the middle of the "SEE PRINTED MANUAL" and "UL" on the sticker under the Xbox 360 warranty sticker that I stuck a sewing needle into and it unlatches the latch: https://youtu.be/7mC8ckDvKqc?si=CVyCszpF...
-
-
-
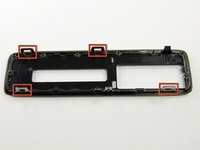
右ケースをフェースプレートに固定している上端右端付近のクリップを外します。
There are 4 black screw that has to be removed before you can detach the other cover. Please note
Sorry, there 5screws, one in the middle and 4 at the edges
-
-
-
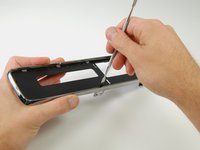
フェイスプレートの左端を持ち上げて、フェイスプレートを右側ケースに固定している最後の2つのクリップを外します。
-
フェイスプレートをデバイスの他の部分から切り離します。
There isn’t 2 clips there is 4 clips
I tore this on reassembly and it was barely held together. Be careful!
-


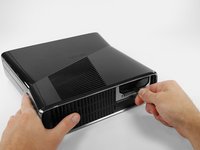


このデバイスを再組み立てするには、インストラクションを逆の順番に従って作業を進めてください。
このデバイスを再組み立てするには、インストラクションを逆の順番に従って作業を進めてください。
48 の人々がこのガイドを完成させました。
以下の翻訳者の皆さんにお礼を申し上げます:
100%

Midori Doiさんは世界中で修理する私たちを助けてくれています! あなたも貢献してみませんか?
翻訳を始める ›

4 件のコメント
Thank you to who ever posted this! The directions are clear, you just have to read than reread, go slowly and don't force anything and most importantly do not get frustrated. My grandpa always said "if it is worth doing, do it right the first time.", and "measure twice, cut once."
Dylan Howe - 返信
so true. :) I needed this guide to replace my Xbox 1 S shell because I got frustrated when taking apart the original.
me I -
The motherboard and the disc drive's PCB (circuit board) are paired. If the drive's PCB is fine, which it most likely is, then all you need to do is swap out the PCB on the new drive with your old one before installing it. No motherboard replacement required.
Only in the unlikely case that the drive's PCB is fried will you require a full drive and motherboard replacement.
SirStephenH - 返信