はじめに
このガイドでは外側ケースを取り外して、任天堂Wii U GamePadのゲームパッドを開口します。トライポイントY1ドライバーが必要です。
必要な工具と部品
-
-
-
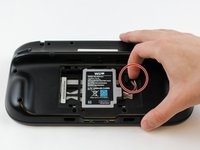
指先で、バッテリーコネクターのプラグを押して後ろ向きに引きます。
-
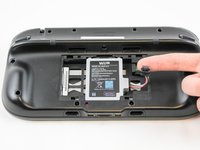
バッテリーケースからバッテリーを取り出します。
-
-
-
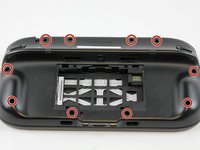
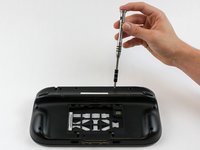
外側ケース周辺に留められたトライウイング用のY1ドライバーで9mmネジを10本外します。
-
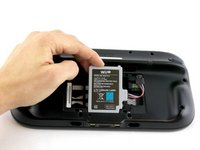
ケースの裏側を持ち上げます。
-
-
-
指でマザーボードから外側ケースのモーターコネクターの接続を外します。
I agree. A circle over the plug would have been better as the picture looks like you just pull on the wires lol.
Chris -
Thanks for the comment. I did get a set of tweezers and the negative cable broke anyway. They really could have done a better job at using a different connector for that.
Why in the world is this thing so tightly connected?
Thanks for the comment. I did get a set of tweezers to try to pull it out but still ended up breaking the negative cable. They really could have used a better set of cables and connectors for this.
You don’t have to do this step!!!! Just open the switch while keeping this wire intact!!!!!
-


デバイスを再組み立てする際は、これらのインストラクションを逆の順番に従って作業を進めてください。
デバイスを再組み立てする際は、これらのインストラクションを逆の順番に従って作業を進めてください。
5 の人々がこのガイドを完成させました。
以下の翻訳者の皆さんにお礼を申し上げます:
100%

これらの翻訳者の方々は世界を修理する私たちのサポートをしてくれています。 あなたも貢献してみませんか?
翻訳を始める ›
チーム

USF Tampa, Team 1-6, Sullivan Spring 2016 USF Tampa, Team 1-6, Sullivan Spring 2016人のメンバー
USFT-SULLIVAN-S16S1G6
4 メンバー
40のガイドは作成済み
2 件のコメント
This doesn't show anything about taking the front of the housing off, is that relatively straightforward?
This doesn't show anything about the L and R sticks like moving on its own when i play, do you how to fix that?
tried to unscrew the 10 Tri-Wing size Y1 screw with my iFixIt toolkit
unfortunately the tool is too “fat” and short, it cannot reach 4 screws on the corners of the gamepad.
having the iFixIt toolkit and needing to purchase an additional slim screwdriver it’s a shame…
Antonello Iannone - 返信