メインコンテンツにスキップ

Wacker Pump PT3A 2012 Mechanical Seal Replacement

必要な工具と部品

  1. Wacker Pump PT3A 2012 Mechanical Seal Replacement, Disconnect the spark plug wire: 手順 1、 2の画像 1 Wacker Pump PT3A 2012 Mechanical Seal Replacement, Disconnect the spark plug wire: 手順 1、 2の画像 2
    • Before you begin, make sure the device is switched off and the engine is cool to the touch.

    • Grab the plastic housing at the end of the spark plug wire.

    • Pull firmly to disconnect the wire from the spark plug.

  2. Wacker Pump PT3A 2012 Mechanical Seal Replacement, Remove the pump housing cover: 手順 2、 3の画像 1 Wacker Pump PT3A 2012 Mechanical Seal Replacement, Remove the pump housing cover: 手順 2、 3の画像 2 Wacker Pump PT3A 2012 Mechanical Seal Replacement, Remove the pump housing cover: 手順 2、 3の画像 3
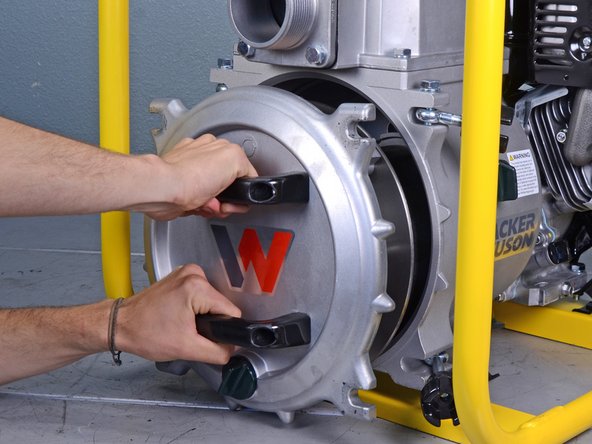
    • Use the included wrench to loosen the four black knobs securing the pump housing cover.

    • If the wrench is missing, slide a screwdriver shank through the knob and twist to loosen the knobs.

  3. Wacker Pump PT3A 2012 Mechanical Seal Replacement: 手順 3、 3の画像 1 Wacker Pump PT3A 2012 Mechanical Seal Replacement: 手順 3、 3の画像 2 Wacker Pump PT3A 2012 Mechanical Seal Replacement: 手順 3、 3の画像 3
    • Slide the pump housing cover out of the pump and remove it.

  4. Wacker Pump PT3A 2012 Mechanical Seal Replacement, Remove the recoil starter: 手順 4、 1の画像 1
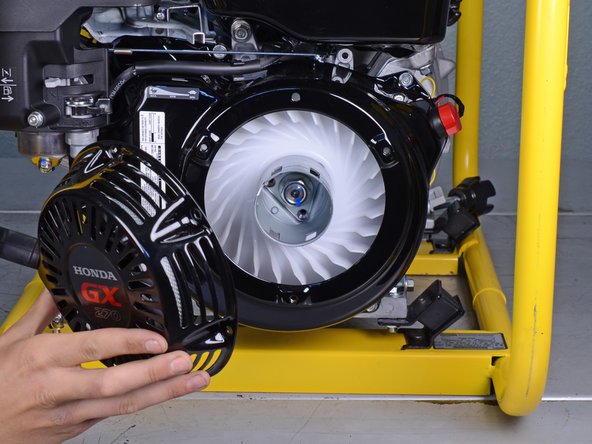
    • Use a 10 mm socket and wrench to remove the three bolts securing the recoil starter.

  5. Wacker Pump PT3A 2012 Mechanical Seal Replacement: 手順 5、 2の画像 1 Wacker Pump PT3A 2012 Mechanical Seal Replacement: 手順 5、 2の画像 2
    • Remove the recoil starter from the engine.

  6. Wacker Pump PT3A 2012 Mechanical Seal Replacement, Brace the driveline: 手順 6、 1の画像 1
    • Slide a large screwdriver through the slots in the starter cap and brace the screwdriver with a wooden block to prevent the driveline from turning clockwise.

  7. Wacker Pump PT3A 2012 Mechanical Seal Replacement, Remove the impeller: 手順 7、 2の画像 1 Wacker Pump PT3A 2012 Mechanical Seal Replacement, Remove the impeller: 手順 7、 2の画像 2
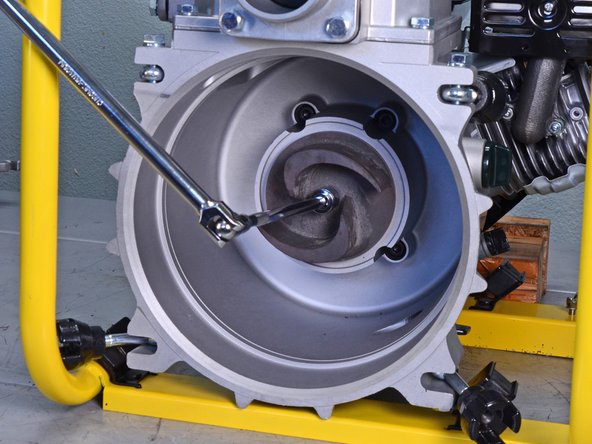
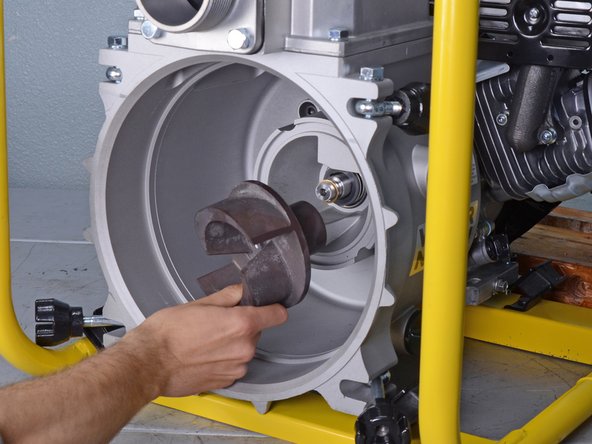
    • Use a 19 mm socket, extension, and wrench to loosen the impeller from the driveline.

  8. Wacker Pump PT3A 2012 Mechanical Seal Replacement: 手順 8、 2の画像 1 Wacker Pump PT3A 2012 Mechanical Seal Replacement: 手順 8、 2の画像 2
    • Remove the impeller from the driveline.

  9. Wacker Pump PT3A 2012 Mechanical Seal Replacement, Remove the washers: 手順 9、 1の画像 1
    • Remove the two washers from the driveline.

    • Replace these washers if they look worn.

  10. Wacker Pump PT3A 2012 Mechanical Seal Replacement, Remove the mechanical seal: 手順 10、 3の画像 1 Wacker Pump PT3A 2012 Mechanical Seal Replacement, Remove the mechanical seal: 手順 10、 3の画像 2 Wacker Pump PT3A 2012 Mechanical Seal Replacement, Remove the mechanical seal: 手順 10、 3の画像 3
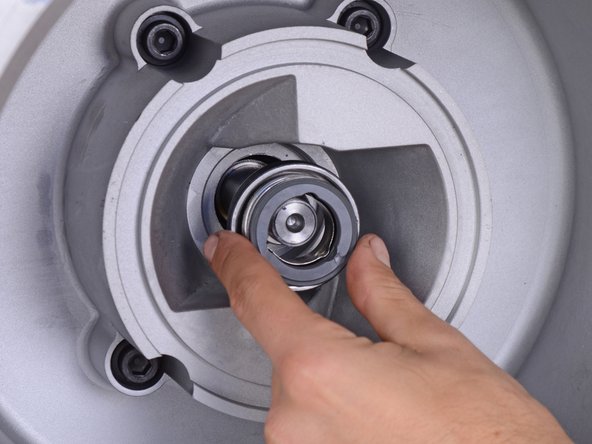
    • Use a flathead screwdriver to pry and loosen the mechanical seal from its recess.

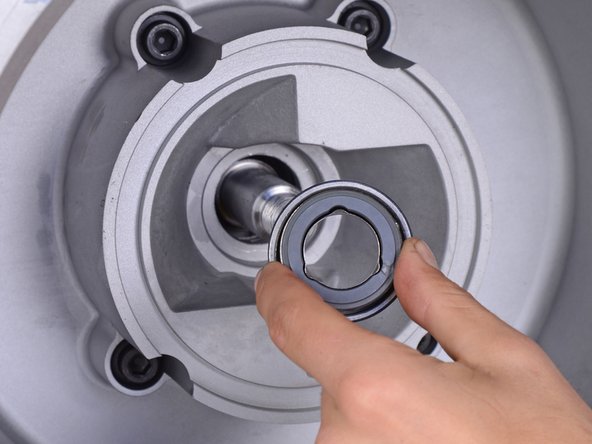
    • Remove the mechanical seal.

終わりに

To reassemble your device, follow these instructions in reverse order.

2 の人々がこのガイドを完成させました。

Arthur Shi

メンバー登録日: 01/03/18

253,389 ポイント

526のガイドは作成済み

チーム

iFixit iFixit人のメンバー

Staff

135 メンバー

17,198のガイドは作成済み

0 件のコメント

コメントを追加

統計データ:

過去 24時間: 0

過去 7 日: 14

過去 30 日: 33

今までの合計 1,535