メインコンテンツにスキップ

Voluas VL001 Speaker Replacement

必要な工具と部品

  1. Voluas VL001 Speaker Replacement, Storage Tank: 手順 1、 3の画像 1 Voluas VL001 Speaker Replacement, Storage Tank: 手順 1、 3の画像 2 Voluas VL001 Speaker Replacement, Storage Tank: 手順 1、 3の画像 3
    • Remove the lid to the storage tank by using the latch and lifting off.

    • Grab the food storage tank on both sides. Depress the tabs that say "Push" on them and lift the tank off.

  2. Voluas VL001 Speaker Replacement, Battery: 手順 2、 3の画像 1 Voluas VL001 Speaker Replacement, Battery: 手順 2、 3の画像 2 Voluas VL001 Speaker Replacement, Battery: 手順 2、 3の画像 3
    • Place your pet feeder upside down.

    • Squeeze the lock and remove the battery cover.

    • Remove the three 1.5V D alkaline batteries.

  3. Voluas VL001 Speaker Replacement, Housing: 手順 3、 3の画像 1 Voluas VL001 Speaker Replacement, Housing: 手順 3、 3の画像 2 Voluas VL001 Speaker Replacement, Housing: 手順 3、 3の画像 3
    • Insert a metal spudger under the adhesive part of each rubber foot.

    • Pry the foot off.

  4. Voluas VL001 Speaker Replacement: 手順 4、 2の画像 1 Voluas VL001 Speaker Replacement: 手順 4、 2の画像 2
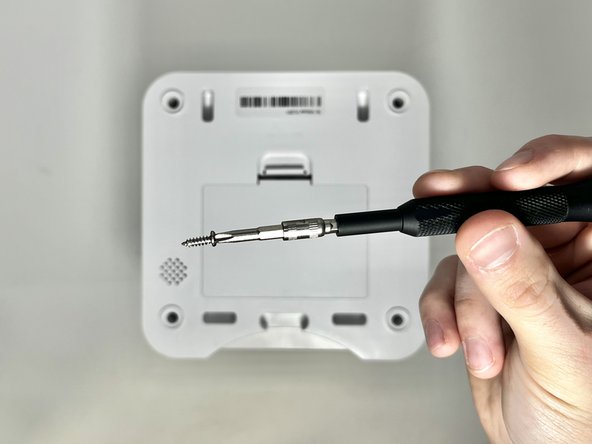
    • Remove four screws from the corners of the device using a Phillips #2 screwdriver.

    • These holes were previously covered by the rubber feet.

    • Using the magnetic tip of the screwdriver, carefully lift the screw out of the hole.

  5. Voluas VL001 Speaker Replacement: 手順 5、 1の画像 1
    • Turn the device over so it is oriented right-side up.

    • Lift the top part of the feeder off, exposing the mechanisms that run the feeder.

  6. Voluas VL001 Speaker Replacement, Speaker: 手順 6、 2の画像 1 Voluas VL001 Speaker Replacement, Speaker: 手順 6、 2の画像 2
    • Using a Phillips #2 screwdriver, remove the six 11.2 mm screws that hold the motor housing on to the device.

    • Remove the motor assembly and set it to the side.

  7. Voluas VL001 Speaker Replacement: 手順 7、 2の画像 1 Voluas VL001 Speaker Replacement: 手順 7、 2の画像 2
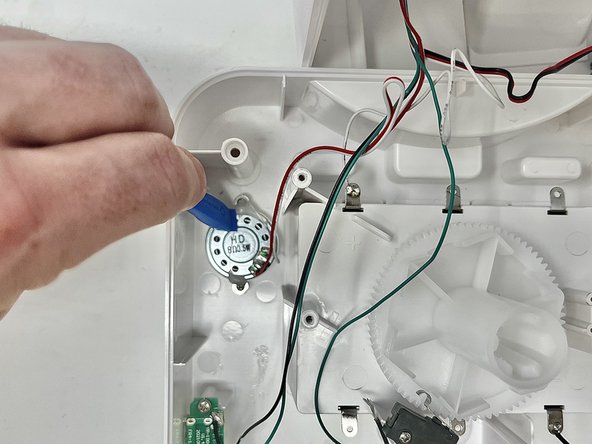
    • Using an opening tool, remove the clear glue covering the two screws.

  8. Voluas VL001 Speaker Replacement: 手順 8、 1の画像 1
    • Use a Phillips #2 screwdriver to remove the two 6 mm screws from the speaker.

  9. Voluas VL001 Speaker Replacement: 手順 9、 2の画像 1 Voluas VL001 Speaker Replacement: 手順 9、 2の画像 2
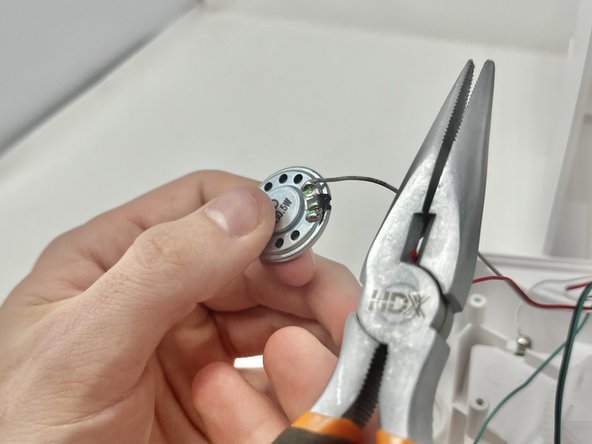
    • Using your wire strippers/pliers, cut the two wires that are connected to the speaker.

  10. Voluas VL001 Speaker Replacement: 手順 10、 3の画像 1 Voluas VL001 Speaker Replacement: 手順 10、 3の画像 2 Voluas VL001 Speaker Replacement: 手順 10、 3の画像 3
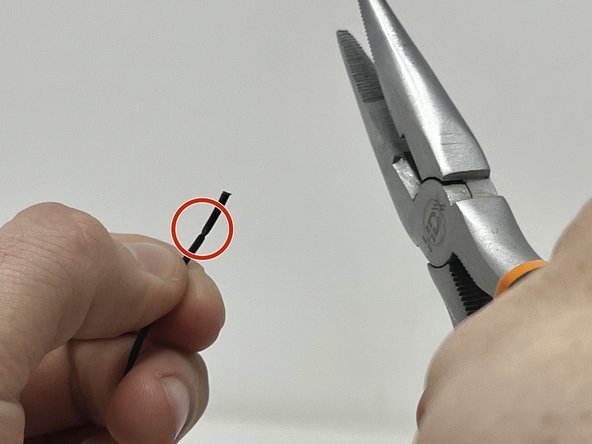
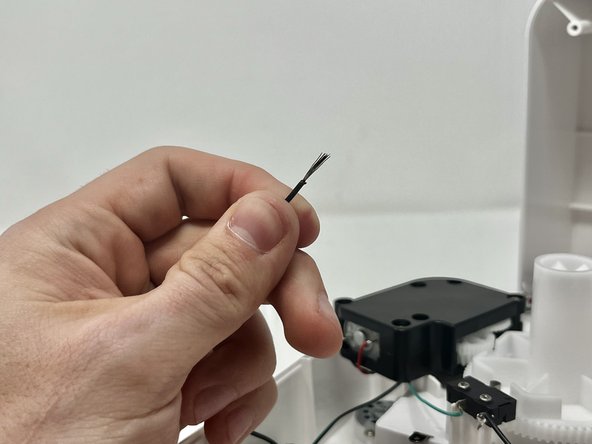
    • Using your wire strippers/pliers, gently crimp the plastic insulation on the wire. Do this several times around the wire to make sure that you can pull it off.

    • Because the wire is so thin, it can be easy to accidentally cut through the wire on this step. Take care to only cut through the insulation.

    • You will want to see a score line in the insulation all around the wire like this.

    • Pull the end of the insulation off, exposing the wire.

  11. Voluas VL001 Speaker Replacement: 手順 11、 2の画像 1 Voluas VL001 Speaker Replacement: 手順 11、 2の画像 2
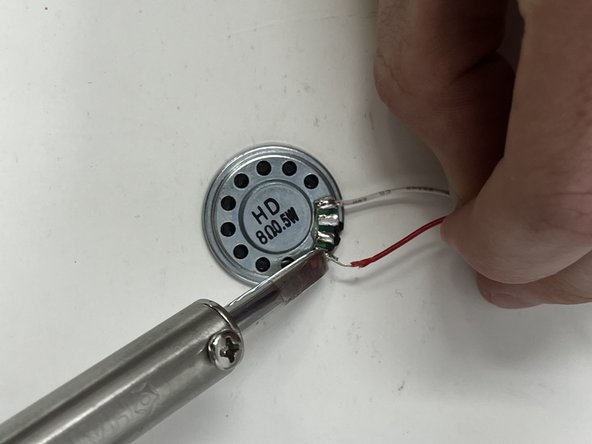
    • Put the exposed wire on the solder patch, making sure it has good contact with the metal.

    • Solder the wire on to the solder patch.

    • Repeat steps 10 and 11 for the white wire.

終わりに

To reassemble your device, follow these instructions in reverse order.

作成者

2人の作成者と共同で作成されました。

Merari Aniga

メンバー登録日: 01/30/24

459 ポイント

4のガイドは作成済み

チーム

Utah Tech University, Team 1-3, McMurrin Spring 2024 Utah Tech University, Team 1-3, McMurrin Spring 2024人のメンバー

UTAHTECH-MCMURRIN-S24S1G3

2 メンバー

10のガイドは作成済み

0 件のコメント

コメントを追加

統計データ:

過去 24時間: 0

過去 7 日: 0

過去 30 日: 0

今までの合計 41