メインコンテンツにスキップ

Visual Land Prestige Elite 9Q Speaker Replacement

必要な工具と部品

  1. Visual Land Prestige Elite 9Q Speaker Replacement, Speaker: 手順 1、 1の画像 1
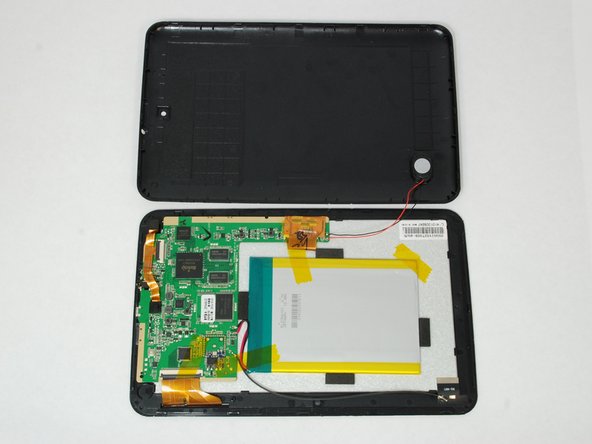
    • Using the large plastic opening tool, start along a side of the device and apply light pressure in the seam between the top and bottom outer covers.

    • Maneuver the smaller plastic opening tool at the spot of the large opening tool and slowly slide along the edge.

    • You should feel each plastic connections begin to loosen.

  2. Visual Land Prestige Elite 9Q Speaker Replacement: 手順 2、 1の画像 1
    • Move tool around each connection, and continue around the device until all connections have been loosened.

    • The user risks damaging the connections if tool is slid to fast.

  3. Visual Land Prestige Elite 9Q Speaker Replacement: 手順 3、 2の画像 1 Visual Land Prestige Elite 9Q Speaker Replacement: 手順 3、 2の画像 2
    • Once all connections have been loosened and using a soft surface, place the device onto its screen.

    • Open the casing and lay as shown in the picture keeping the speaker wires loose.

  4. Visual Land Prestige Elite 9Q Speaker Replacement: 手順 4、 2の画像 1 Visual Land Prestige Elite 9Q Speaker Replacement: 手順 4、 2の画像 2
    • Using ESD safe tweezers and a spudger, gently remove the glued speaker away from the casing.

    • The speaker is still connected to the motherboard with wire.

  5. Visual Land Prestige Elite 9Q Speaker Replacement: 手順 5、 1の画像 1
    • Next locate where the speaker's wires attach to the motherboard.

    • Make note of the red and black wires positions, for mixing them can cause permanent damage to your device.

  6. Visual Land Prestige Elite 9Q Speaker Replacement: 手順 6、 2の画像 1 Visual Land Prestige Elite 9Q Speaker Replacement: 手順 6、 2の画像 2
    • Before replacing the speaker, it's helpful to disconnect the LCD ribbon allowing sufficient space.

    • Remove the tape, and using hook tweezers, disconnect the LCD ZIF (zero insertion force) connection.

    • The ZIF connection takes manuvering, but the ribbon should be free and pushed out of the way.

  7. Visual Land Prestige Elite 9Q Speaker Replacement: 手順 7、 2の画像 1 Visual Land Prestige Elite 9Q Speaker Replacement: 手順 7、 2の画像 2
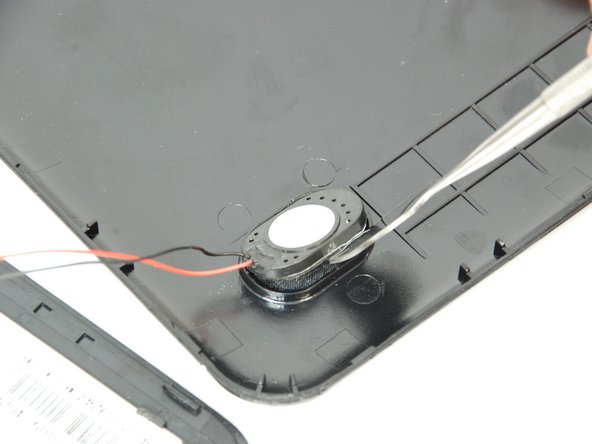
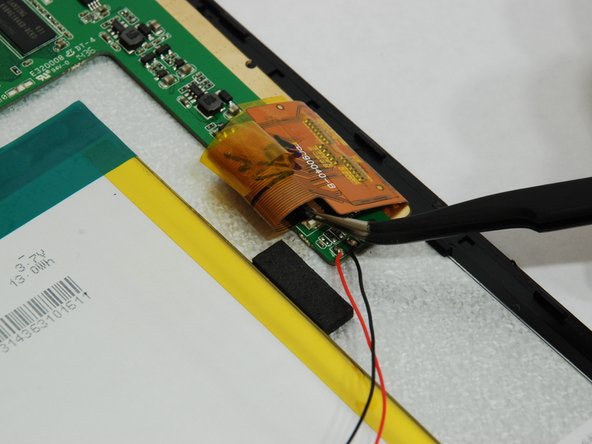
    • Before disconnecting the speaker, refer to Soldering Tips for proper soldering instructions.

    • Check the connection between the speaker and the motherboard. If it isn’t connected well, re-soldering the joint may fix the speaker.

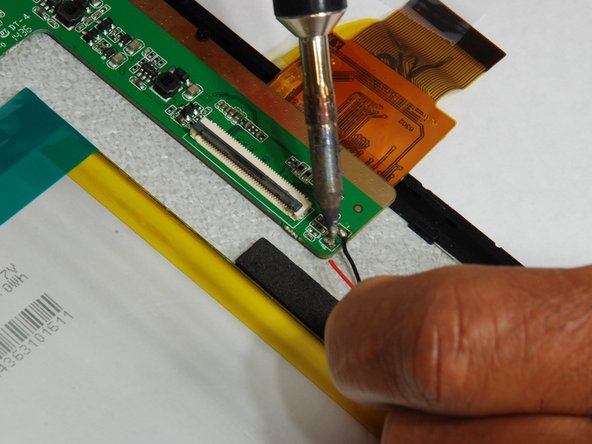
    • Use a soldering iron the remove the speaker wires.

    • Ensure that each wire and solder connection do not touch. This will damage the device.

    • Note which nodes the wires are connected to, for replacement will occur in this order.

終わりに

To reassemble your device, follow these instructions in reverse order.

作成者

3人の作成者と共同で作成されました。

Joseph Justice

メンバー登録日: 07/19/16

175 ポイント

1ガイドが承認済み

チーム

University of Memphis, Team 1-1, Kim SU 2016 University of Memphis, Team 1-1, Kim SU 2016人のメンバー

UM-KIM-SU16S1G1

4 メンバー

8のガイドは作成済み

0 件のコメント

コメントを追加

統計データ:

過去 24時間: 1

過去 7 日: 2

過去 30 日: 2

今までの合計 195