メインコンテンツにスキップ

Toshiba Chromebook 2 Motherboard Replacement

必要な工具と部品

  1. Toshiba Chromebook 2 Motherboard Replacement, Back Cover: 手順 1、 1の画像 1
    • Remove all external devices from the Toshiba Chromebook 2.

  2. Toshiba Chromebook 2 Motherboard Replacement: 手順 2、 1の画像 1
    • Close the Toshiba Chromebook 2 and turn it over so that the bottom of the laptop is facing upwards toward you with the lettering on the bottom facing right side up.

  3. Toshiba Chromebook 2 Motherboard Replacement: 手順 3、 2の画像 1 Toshiba Chromebook 2 Motherboard Replacement: 手順 3、 2の画像 2
    • Remove the 8 visible Phillips 8.25 mm screws using the Phillips #0 screwdriver.

  4. Toshiba Chromebook 2 Motherboard Replacement: 手順 4、 2の画像 1 Toshiba Chromebook 2 Motherboard Replacement: 手順 4、 2の画像 2
    • Remove 2 hidden Phillips 8.25 mm screws located underneath the rubber grips at the back (opposite the hinges) with the Phillips #0 screwdriver.

    • The rubber grips are glued in place, so you'll need to peel them up with a spudger or other pry tool.

  5. Toshiba Chromebook 2 Motherboard Replacement: 手順 5、 1の画像 1
    • Remove the back panel by pulling up on 2 adjacent corners.

  6. Toshiba Chromebook 2 Motherboard Replacement, Motherboard: 手順 6、 2の画像 1 Toshiba Chromebook 2 Motherboard Replacement, Motherboard: 手順 6、 2の画像 2
    • Remove the 14 Phillips 2.34mm screws using the Phillips #0 screwdriver.

  7. Toshiba Chromebook 2 Motherboard Replacement: 手順 7、 1の画像 1
    • Remove the metal plate covering the motherboard by lifting it vertically.

  8. Toshiba Chromebook 2 Motherboard Replacement: 手順 8、 3の画像 1 Toshiba Chromebook 2 Motherboard Replacement: 手順 8、 3の画像 2 Toshiba Chromebook 2 Motherboard Replacement: 手順 8、 3の画像 3
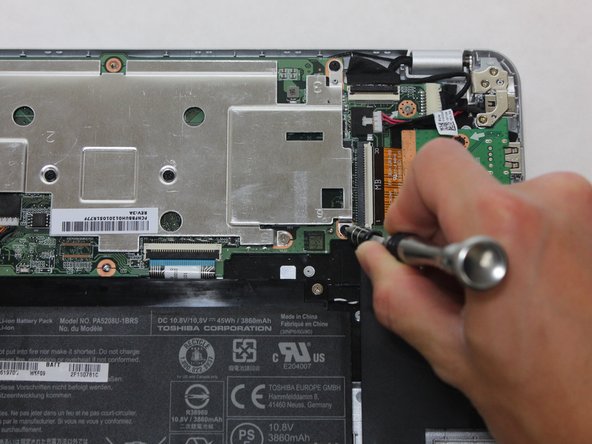
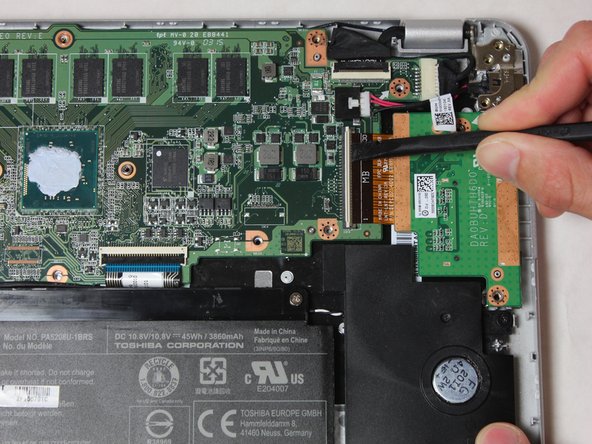
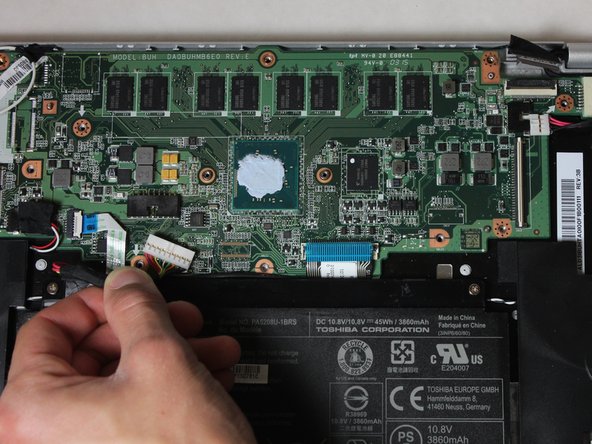
    • Flip up the plastic clamps holding down the 4 ribbon cables connected to the motherboard while gently pulling the ribbon cables from the sockets.

  9. Toshiba Chromebook 2 Motherboard Replacement: 手順 9、 3の画像 1 Toshiba Chromebook 2 Motherboard Replacement: 手順 9、 3の画像 2 Toshiba Chromebook 2 Motherboard Replacement: 手順 9、 3の画像 3
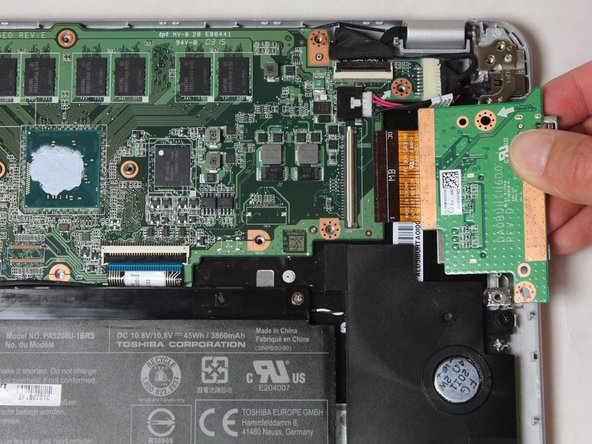
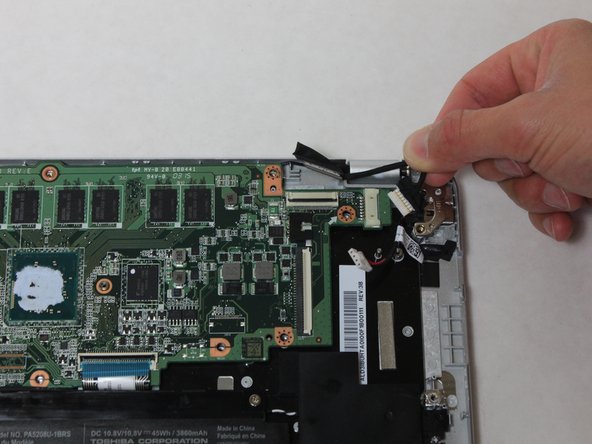
    • Use the spudger to press down on the 2 white port cables, while also pulling each white port cable out of their sockets.

  10. Toshiba Chromebook 2 Motherboard Replacement: 手順 10、 3の画像 1 Toshiba Chromebook 2 Motherboard Replacement: 手順 10、 3の画像 2 Toshiba Chromebook 2 Motherboard Replacement: 手順 10、 3の画像 3
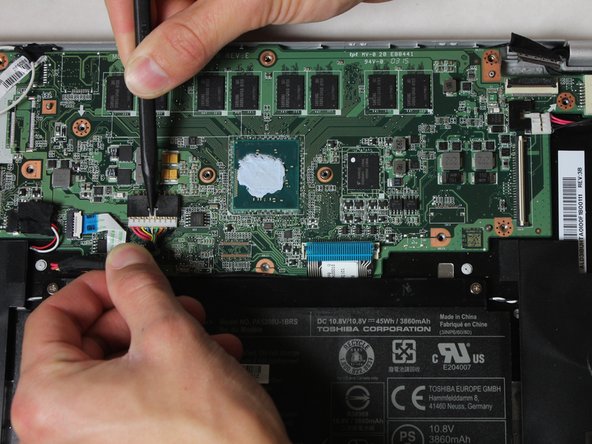
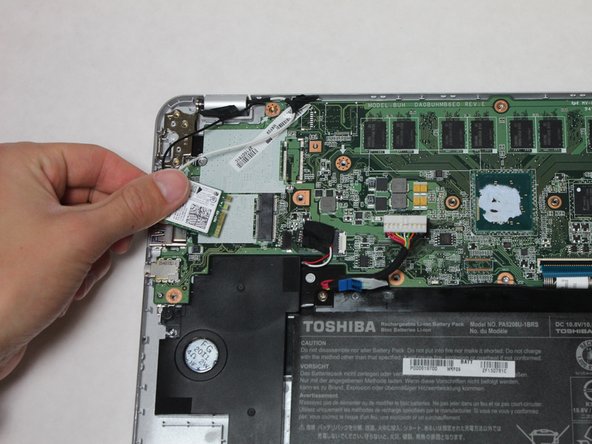
    • Disconnect the motherboard from the 3 remaining cables by pulling the chords out of the sockets.

  11. Toshiba Chromebook 2 Motherboard Replacement: 手順 11、 2の画像 1 Toshiba Chromebook 2 Motherboard Replacement: 手順 11、 2の画像 2
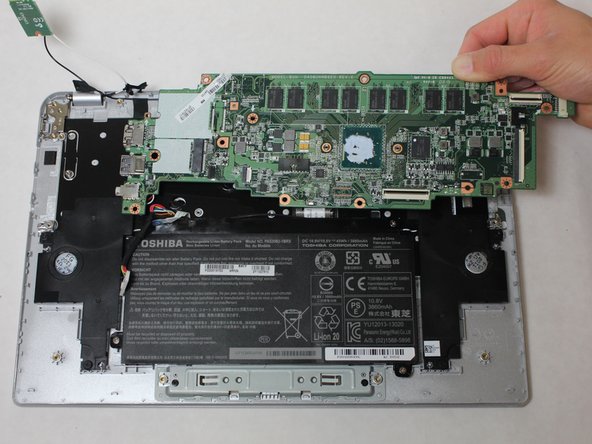
    • Remove the motherboard by pulling upward and to the right.

    • Be careful not to damage the ports located on the left side of the motherboard during removal.

終わりに

To reassemble your device, follow these instructions in reverse order.

2 の人々がこのガイドを完成させました。

作成者

3人の作成者と共同で作成されました。

Sam Nishi

メンバー登録日: 10/06/16

485 ポイント

1ガイドが承認済み

チーム

Cal Poly, Team 10-4, Livingston Fall 2016 Cal Poly, Team 10-4, Livingston Fall 2016人のメンバー

CPSU-LIVINGSTON-F16S10G4

4 メンバー

11のガイドは作成済み

0 件のコメント

コメントを追加

統計データ:

過去 24時間: 0

過去 7 日: 3

過去 30 日: 7

今までの合計 2,857