この修理ガイドは変更されています。最新の未承認バージョンに切り替えます。
はじめに
Quickly replace/repair a toilet flange with a replacement kit from a hardware store, following these steps. This should not take more than 20 minutes, although it is highly recommended you do this with a partner as there is a bit of fine adjustment and heavy (60-120lbs) lifting involved. For this, I will be using the Jag Plumbing Products Toilet Bowl Anchor Flange Kit from Home Depot, but similar kits from elsewhere may be substituted as well, provided they have a flange and bolts.
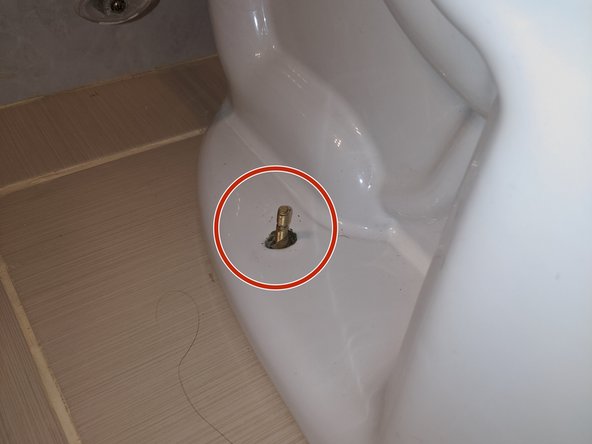
Ensure the area where you will be working is well lit and dry. Check the toilet itself to see if there are any cracks in the porcelain. If there are any, you will need a new toilet unfortunately.
必要な工具と部品
-
-
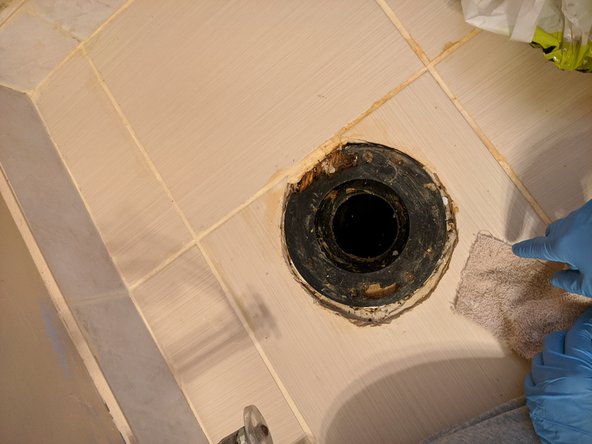
Spread a towel a bit behind you or beside if you have enough space, as this is where you will be placing the toilet.
-
-
-
-
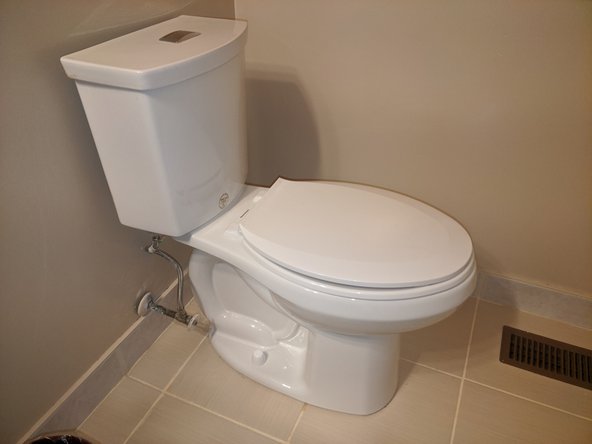
Clean up the area, and reconnect the waterline. Once connected, turn back on the valve.
-
If water leaks out, the toilet is not positioned properly and needs to be readjusted. Restart from step 7, after undoing the bolts and lifting the toilet back up.
-
If there are no leaks, reconnect the waterline and clean up any excess wax. Congratulations, you have successfully replaced your toilet flange!
-


ある他の人がこのガイドを完成しました。
チーム

York University, Team S1-G12, O'Regan Summer 2020 York University, Team S1-G12, O'Regan Summer 2020人のメンバー
YORK-O'REGAN-SU20S1G12
1 メンバー
1のガイドは作成済み