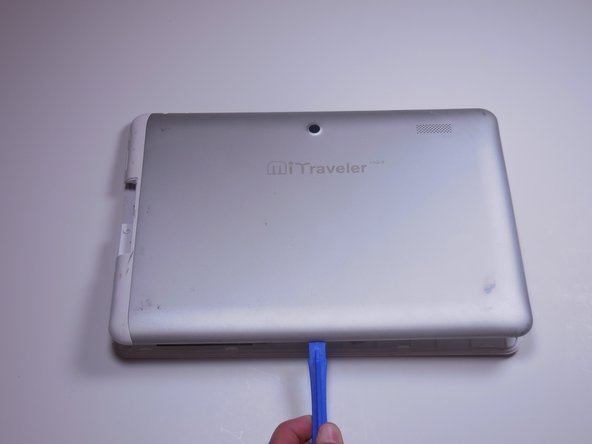
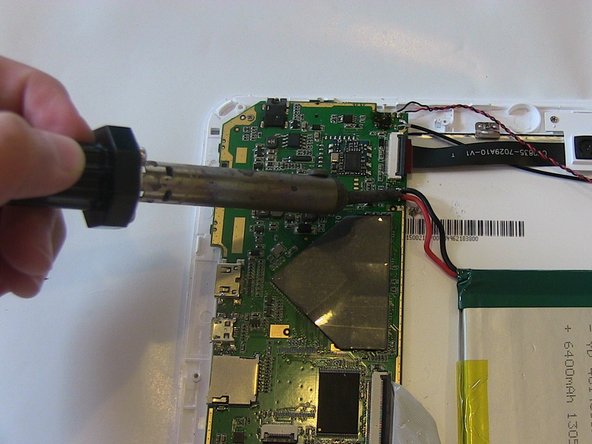
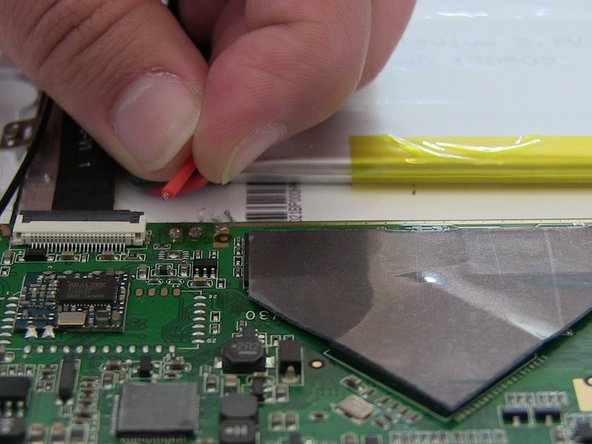
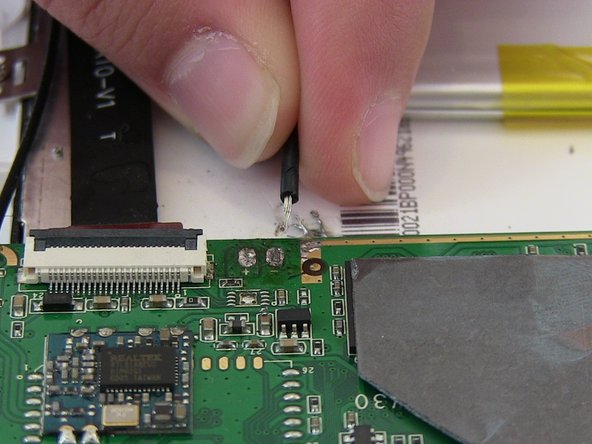
メインコンテンツにスキップ

Tivax MiTraveler 10Q-8 Battery Replacement

必要な工具と部品

  1. Tivax MiTraveler 10Q-8 Battery Replacement, Rear Case: 手順 1、 2の画像 1 Tivax MiTraveler 10Q-8 Battery Replacement, Rear Case: 手順 1、 2の画像 2
    • With the device face down, slide the charging port cover off on the left side of device.

  2. Tivax MiTraveler 10Q-8 Battery Replacement: 手順 2、 2の画像 1 Tivax MiTraveler 10Q-8 Battery Replacement: 手順 2、 2の画像 2
    • Remove the 2.9 mm screw from the charging port using a Phillips #000 screwdriver.

  3. Tivax MiTraveler 10Q-8 Battery Replacement: 手順 3、 1の画像 1
    • To pry the back plate off, use the plastic opening tool between the back plate and front plate; start at the headphone jack.

    • Make sure the lip of the plastic opening tool is face up.

  4. Tivax MiTraveler 10Q-8 Battery Replacement: 手順 4、 2の画像 1 Tivax MiTraveler 10Q-8 Battery Replacement: 手順 4、 2の画像 2
    • Move around the device with the plastic opening tool, pushing down to release the back plate from clips.

    • You will hear popping sounds when you work around the device.

  5. Tivax MiTraveler 10Q-8 Battery Replacement: 手順 5、 2の画像 1 Tivax MiTraveler 10Q-8 Battery Replacement: 手順 5、 2の画像 2
    • Once you’ve moved around the whole device with the plastic opening tool, the back plate will completely release from the rest of the device.

  6. Tivax MiTraveler 10Q-8 Battery Replacement, Battery: 手順 6、 1の画像 1
    • The battery rests flat on the inside surface of the tablet. It is a rectangular shape and has blue and yellow tape.

  7. Tivax MiTraveler 10Q-8 Battery Replacement: 手順 7、 1の画像 1
    • Two wires, one red and one black, which run from the motherboard to the battery, need to be desoldered from the motherboard.

    • Review how to solder here.

  8. Tivax MiTraveler 10Q-8 Battery Replacement: 手順 8、 2の画像 1 Tivax MiTraveler 10Q-8 Battery Replacement: 手順 8、 2の画像 2
    • Work the soldering gun on the red wire where it is connected to the motherboard. It should release from the motherboard.

    • Work the soldering gun on the black wire where it is connected to the motherboard. It will release from the motherboard.

  9. Tivax MiTraveler 10Q-8 Battery Replacement: 手順 9、 3の画像 1 Tivax MiTraveler 10Q-8 Battery Replacement: 手順 9、 3の画像 2 Tivax MiTraveler 10Q-8 Battery Replacement: 手順 9、 3の画像 3
    • Once both wires have been desoldered, remove the battery from the device.

終わりに

To reassemble your device, follow these instructions in reverse order.

作成者

5人の作成者と共同で作成されました。

Maria

メンバー登録日: 03/16/15

210 ポイント

2のガイドは作成済み

チーム

Colorado Springs, Team 4-3, Panko Spring 2015 Colorado Springs, Team 4-3, Panko Spring 2015人のメンバー

UCCS-PANKO-S15S4G3

3 メンバー

10のガイドは作成済み

0 件のコメント

コメントを追加

統計データ:

過去 24時間: 0

過去 7 日: 1

過去 30 日: 8

今までの合計 848