メインコンテンツにスキップ

The Sharper Image Literati Tablet Keyboard Replacement

必要な工具と部品

  1. The Sharper Image Literati Tablet Keyboard Replacement, Battery: 手順 1、 1の画像 1
    • Wedge plastic spudger tool between the back panel and the body of device.

    • Pry apart the back panel and the device.

  2. The Sharper Image Literati Tablet Keyboard Replacement: 手順 2、 1の画像 1
    • Desolder the battery wires from the circuit board.

  3. The Sharper Image Literati Tablet Keyboard Replacement: 手順 3、 1の画像 1
    • Warm the battery with a hair dryer.

    • Be carful not to over-heat the battery, this could cause the battery to ignite.

  4. The Sharper Image Literati Tablet Keyboard Replacement: 手順 4、 1の画像 1
    この手順で使用する道具:
    Plastic Cards
    $2.99
    購入する
    • Gently wedge a spudger or thin plastic card between the battery and the body of device. Work the spudger or card along the length of the battery to free it from the adhesive.

    • Do not bend or puncture the battery. Work slowly and carefully.

  5. The Sharper Image Literati Tablet Keyboard Replacement, SD Port: 手順 5、 1の画像 1
    • Use a Phillips #00 screwdriver to remove the fifteen 4mm screws from the silver peripheral edging.

  6. The Sharper Image Literati Tablet Keyboard Replacement: 手順 6、 1の画像 1
    • Use a Phillips #00 screwdriver to remove three 4 mm screws from the circuit board containing the headphone jack and power jack.

  7. The Sharper Image Literati Tablet Keyboard Replacement: 手順 7、 1の画像 1
    • Remove the circuit board.

  8. The Sharper Image Literati Tablet Keyboard Replacement: 手順 8、 1の画像 1
    • Unclip ZIF clip from the chip and unplug ribbon cable.

  9. The Sharper Image Literati Tablet Keyboard Replacement: 手順 9、 1の画像 1
    • Detach the peripheral edge with plastic wedge.

    • This may require a little hard pulling.

  10. The Sharper Image Literati Tablet Keyboard Replacement: 手順 10、 1の画像 1
    • Remove peripheral silver edge.

  11. The Sharper Image Literati Tablet Keyboard Replacement: 手順 11、 1の画像 1
    • Remove screws from the large metal shielding.

  12. The Sharper Image Literati Tablet Keyboard Replacement: 手順 12、 1の画像 1
    • Remove the silver backing plate and the adhered SD port chip.

  13. The Sharper Image Literati Tablet Keyboard Replacement, Keyboard: 手順 13、 1の画像 1
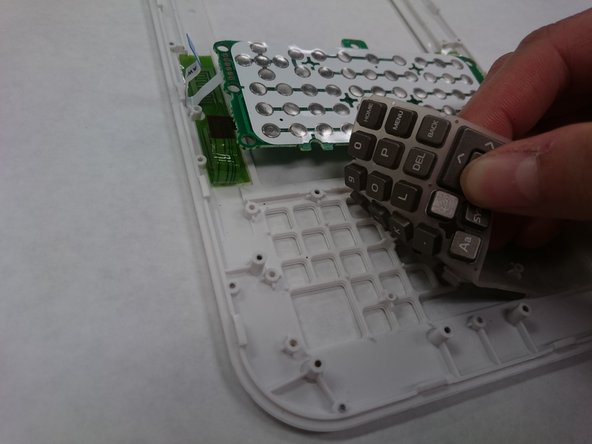
    • Remove the 10 Phillips head 4.2 mm screws using PH#00 screwdriver from the key board chip.

  14. The Sharper Image Literati Tablet Keyboard Replacement: 手順 14、 2の画像 1 The Sharper Image Literati Tablet Keyboard Replacement: 手順 14、 2の画像 2
    • Peal back the sensor array and keypad.

終わりに

To reassemble your device, follow these instructions in reverse order.

作成者

2人の作成者と共同で作成されました。

Spencer Dodder

メンバー登録日: 03/21/18

560 ポイント

4のガイドは作成済み

チーム

IUPUI, Team S5-G4, Baechle Spring 2018 IUPUI, Team S5-G4, Baechle Spring 2018人のメンバー

IUPUI-BAECHLE-S18S5G4

3 メンバー

8のガイドは作成済み

コメント 1 件

This is NOT how you open them!!! I broke one of mine doing this. The white part SLIDES UP! DO not ply it open!!! Slide it up ( it needs a LITTLE ply around the silver part. ) It comes off then there are TWO SCREWS holding the brown part down. Once you remove the two screws ( they are under the white part ) then you can slide up the brown part too.

Phynix Heart - 返信

コメントを追加

統計データ:

過去 24時間: 0

過去 7 日: 1

過去 30 日: 2

今までの合計 198