はじめに
UIボードはノブやキーボードの動作を担当し、スピーカーに接続する。これが故障してしまうと、楽しみがまったくなくなってしまいます。
このガイドでは、OP-1のUIボードの交換方法をご紹介します。
必要な工具と部品
-
-
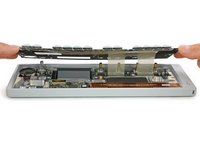
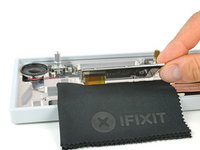
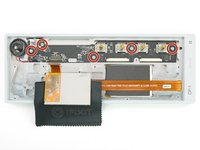
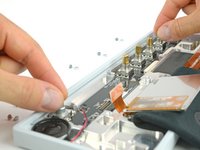
プラス#00ドライバーで、ネジを12本外します。
-
そして、4つのロータリーノブと音量ノブを引き抜きます。
-
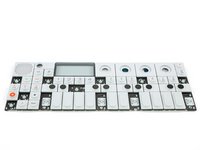
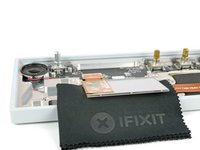
これでキーボードを少し持ち上げたり、戻すことができます。
Your missing the ribbon decoupling step, unless you skipped it because it’s such a tight squeeze to get back in.
The concept of removing the square panels that the knobs sit on was skipped.
-
-
-
-
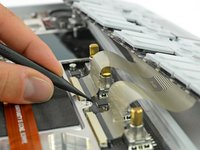
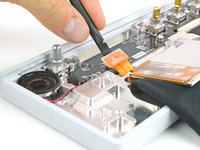
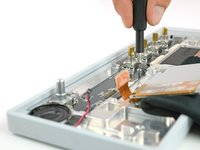
各コネクターの両側にある2つの黒いペン先を押して、フレックスケーブルのロックを解除します。
-
これでフレックスケーブルを引き抜いて、キーボードを完全に取り外すことができます。
I found bring the OP-1 higher up off my work surface made installing the ribbons much easier, oh and keep the keyboard assembly parallel to the OP-1 to ensure the ribbons seat evenly.
There ribbons are incredibly frustrating -- I cannot, for the life of me, lock them in place. Even after bending them, the direction of the bend itself creates tension that pulls them out of the zero insertion force connector. The black nibs do not seem to provide enough locking force. Frustratingly enough, this happens slowly over time, so usually 24 hours after I have fully reassembled the keyboard, it starts malfunctioning again. I would really appreciate some help here.
-
-
-
ディスプレイは接着剤で軽く固定されています。ディスプレイを取り外すには、スパッジャーが役立ちます。
-
UIボードにアクセスするためにディスプレイを前面に裏返したときに、ディスプレイが損傷しないことを確認してください。
-
-
-
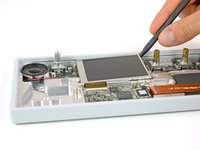
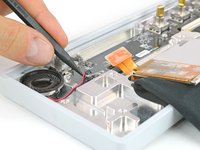
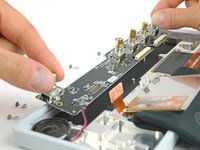
これでUIボードが自由に取り出せます。ツマミを持って、右側から半分ほど持ち上げることができます。
-
左側はスピーカーとケーブルが邪魔でまっすぐ取り出せないかもしれません。右斜めに動かすと取り出します。
-


デバイスを再度組み立てるには、以下の手順を逆の順序で行ってください。
デバイスを再度組み立てるには、以下の手順を逆の順序で行ってください。
10 の人々がこのガイドを完成させました。
以下の翻訳者の皆さんにお礼を申し上げます:
100%

Midori Doiさんは世界中で修理する私たちを助けてくれています! あなたも貢献してみませんか?
翻訳を始める ›

チーム

Tobias Isakeit - Repairability Engineer Tobias Isakeit - Repairability Engineer人のメンバー
Business
1 メンバー
1,131のガイドは作成済み
2 件のコメント
Can anyone recommend a good adhesive tape to fix the screen in place after doing the repair?
No need to replace the adhesive tape as long as you leave it attached to the op1 or to the back of the display itself. So when you go to put everything back together, slot the display back into place, the adhesive tape that is there should stick very gently and when you go to put the keyboard with the display glass back, everything will be held in place.
Also, this guide skips over detaching the ribbon cables when you are removing the keyboard, the two connectors each have two (2 on each port) very small black colored locking mechanisms on the left and right of the cable's port, using a spudger you can push those locking mechanisms up about 2mm, and the ribbons should detach from the ui board seamlessly allowing you to gently pull them out. When putting it back together, insert the ribbon cable evenly to the new port, and push the locking mechanisms into place (reverse from what you did before).
sahdudeone - 返信