メインコンテンツにスキップ

SuperSonic Matrix Mid SC-999 Speaker Replacement

必要な工具と部品

  1. SuperSonic Matrix Mid SC-999 Speaker Replacement, Back Cover: 手順 1、 1の画像 1
    • Wedge the plastic opening tool between the back cover of the device and the front panel.

    • You will hear a snapping sound as the cover is separated from the body of the device.

  2. SuperSonic Matrix Mid SC-999 Speaker Replacement: 手順 2、 1の画像 1
    • Slide the opening tool along the seam between the front panel and the back cover to un-clip the remaining connections around the device.

    • Again, you will hear a snapping sound as the cover is separated from the body of the device.

  3. SuperSonic Matrix Mid SC-999 Speaker Replacement: 手順 3、 2の画像 1 SuperSonic Matrix Mid SC-999 Speaker Replacement: 手順 3、 2の画像 2
    • Lift the back cover from the body of the device to expose the internal components.

  4. SuperSonic Matrix Mid SC-999 Speaker Replacement, Speaker: 手順 4、 1の画像 1
    • Remove the Speakers

    • Use the tweezers to remove the speakers from their compartments.

  5. SuperSonic Matrix Mid SC-999 Speaker Replacement: 手順 5、 2の画像 1 SuperSonic Matrix Mid SC-999 Speaker Replacement: 手順 5、 2の画像 2
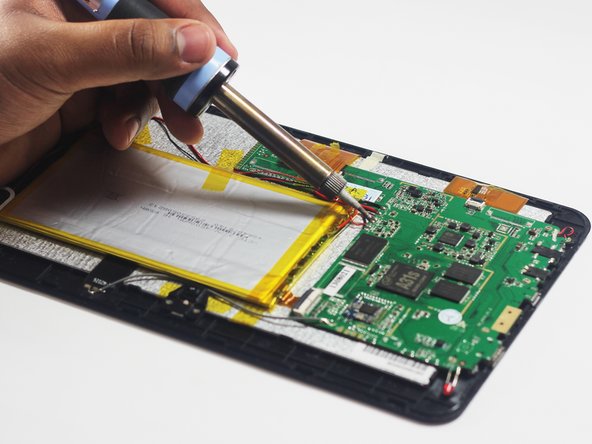
    • Desolder the 4 Speaker Wires

    • These wires connect the speakers to the motherboard. They are the thinnest wires.

    • If you're unfamiliar with soldering or desoldering check out this guide.

    • Be sure to wear protective eye wear. Also, keep in mind that the soldering iron will become extremely hot.

終わりに

To reassemble your device, follow these instructions in reverse order.

作成者

5人の作成者と共同で作成されました。

Johncy George

メンバー登録日: 03/26/15

101 ポイント

1ガイドが承認済み

チーム

Baylor, Team 6-1, Shaver Spring 2015 Baylor, Team 6-1, Shaver Spring 2015人のメンバー

BU-SHAVER-S15S6G1

4 メンバー

18のガイドは作成済み

0 件のコメント

コメントを追加

統計データ:

過去 24時間: 1

過去 7 日: 5

過去 30 日: 6

今までの合計 304