メインコンテンツにスキップ

SteelSeries Arctis Pro Plus GameDAC Potentiometer Replacement

必要な工具と部品

  1. SteelSeries Arctis Pro Plus GameDAC Potentiometer Replacement, GameDAC Potentiometer: 手順 1、 3の画像 1 SteelSeries Arctis Pro Plus GameDAC Potentiometer Replacement, GameDAC Potentiometer: 手順 1、 3の画像 2 SteelSeries Arctis Pro Plus GameDAC Potentiometer Replacement, GameDAC Potentiometer: 手順 1、 3の画像 3
    • Remove the plastic cover using the iFixit opening tool to pry the cover open.

    • Insert opening picks to keep the cover open as you work your way around the GameDAC.

    • Pop the cover off.

  2. SteelSeries Arctis Pro Plus GameDAC Potentiometer Replacement: 手順 2、 2の画像 1 SteelSeries Arctis Pro Plus GameDAC Potentiometer Replacement: 手順 2、 2の画像 2
    • Remove the control wheel from the GameDAC by pulling on the knob.

  3. SteelSeries Arctis Pro Plus GameDAC Potentiometer Replacement: 手順 3、 2の画像 1 SteelSeries Arctis Pro Plus GameDAC Potentiometer Replacement: 手順 3、 2の画像 2
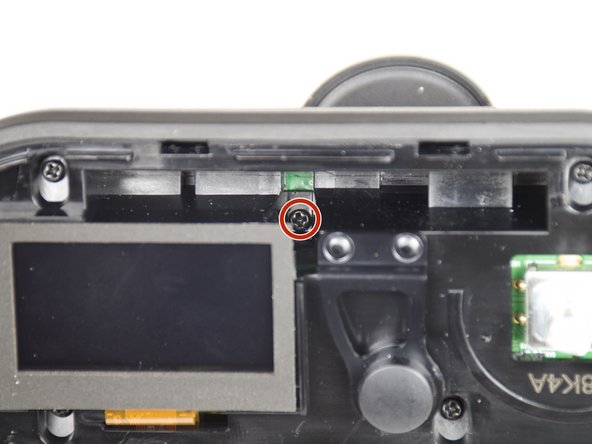
    • Remove the five 6mm screws using the Phillips #0 driver head.

    • There is one screw hidden on the upper right-hand side of the display.

  4. SteelSeries Arctis Pro Plus GameDAC Potentiometer Replacement: 手順 4、 2の画像 1 SteelSeries Arctis Pro Plus GameDAC Potentiometer Replacement: 手順 4、 2の画像 2
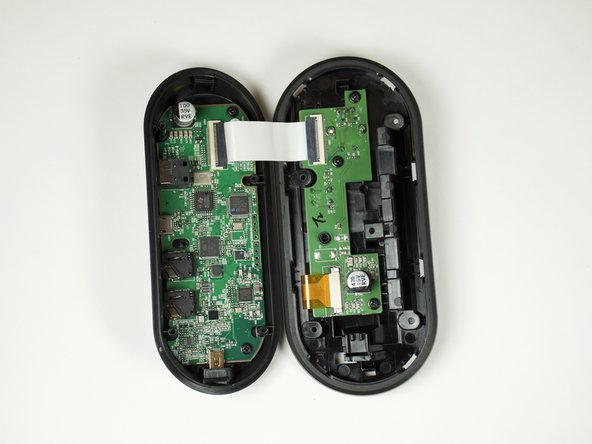
    • Hold the sides of the GameDAC and pull apart.

    • Don't pull the two sides apart quickly or forcefully to avoid tearing the wire connection between the two boards.

  5. SteelSeries Arctis Pro Plus GameDAC Potentiometer Replacement: 手順 5、 1の画像 1
    • Remove the three 4mm screws from the circuit board using the Phillips #0 driver head.

  6. SteelSeries Arctis Pro Plus GameDAC Potentiometer Replacement: 手順 6、 2の画像 1 SteelSeries Arctis Pro Plus GameDAC Potentiometer Replacement: 手順 6、 2の画像 2
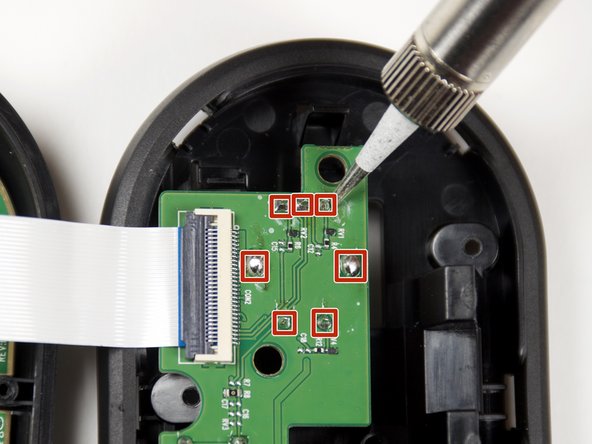
    • Desolder the seven potentiometer pins from the board to remove the button.

    • For help desoldering connections, follow this useful guide on はんだ付けとはんだ除去の作業ガイド.

    • Use caution when soldering. The heated tip may cause damage to the board or burn you.

終わりに

To reassemble your device, follow these instructions in reverse order.

5 の人々がこのガイドを完成させました。

作成者

4人の作成者と共同で作成されました。

Avinash Vadlamudi

メンバー登録日: 01/24/19

451 ポイント

1ガイドが承認済み

チーム

Cal Poly, Team S18-G1, White Winter 2019 Cal Poly, Team S18-G1, White Winter 2019人のメンバー

CPSU-WHITE-W19S18G1

4 メンバー

21のガイドは作成済み

3 件のコメント

Hi there,

do you know what type of potentiometer is needed?

Greetings

Chris

Christian Humann - 返信

I would like to know too. Cause it failed for me as well!!

Antonis Lazarakis - 返信

Can I replace the Oled Screen with 2,42 inch arduino oled display that also have 24pin flex?

Muso!27 - 返信

コメントを追加

統計データ:

過去 24時間: 6

過去 7 日: 18

過去 30 日: 74

今までの合計 4,496