メインコンテンツにスキップ

Sony Cyber-Shot DSC-TX9 Lens Replacement

必要な工具と部品

  1. Sony Cyber-Shot DSC-TX9 Lens Replacement, Prerequisites Only: 手順 1、 3の画像 1 Sony Cyber-Shot DSC-TX9 Lens Replacement, Prerequisites Only: 手順 1、 3の画像 2 Sony Cyber-Shot DSC-TX9 Lens Replacement, Prerequisites Only: 手順 1、 3の画像 3
    • Use a Phillips #0 screwdriver to unscrew the six 2mm screws on the outer case of the camera.

    • If there is a battery or SD card inside remove before beginning the process.

  2. Sony Cyber-Shot DSC-TX9 Lens Replacement: 手順 2、 2の画像 1 Sony Cyber-Shot DSC-TX9 Lens Replacement: 手順 2、 2の画像 2
    • Use your hands or a Spudger to Pull off the front cover of the camera.

    • If the casing is not coming apart easily, do not force it.

  3. Sony Cyber-Shot DSC-TX9 Lens Replacement: 手順 3、 1の画像 1
    • Remove the protective black cover layer with your hands and set it aside.

    • The use of tweezers may be necessary if the cover is difficult to remove.

  4. Sony Cyber-Shot DSC-TX9 Lens Replacement: 手順 4、 2の画像 1 Sony Cyber-Shot DSC-TX9 Lens Replacement: 手順 4、 2の画像 2
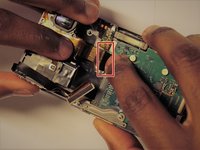
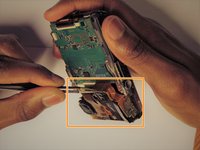
    • The ZIF connector can be removed by flipping the small black holder into the upright position and then sliding the ribbon cable out carefully.

    • Once this has been done, use tweezers to unplug the flat topped connector for the lens’ circuit board from the motherboard.

    • DO NOT force the ribbon cables or they will rip.

    • Refer to the (ケーブルコネクタの識別と接続の外し方) page for assistance.

  5. Sony Cyber-Shot DSC-TX9 Lens Replacement, Lens: 手順 5、 1の画像 1
    • Using the tweezers carefully remove the broken/damaged lens with its attached circuit board

終わりに

To reassemble your device, follow these instructions in reverse order.

作成者

3人の作成者と共同で作成されました。

robert.oliver6

メンバー登録日: 03/23/17

101 ポイント

1ガイドが承認済み

チーム

UMass Dartmouth, Team S4-G3, Julie Spring 2017 UMass Dartmouth, Team S4-G3, Julie Spring 2017人のメンバー

UMASSD-JULIE-S17S4G3

5 メンバー

8のガイドは作成済み

0 件のコメント

コメントを追加

統計データ:

過去 24時間: 0

過去 7 日: 5

過去 30 日: 6

今までの合計 396