メインコンテンツにスキップ
リペアコミュニティに参加 - アカウントの作成

Sony Clie PEG-NR70 Speaker Rail Replacement

必要な工具と部品

  1. Sony Clie PEG-NR70 Speaker Rail Replacement, The Case: 手順 1、 1の画像 1
    • Unscrew the 1.9mm screw located at the top of the device with a Phillips #00 screwdriver.

    • It may be helpful to set up a piece of paper to keep track of where removed screws came from.

    FixBotに聞いてみる

    コメントを追加

  2. Sony Clie PEG-NR70 Speaker Rail Replacement: 手順 2、 1の画像 1
    • Unscrew the 2.5mm screw located on the left side of the device with a Phillips #00 screwdriver.

    FixBotに聞いてみる

    コメントを追加

  3. Sony Clie PEG-NR70 Speaker Rail Replacement: 手順 3、 2の画像 1 Sony Clie PEG-NR70 Speaker Rail Replacement: 手順 3、 2の画像 2
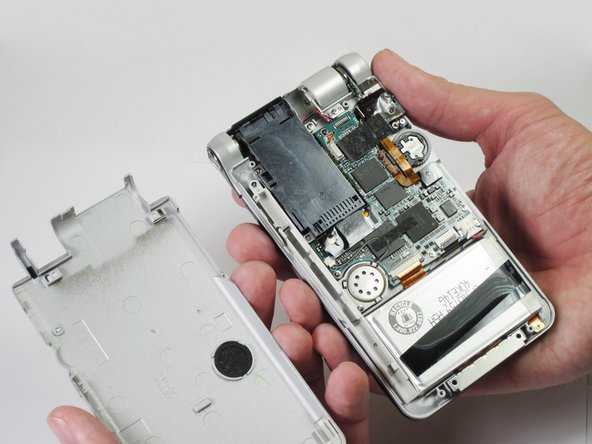
    • Unscrew the five 2.5mm screws on the back panel with a Phillips #00 screwdriver.

    • Remove the back panel by lifting it away with your hands.

    FixBotに聞いてみる

    コメントを追加

  4. Sony Clie PEG-NR70 Speaker Rail Replacement, Speaker Rail: 手順 4、 2の画像 1 Sony Clie PEG-NR70 Speaker Rail Replacement, Speaker Rail: 手順 4、 2の画像 2
    この手順で使用する道具:
    Tweezers
    $4.99
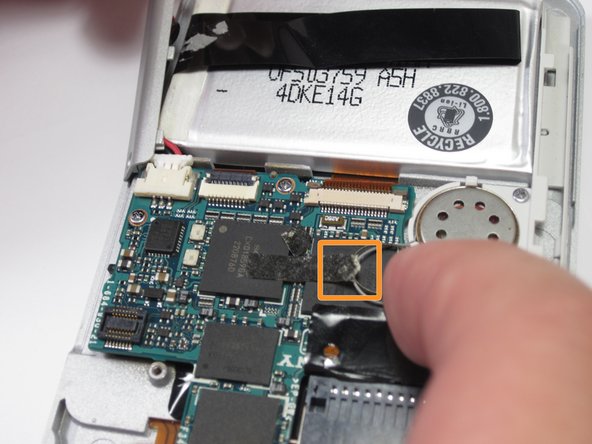
    • Use tweezers to unplug the speaker wire from the motherboard by pulling the plug (not the wires) down towards the speaker.

    • Be careful not to tear the speaker wires! They are very thin.

    • Remove the tape holding speaker wire by peeling it away.

    FixBotに聞いてみる

    コメントを追加

  5. Sony Clie PEG-NR70 Speaker Rail Replacement: 手順 5、 1の画像 1
    • Holding down the speaker rail unscrew the two 2.5mm screws with a Phillips #00 screwdriver.

    • Remove the speaker rail vertically from the device.

    FixBotに聞いてみる

    コメントを追加

終わりに

To reassemble your device, follow these instructions in reverse order.

キャンセル: このガイドを終了できませんでした。

作成者

7人の作成者と共同で作成されました。

Daniel Soski

メンバー登録日: 04/18/13

63 ポイント

6のガイドは作成済み

チーム

Cal Poly, Team 14-11, Maness Spring 2013 Cal Poly, Team 14-11, Maness Spring 2013人のメンバー

CPSU-MANESS-S13S14G11

5 メンバー

8のガイドは作成済み

0件のガイドコメント

コメントを追加

統計データ:

過去 24時間: 1

過去 7 日: 3

過去 30 日: 32

今までの合計 691