はじめに
If you have no sound in the earphones or it wobbles between right and left earphones, there is an issue with wires in the earphones. If you notice that the sound changes when you move around the audio jack, replacing the jack would fix the sound issue. In order to replace an earphone connector, you would need to cut off the old connector and solder the new connector with the wires of the earphones. Please follow safety rules when using soldering equipment.
必要な工具と部品
-
-
Use wire cutters to remove the audio jack.
-
Use wire cutters to remove approximately 1/2 inch of insulation of the wire and separate the four wires inside of it.
-
Red wire is the right speaker '+' terminal.
-
Green wire is the left speaker '+' terminal.
-
Golden wire is the ground terminal.
-
Purple wire is the microphone terminal.
-
-
-
-
Put shrink tubing on either one of the wires.
-
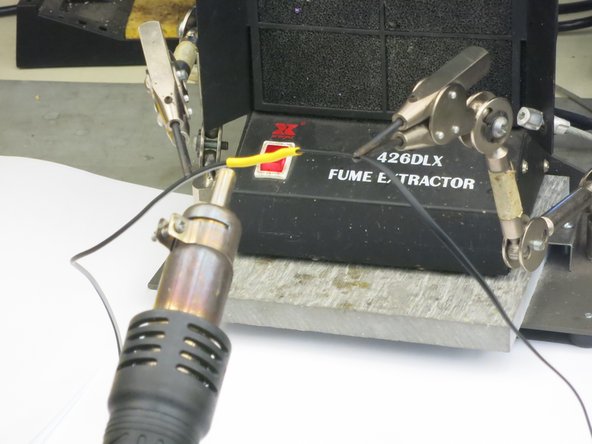
For each wire color, put the headphone wire and the replacement wire into clamps. Weave them together using fingers.
-
-
-
Using Digital Multimeter in the "Continuity" mode, place two probes on the soldered wires of the same color. You will hear audio signal indicating that there is a connection.
-
Repeat this for each of the wire colors.
-


Repeat the procedure if you need to install a new audio jack.
Repeat the procedure if you need to install a new audio jack.
チーム

Cal Poly, Team S4-G1, Livingston Fall 2017 Cal Poly, Team S4-G1, Livingston Fall 2017人のメンバー
CPSU-LIVINGSTON-F17S4G1
5 メンバー
25のガイドは作成済み