はじめに
Use this guide to remove the core assembly in the Samsung Galaxy Watch4.
必要な工具と部品
-
-
Before starting repairs, take your watch off the charger and power it down.
-
Remove the watch band.
-
-
-
Use a Tri-point Y000 screwdriver to remove the four 4.0 mm-long screws.
-
-
-
Insert an opening tool into the seam between the back cover and the metal housing.
-
Twist the opening tool to create a gap.
-
-
-
Lay the watch face down.
-
Carefully swing open the back cover by folding the back cover to the opposite site of the created gap.
-
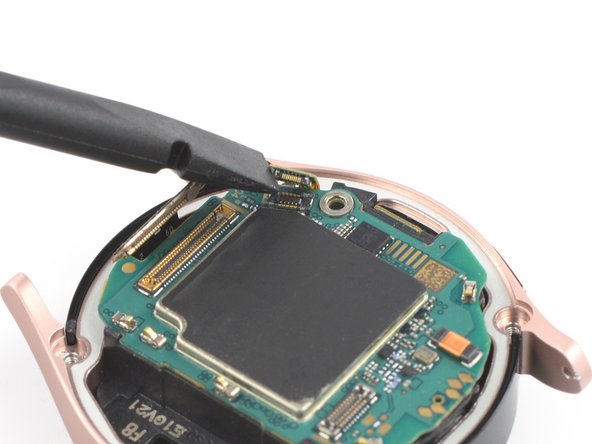
Use the flat end of a spudger to pry up and disconnect the sensor flex cable from the motherboard.
-
-
-
-
Use a Phillips screwdriver to remove the 4.4 mm-long screw securing the motherboard.
-
-
-
Use the flat end of a spudger to disconnect the display flex cable.
-
-
-
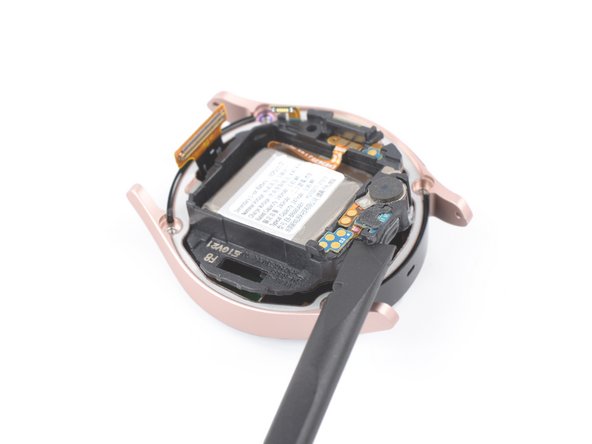
Use your fingers to lift the motherboard out from the watch assembly towards the bottom of the watch.
-
-
-
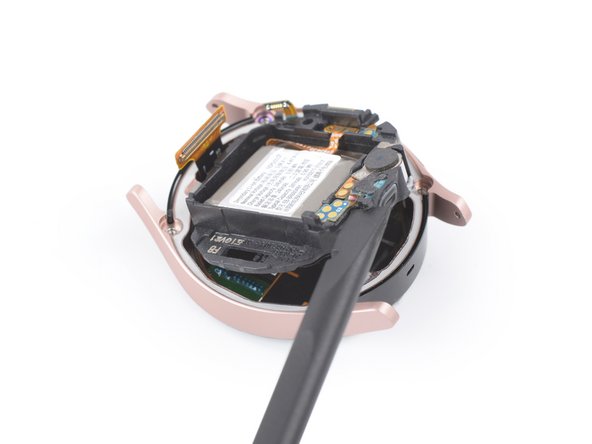
Place the corner of the flat end of a spudger under the plastic frame, on the opposite side of the display connector.
-
Twist and tilt the spudger to lever the core assembly out of the metal housing.
-


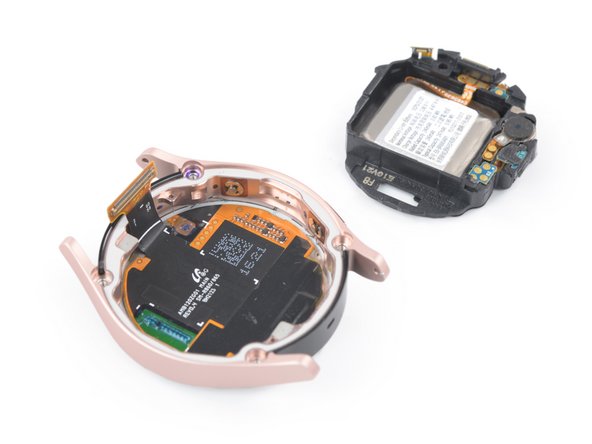
If possible, turn on your device and test your repair before installing new adhesive and resealing.
To reassemble your device, follow these instructions in reverse order.
Take your e-waste to an R2 or e-Stewards certified recycler.
Repair didn’t go as planned? Try some basic troubleshooting, or ask our Answers community for help.
2 の人々がこのガイドを完成させました。


2 件のコメント
I had the black screen of death and I wasn't getting anywhere with forced restarts, etc. My watch had gone blank and wouldn't even display charging level, though it did chime the noise when put on charge. Out of desperation I opened the case to look for water damage and to my surprise I found no damage or indication of water in the watch, aside from a small amount of corrosion on the aluminum case where it seals along the gasket, really just aluminum oxidation. After I put it all back together after pulling it apart looking for signs of water intrusion, the display finally functioned. My guess is disconnecting the motherboard from the battery gave the HARD reset I needed to get back in business. Thanks for the step by step guide to pull everything apart for exploratory surgery, it fixed my problem without needing to replace any components.
Hi @westleythayer, thanks a lot for sharing your repair experience! I hope your smartwatch brings you endless enjoyment in the years ahead.