メインコンテンツにスキップ

Samsung Galaxy Tab S3 Rear Facing Camera Camera Replacement

必要な工具と部品

  1. Samsung Galaxy Tab S3 Rear Facing Camera Camera Replacement, Display: 手順 1、 1の画像 1
    • To soften the adhesive holding the tablet together, heat up the edges of the glass panel using a heated iOpener on the edge of the device. Alternatively you can use a heat gun to loosen the adhesive.

    • Leave the iOpener on edge for two minutes.

    • Be careful not to burn yourself while handling the hot iOpener. For more information on the iOpener, use the iOpener Instructions Guide.

  2. Samsung Galaxy Tab S3 Rear Facing Camera Camera Replacement: 手順 2、 1の画像 1
    • Place a suction cup near edge that you heated up with the iOpener.

    • Press down on the suction cup to create a seal, and pull up with force to create a separation between the display and the midframe.

    • Use an opening tool to split apart the glass panel from the midframe.

    • Be careful to not break the glass when prying from the frame.

  3. Samsung Galaxy Tab S3 Rear Facing Camera Camera Replacement: 手順 3、 1の画像 1
    この手順で使用する道具:
    Plastic Cards
    $2.99
    購入する
    • As you continue along the edge using the opening tool, use a plastic card to keep the glass separate from the midframe.

    • You can also use multiple opening picks instead of a plastic card.

  4. Samsung Galaxy Tab S3 Rear Facing Camera Camera Replacement: 手順 4、 3の画像 1 Samsung Galaxy Tab S3 Rear Facing Camera Camera Replacement: 手順 4、 3の画像 2 Samsung Galaxy Tab S3 Rear Facing Camera Camera Replacement: 手順 4、 3の画像 3
    • Pull off the glass panel using the suction cup.

    • As you remove the glass panel, be careful not to tear the ribbon connecting the motherboard to the display.

    • Carefully disconnect the ribbon cable connecting the display assembly to the motherboard. You can disconnect this ribbon from either end.

  5. Samsung Galaxy Tab S3 Rear Facing Camera Camera Replacement, Rear glass panel: 手順 5、 2の画像 1 Samsung Galaxy Tab S3 Rear Facing Camera Camera Replacement, Rear glass panel: 手順 5、 2の画像 2
    • Repeat steps 3 through 7 to remove the rear glass panel on the opposite side of the device.

  6. Samsung Galaxy Tab S3 Rear Facing Camera Camera Replacement, Battery: 手順 6、 2の画像 1 Samsung Galaxy Tab S3 Rear Facing Camera Camera Replacement, Battery: 手順 6、 2の画像 2
    • Use a Phillips #000 screwdriver to unscrew the five screws securing the battery, and the twenty-two screws surrounding the midframe.

  7. Samsung Galaxy Tab S3 Rear Facing Camera Camera Replacement: 手順 7、 1の画像 1
    • The midframe should snap off from the device’s motherboard.

  8. Samsung Galaxy Tab S3 Rear Facing Camera Camera Replacement: 手順 8、 3の画像 1 Samsung Galaxy Tab S3 Rear Facing Camera Camera Replacement: 手順 8、 3の画像 2 Samsung Galaxy Tab S3 Rear Facing Camera Camera Replacement: 手順 8、 3の画像 3
    • Locate the ribbon running from the midframe and disconnect it from the motherboard with the flat end of a spudger.

  9. Samsung Galaxy Tab S3 Rear Facing Camera Camera Replacement: 手順 9、 2の画像 1 Samsung Galaxy Tab S3 Rear Facing Camera Camera Replacement: 手順 9、 2の画像 2
    • Use the flat end of the spudger to pop off the connector between the battery and the motherboard.

  10. Samsung Galaxy Tab S3 Rear Facing Camera Camera Replacement: 手順 10、 2の画像 1 Samsung Galaxy Tab S3 Rear Facing Camera Camera Replacement: 手順 10、 2の画像 2
    • Flip the midframe over and pop the battery out, making sure to slide it out from underneath the ribbon cables.

  11. Samsung Galaxy Tab S3 Rear Facing Camera Camera Replacement: 手順 11、 1の画像 1
    • The battery should now be removed and detached from the device.

  12. Samsung Galaxy Tab S3 Rear Facing Camera Camera Replacement, Rear Facing Camera: 手順 12、 3の画像 1 Samsung Galaxy Tab S3 Rear Facing Camera Camera Replacement, Rear Facing Camera: 手順 12、 3の画像 2 Samsung Galaxy Tab S3 Rear Facing Camera Camera Replacement, Rear Facing Camera: 手順 12、 3の画像 3
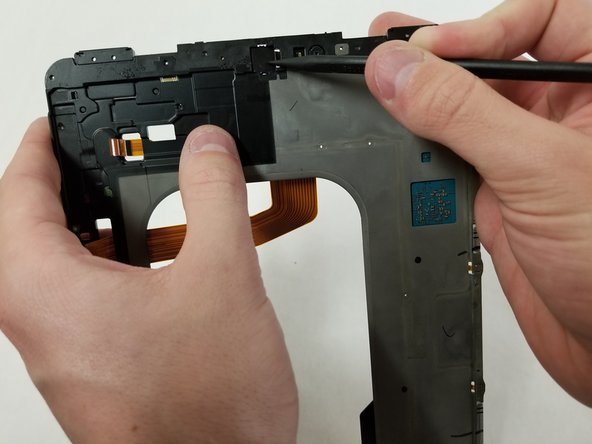
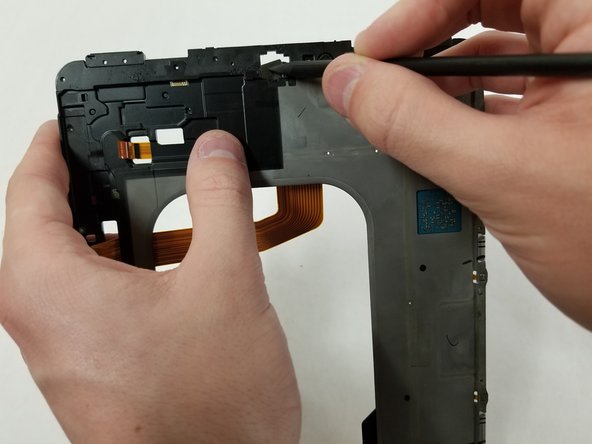
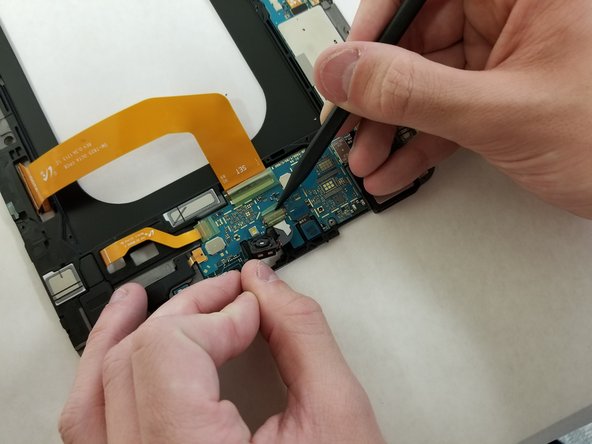
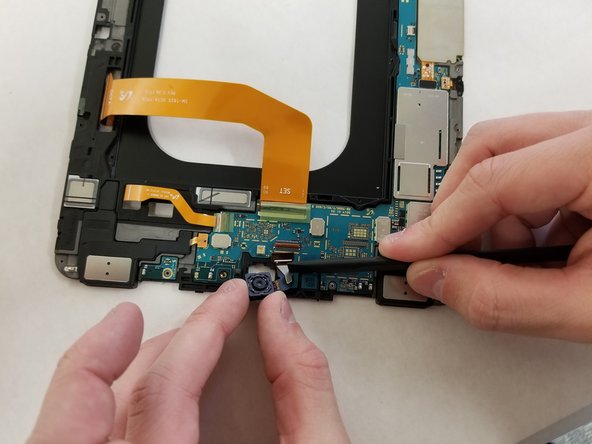
    • Flip over the device, and carefully push the Rear Camera out of its framing using the spudger.

  13. Samsung Galaxy Tab S3 Rear Facing Camera Camera Replacement: 手順 13、 3の画像 1 Samsung Galaxy Tab S3 Rear Facing Camera Camera Replacement: 手順 13、 3の画像 2 Samsung Galaxy Tab S3 Rear Facing Camera Camera Replacement: 手順 13、 3の画像 3
    • Flip the motherboard over and locate the ribbon attaching the Rear Camera to the motherboard. Carefully pop off the ribbon from the logic board with the flat end of the spudger.

  14. Samsung Galaxy Tab S3 Rear Facing Camera Camera Replacement: 手順 14、 1の画像 1
    • Remove the Rear Camera from the device.

終わりに

To reassemble your device, follow these instructions in reverse order. If you have removed too much adhesive, you may need to apply more during the reassembly process.

2 の人々がこのガイドを完成させました。

作成者

5人の作成者と共同で作成されました。

Mimi Fucini

メンバー登録日: 04/18/18

684 ポイント

4のガイドは作成済み

チーム

Cal Poly, Team S22-G4, Maness Spring 2018 Cal Poly, Team S22-G4, Maness Spring 2018人のメンバー

CPSU-MANESS-S18S22G4

5 メンバー

15のガイドは作成済み

コメント 1 件

This repair can be done without removing the screen!

hansderaedt - 返信

コメントを追加

統計データ:

過去 24時間: 0

過去 7 日: 1

過去 30 日: 4

今までの合計 681