メインコンテンツにスキップ

Samsung Galaxy Tab 8.9 Battery Replacement

必要な工具と部品

  1. Samsung Galaxy Tab 8.9 Battery Replacement, Battery: 手順 1、 1の画像 1
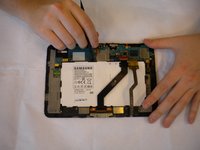
    • Insert a plastic opening tool between the back cover and the screen of the Samsung Galaxy Tab 8.9.

  2. Samsung Galaxy Tab 8.9 Battery Replacement: 手順 2、 1の画像 1
    • 6 cm [2 in] away from the first plastic opening tool, insert a second plastic opening tool between the back cover and the screen.

  3. Samsung Galaxy Tab 8.9 Battery Replacement: 手順 3、 1の画像 1
    • Slide the second plastic opening tool along the edge of the device to separate the back cover from the screen.

  4. Samsung Galaxy Tab 8.9 Battery Replacement: 手順 4、 1の画像 1
    • Use your hands to open the back cover.

  5. Samsung Galaxy Tab 8.9 Battery Replacement, Remove Green Tape: 手順 5、 3の画像 1 Samsung Galaxy Tab 8.9 Battery Replacement, Remove Green Tape: 手順 5、 3の画像 2 Samsung Galaxy Tab 8.9 Battery Replacement, Remove Green Tape: 手順 5、 3の画像 3
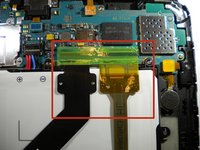
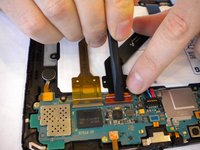
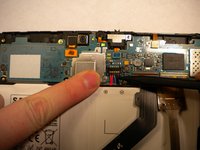
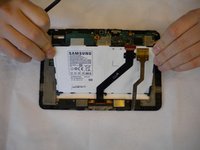
    • Use tweezers to peel up the green tape located on top of the two flexible ribbon cables.

  6. Samsung Galaxy Tab 8.9 Battery Replacement: 手順 6、 2の画像 1 Samsung Galaxy Tab 8.9 Battery Replacement: 手順 6、 2の画像 2
    • Insert a spudger under the orange tab.

    • Gently pry up the tab to disconnect the black flexible ribbon cable from the motherboard.

  7. Samsung Galaxy Tab 8.9 Battery Replacement: 手順 7、 3の画像 1 Samsung Galaxy Tab 8.9 Battery Replacement: 手順 7、 3の画像 2 Samsung Galaxy Tab 8.9 Battery Replacement: 手順 7、 3の画像 3
    • Carefully pull out the yellow flexible ribbon cable to disconnect it from the motherboard.

  8. Samsung Galaxy Tab 8.9 Battery Replacement, Disconnect Battery from MotherBoard: 手順 8、 3の画像 1 Samsung Galaxy Tab 8.9 Battery Replacement, Disconnect Battery from MotherBoard: 手順 8、 3の画像 2 Samsung Galaxy Tab 8.9 Battery Replacement, Disconnect Battery from MotherBoard: 手順 8、 3の画像 3
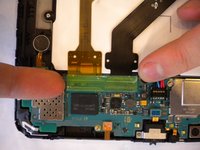
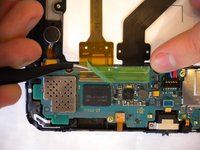
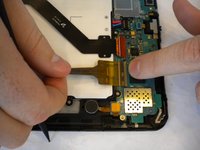
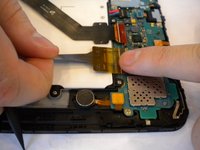
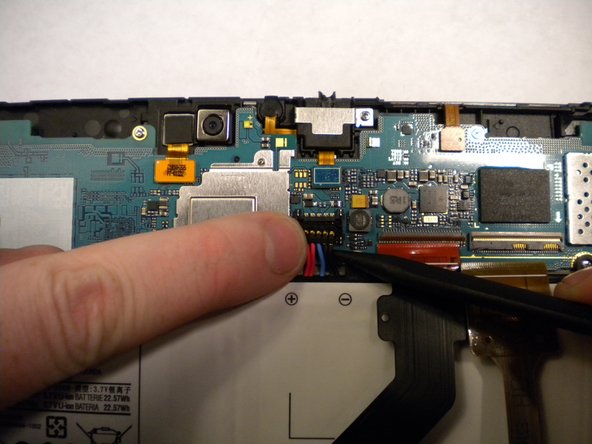
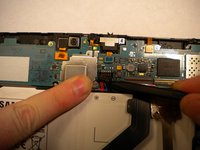
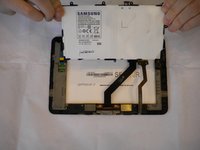
    • Insert the spudger under the red, black, and white cables.

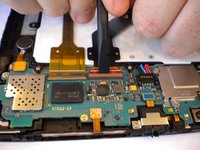
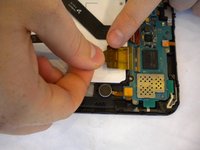
    • Pry up and detach the battery from the motherboard.

  9. Samsung Galaxy Tab 8.9 Battery Replacement: 手順 9、 1の画像 1
    • Use a Phillips #00 screwdriver to remove the nine 1 mm screws located around the battery.

  10. Samsung Galaxy Tab 8.9 Battery Replacement, Remove the Battery: 手順 10、 3の画像 1 Samsung Galaxy Tab 8.9 Battery Replacement, Remove the Battery: 手順 10、 3の画像 2 Samsung Galaxy Tab 8.9 Battery Replacement, Remove the Battery: 手順 10、 3の画像 3
    • Use a spudger to lift up and separate the battery from its housing.

終わりに

To reassemble your device, follow these instructions in reverse order.

4 の人々がこのガイドを完成させました。

作成者

10人の作成者と共同で作成されました。

Dan D

メンバー登録日: 09/25/14

160 ポイント

1ガイドが承認済み

チーム

USF Tampa, Team 11-4, Blackwell Fall 2014 USF Tampa, Team 11-4, Blackwell Fall 2014人のメンバー

USFT-BLACKWELL-F14S11G4

4 メンバー

10のガイドは作成済み

コメント 1 件

Step 8 Clearer to say:

Insert the spudger under the red, black, and white cables to pry up the battery connector and detach it and the battery from the motherboard.

Paul Jackson - 返信

コメントを追加

統計データ:

過去 24時間: 0

過去 7 日: 5

過去 30 日: 12

今までの合計 4,606