メインコンテンツにスキップ

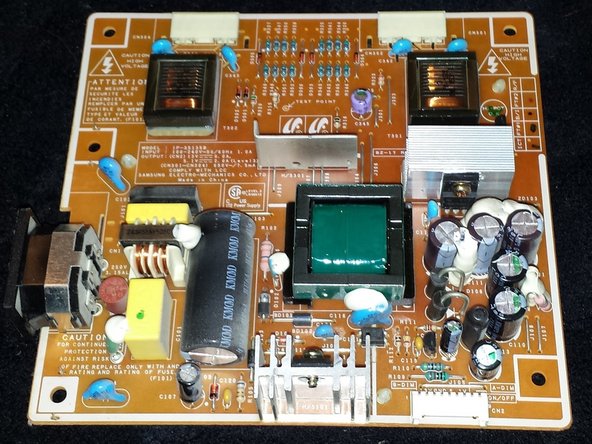
Samsung 930 LCD Monitor Power Board Replacement

必要な工具と部品

  1. Samsung 930 LCD Monitor Power Board Replacement, Power Board: 手順 1、 1の画像 1
    • You will need a phillips screwdriver and a replacement power board which can be ordered online 1. First, place the monitor face down, then remove the plastic covering if it’s on Once this is done remove the three screws shown below. Once these screws are removed, the stand is able to be removed.

  2. Samsung 930 LCD Monitor Power Board Replacement: 手順 2、 2の画像 1 Samsung 930 LCD Monitor Power Board Replacement: 手順 2、 2の画像 2
    • 2. Now remove the three screws shown below.

  3. Samsung 930 LCD Monitor Power Board Replacement: 手順 3、 1の画像 1
    • 3. Now the plastic casing is able to be removed. Carefully pull apart the two pieces to reveal the metal casing as shown below. There are a few connectors you’ll have to remove before revealing the power board.

  4. Samsung 930 LCD Monitor Power Board Replacement: 手順 4、 1の画像 1
    • 4. Carefully remove the metal clips shown below.

  5. Samsung 930 LCD Monitor Power Board Replacement: 手順 5、 1の画像 1
    • 5. Once this is removed you’ll need to remove the black plastic connector holders. Then remove the four connectors, I suggest you mark these to make sure they are connected back into the same location when reassembling because the monitor was known to work this way.

  6. Samsung 930 LCD Monitor Power Board Replacement: 手順 6、 1の画像 1
    • 6. Remove the LCD display connector as show. You’ll need to squeeze the two sides on this connector with your index finger and thumb in order to unlock it.

  7. Samsung 930 LCD Monitor Power Board Replacement: 手順 7、 3の画像 1 Samsung 930 LCD Monitor Power Board Replacement: 手順 7、 3の画像 2 Samsung 930 LCD Monitor Power Board Replacement: 手順 7、 3の画像 3
    • Caution: The circuit board contains many capacitors that could cause serious injury. Use a capacitor discharge probe to safely rid the capacitors of dangerous charges.

    • Wearing electrically insulated gloves and rubber soled shoes while working with and near the capacitors ensures greater safety and protection against electric shock. See iFixit's Project Safety page for additional safety information.

    • 7. Now the metal casing that is holding the power board can be detached from the LCD screen. You’ll need to remove the final three screws in order to replace the power board. You’ll be able to follow this walkthrough in reverse in order to reassemble the monitor.

終わりに

To reassemble your device, follow these instructions in reverse order.

12 の人々がこのガイドを完成させました。

作成者

3人の作成者と共同で作成されました。

Brad

メンバー登録日: 11/17/13

656 ポイント

2のガイドは作成済み

0 件のコメント

コメントを追加

統計データ:

過去 24時間: 0

過去 7 日: 9

過去 30 日: 40

今までの合計 3,531