はじめに
The seal on the support valve is heavily stressed. It should always be well greased and also be exchanged from time to time. In this model, the support valve is independent of the heater, there is also a version in which it is screwed to the heater.
Note: the device is opened here to replace the seals. This is a reliable but a bit cumbersome procedure. If you are very skilled and can work carefully, you May also pull off the seals and replace them directly. Use a blunt tool, being careful not to damage the valve.
These instructions may also help with other Saeco models and with coffee makers from Philips and Gaggia—they are all made by the same manufacturer and have a very similar design.
必要な工具と部品
-
-
The coffeebean supply is fixed with two screws. Unscrew them and lift it off.
-
There is a black rubber lid under the bean hopper that you can easily lift off, leaving a large opening.
-
The adjuster of the grinder has to be solved. Mark the position or just take a picture. This type is fixed with a screw, others are only sticked together.
-
-
-
-
Now the cover can be raised: first grip on left and right rear side and lift about 10 cm (4 in). Sometimes the cover jams a little bit.
-
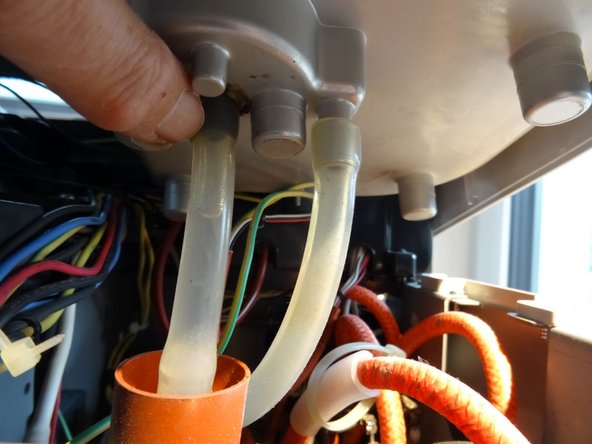
Solve the hoses which lead to the water tank. Perhaps you have to pull out some contacts, (e.g. the yellow-green protection lead), don´t forget to put them on again later.
-
The cover can be drawn aslant towards the front, sliding it over the hot water pipe.
-
Most repairs can be done with the cover being laid up partially , it must not be completely removed.
-
-
-
On some models, the support valve is bolted to the heater. There are these instructions.
-
-
-
The support valve is visible when the brew group has been removed. It represents the connection between the hot pressurized water and the brewing group.
-
Two big screws hold the valve, here 6mm Allen screws. To solve.
-
-
-
Careful cleaning is very beneficial to the aroma.
-
The valve is single in this model. Here two seals are exchanged. For other models, it is bolted directly to the heater. In this case, remove the heater and valve and unscrew the valve. You then have to replace three seals.
-
-
-
Unscrew the valve piece with a wrench SW 13.
-
Check if everything is smooth. Clean all parts well. Careful, they are sensitive.
-
The valve spring.
-
The valve stamp. Check if the gasket on the valve seat is still good. Change it if necessary.
-
The sliding piece.
-
Support seal on the thermoblock. Medium size.
-
Support gasket above. The biggest of the three.
-
Support gasket below. The smallest.
-


Repeat the steps in order to reassemble your device.
Repeat the steps in order to reassemble your device.
ある他の人がこのガイドを完成しました。
以下の翻訳者の皆さんにお礼を申し上げます:
100%


これらの翻訳者の方々は世界を修理する私たちのサポートをしてくれています。 あなたも貢献してみませんか?
翻訳を始める ›
チーム

コメント 1 件
Wow! I dare anybody to follow these instruction for a successful repair. Terrible sequence and explanation. Just look at the pictures (they are good and clear) and try to figure out the rest.
Axxam Enni - 返信