メインコンテンツにスキップ

SCUF Reflex Joystick Replacement

必要な工具と部品

  1. SCUF Reflex Joystick Replacement, Remove the middle trim: 手順 1、 1の画像 1
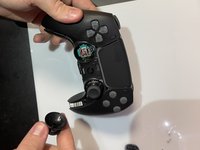
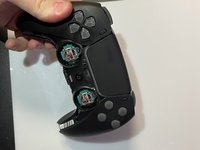
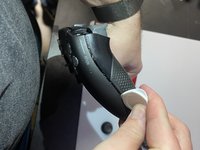
    • Insert an opening pick underneath the middle trim at the bottom-right corner of the controller to release the clips.

    • Loosen the rest of the clips and take the middle trim out.

  2. SCUF Reflex Joystick Replacement, Remove L1 and R1: 手順 2、 3の画像 1 SCUF Reflex Joystick Replacement, Remove L1 and R1: 手順 2、 3の画像 2 SCUF Reflex Joystick Replacement, Remove L1 and R1: 手順 2、 3の画像 3
    • Use a tool to pop the R1 and L1 buttons off of the controller.

  3. SCUF Reflex Joystick Replacement, Unscrew the grips: 手順 3、 2の画像 1 SCUF Reflex Joystick Replacement, Unscrew the grips: 手順 3、 2の画像 2
    • Unscrew and remove the screw from the bottom of each grip.

  4. SCUF Reflex Joystick Replacement, Unscrew behind L1 and R1: 手順 4、 1の画像 1
    • Unscrew the screws behind the L1 and R1 buttons.

  5. SCUF Reflex Joystick Replacement, Pull the joysticks off: 手順 5、 2の画像 1 SCUF Reflex Joystick Replacement, Pull the joysticks off: 手順 5、 2の画像 2
    • Pull the joysticks off of the controller.

  6. SCUF Reflex Joystick Replacement, Pull the scuff buttons off: 手順 6、 1の画像 1
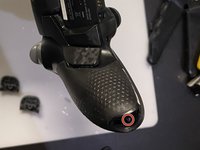
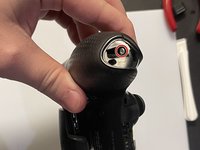
    • Pull the scuff buttons off the back of the controller by sliding them down.

  7. SCUF Reflex Joystick Replacement, Remove the rear case: 手順 7、 2の画像 1 SCUF Reflex Joystick Replacement, Remove the rear case: 手順 7、 2の画像 2
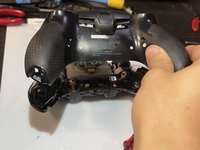
    • Slide the prying tool down the edge of the rear casing of the controller to remove the rear case.

    • Be sure to deal with all the clips!

  8. SCUF Reflex Joystick Replacement, Slide the battery out: 手順 8、 2の画像 1 SCUF Reflex Joystick Replacement, Slide the battery out: 手順 8、 2の画像 2
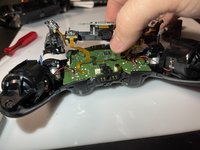
    • Slide the battery out of the controller. It is a big grey box.

  9. SCUF Reflex Joystick Replacement, Unplug the battery: 手順 9、 1の画像 1
    • Unplug the battery to finish removing the battery from the controller.

  10. SCUF Reflex Joystick Replacement, Take the battery bracket out: 手順 10、 2の画像 1 SCUF Reflex Joystick Replacement, Take the battery bracket out: 手順 10、 2の画像 2
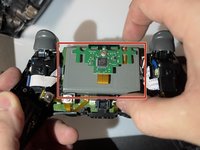
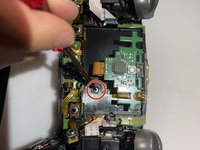
    • Unscrew the screw on the back of the controller to remove the battery bracket.

  11. SCUF Reflex Joystick Replacement, Desolder the ribbon cables: 手順 11、 2の画像 1 SCUF Reflex Joystick Replacement, Desolder the ribbon cables: 手順 11、 2の画像 2
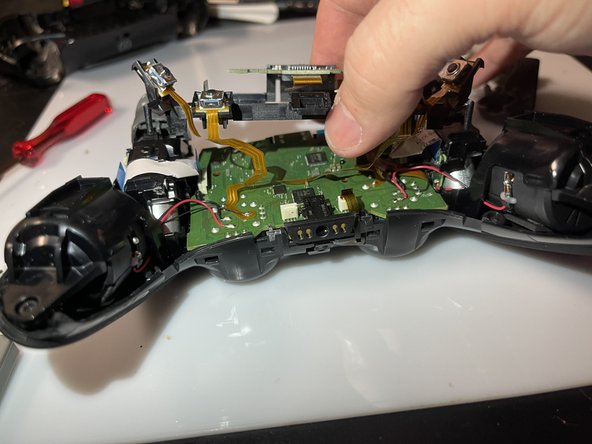
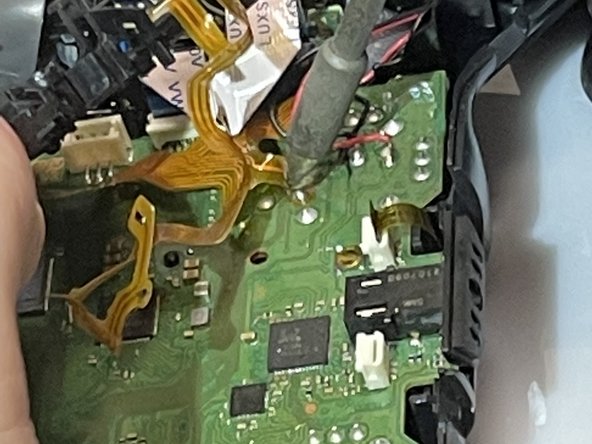
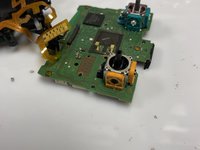
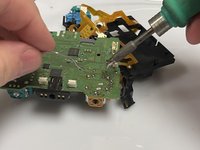
    • Use a soldering iron to desolder the ribbon cables on the motherboard.

  12. SCUF Reflex Joystick Replacement: 手順 12、 1の画像 1
    • Unplug these four cables from the motherboard.

  13. SCUF Reflex Joystick Replacement: 手順 13、 1の画像 1
    • Use the soldering iron to desolder the black and red wires off of the motherboard.

  14. SCUF Reflex Joystick Replacement: 手順 14、 1の画像 1
    • Remove the motherboard and the battery bracket from the controller to expose the joystick component.

  15. SCUF Reflex Joystick Replacement: 手順 15、 1の画像 1
    この手順で使用する道具:
    Desoldering Pump
    $3.99
    購入する
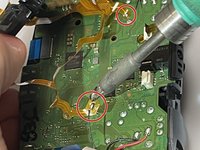
    • Use the soldering iron and the desoldering pump to desolder the 14 connections for the component.

  16. SCUF Reflex Joystick Replacement: 手順 16、 1の画像 1
    • Remove the component from the motherboard.

  17. SCUF Reflex Joystick Replacement: 手順 17、 2の画像 1 SCUF Reflex Joystick Replacement: 手順 17、 2の画像 2
    • Put the new component on the motherboard.

    • Use the soldering iron to connect the new component to the motherboard.

終わりに

To reassemble your device, follow these instructions in reverse order.

ある他の人がこのガイドを完成しました。

作成者

4人の作成者と共同で作成されました。

Tri Truong

メンバー登録日: 02/13/23

415 ポイント

2のガイドは作成済み

チーム

University of Memphis, Team 1-70, Cameron Spring 2023 University of Memphis, Team 1-70, Cameron Spring 2023人のメンバー

UM-CAMERON-S23S1G70

1 メンバー

2のガイドは作成済み

0 件のコメント

コメントを追加

統計データ:

過去 24時間: 9

過去 7 日: 42

過去 30 日: 302

今までの合計 3,222