メインコンテンツにスキップ

Ridgid JobMax R8620 Series E Motor Replacement

必要な工具と部品

  1. Ridgid JobMax R8620 Series E Motor Replacement, Motor: 手順 1、 1の画像 1
    • Pull the battery out of the case by hand before opening the device.

    • Using a Torx T10 screwdriver, remove the nine 6mm screws on the drill cover.

    • Lift off the outer casing.

  2. Ridgid JobMax R8620 Series E Motor Replacement: 手順 2、 1の画像 1
    • Using a spudger or your fingers, remove the LED light from the groove in the handle.

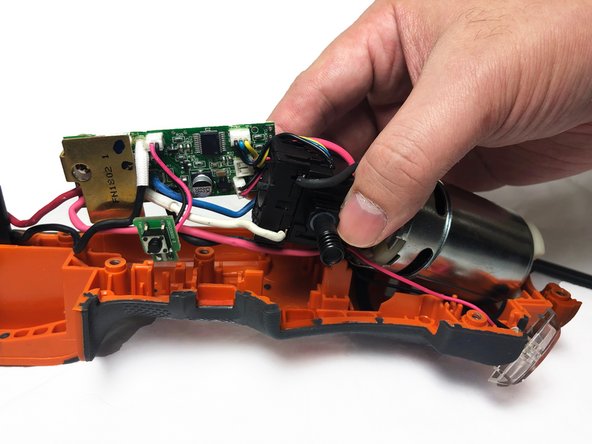
  3. Ridgid JobMax R8620 Series E Motor Replacement: 手順 3、 2の画像 1 Ridgid JobMax R8620 Series E Motor Replacement: 手順 3、 2の画像 2
    • Carefully remove the motor as well as the main board from the drill cover.

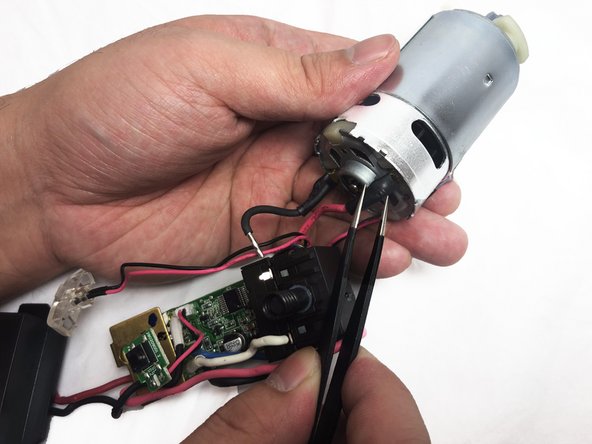
  4. Ridgid JobMax R8620 Series E Motor Replacement: 手順 4、 2の画像 1 Ridgid JobMax R8620 Series E Motor Replacement: 手順 4、 2の画像 2
    • Find the black and red wires from the motor.

    • Remove the electrical tape using tweezers.

    • Using a soldering iron, desolder the black and red wires from the motor.

    • Refer to this helpful guide for tips on soldering/desoldering.

終わりに

To reassemble your device, follow these instructions in reverse order.

作成者

3人の作成者と共同で作成されました。

Pengjian Zhou

メンバー登録日: 02/06/19

533 ポイント

4のガイドは作成済み

チーム

UC Davis, Team S20-G1, Lore Winter 2019 UC Davis, Team S20-G1, Lore Winter 2019人のメンバー

UCD-LORE-W19S20G1

3 メンバー

8のガイドは作成済み

0 件のコメント

コメントを追加

統計データ:

過去 24時間: 0

過去 7 日: 1

過去 30 日: 10

今までの合計 750