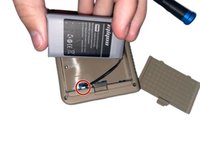
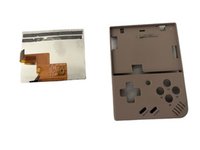
メインコンテンツにスキップ

RetroMini Miyoo Mini Plus Case Replacement

必要な工具と部品

  1. RetroMini Miyoo Mini Plus Case Replacement, Battery: 手順 1、 2の画像 1 RetroMini Miyoo Mini Plus Case Replacement, Battery: 手順 1、 2の画像 2
    • Lay the device face down on a flat surface.

    • You may want to lay the device on a towel or other soft surface to avoid scratching the screen.

  2. RetroMini Miyoo Mini Plus Case Replacement: 手順 2、 2の画像 1 RetroMini Miyoo Mini Plus Case Replacement: 手順 2、 2の画像 2
    • Use your fingernail to push in the battery compartment tab.

    • Lift the cover up to expose the battery.

  3. RetroMini Miyoo Mini Plus Case Replacement: 手順 3、 1の画像 1
    • Use an opening tool to gently lift the the battery from its compartment.

    • Gently pull the battery out and set the battery next to the system, with care not to strain the attached wire.

  4. RetroMini Miyoo Mini Plus Case Replacement: 手順 4、 2の画像 1 RetroMini Miyoo Mini Plus Case Replacement: 手順 4、 2の画像 2
    • Pinch the white battery connector and pull it directly out of its socket.

    • Completely remove the battery.

  5. RetroMini Miyoo Mini Plus Case Replacement: 手順 5、 2の画像 1 RetroMini Miyoo Mini Plus Case Replacement: 手順 5、 2の画像 2
    • When you have the new battery, put the new battery wire into the connecter.

    • Place the battery back into the empty space with the wire at the bottom of the battery.

  6. RetroMini Miyoo Mini Plus Case Replacement, Button: 手順 6、 2の画像 1 RetroMini Miyoo Mini Plus Case Replacement, Button: 手順 6、 2の画像 2
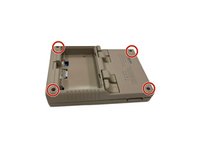
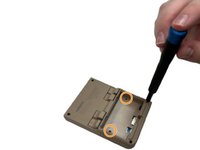
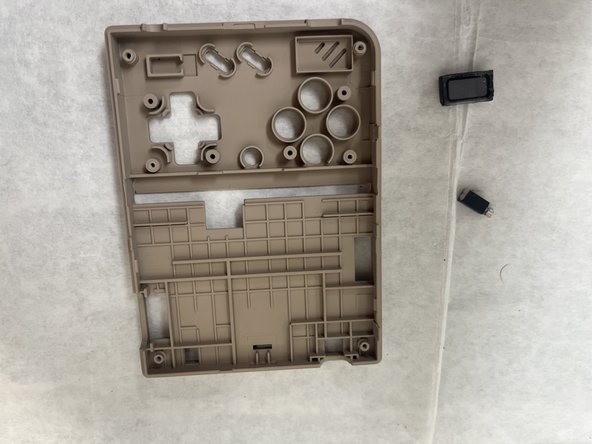
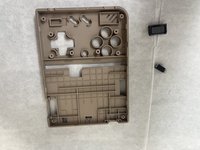
    • Remove the four screws securing the rear case with a Phillips screwdriver.

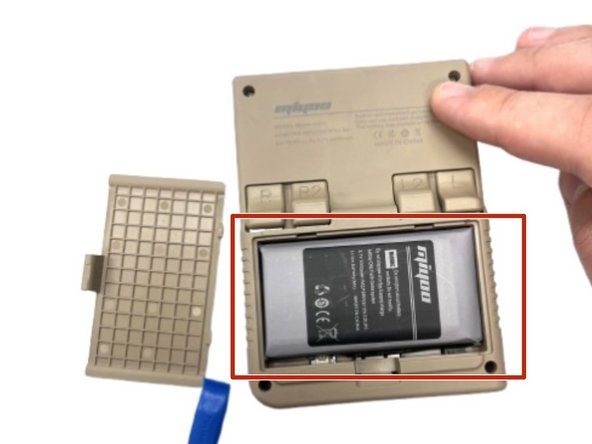
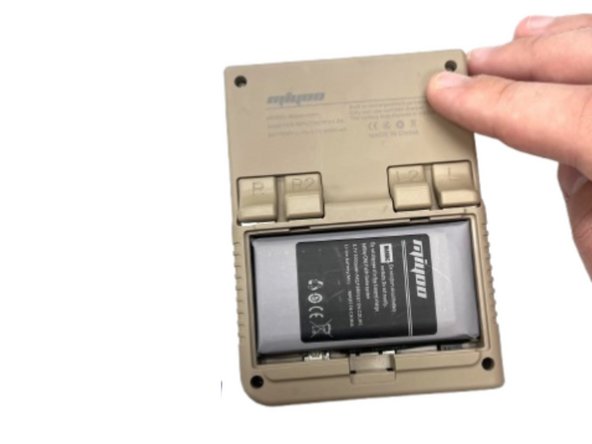
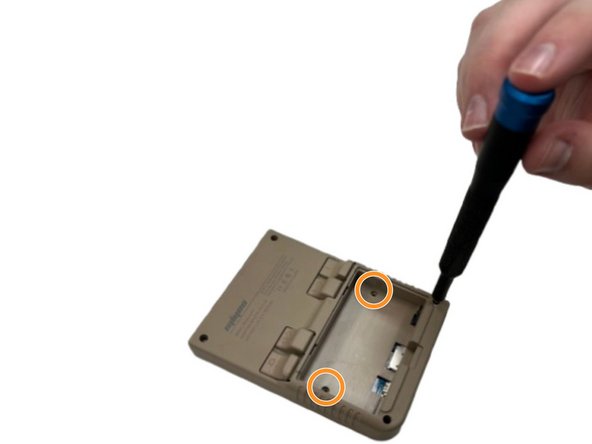
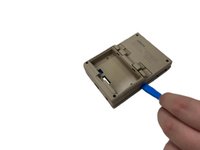
    • Remove the two Phillips screws inside the battery compartment.

  7. RetroMini Miyoo Mini Plus Case Replacement: 手順 7、 2の画像 1 RetroMini Miyoo Mini Plus Case Replacement: 手順 7、 2の画像 2
    • Insert an opening tool into the seam between the front and rear case.

    • Pry the front and rear case apart.

  8. RetroMini Miyoo Mini Plus Case Replacement: 手順 8、 2の画像 1 RetroMini Miyoo Mini Plus Case Replacement: 手順 8、 2の画像 2
    • Gently set the rear case aside.

    • Make sure you lift the black tab on the left side of the motherboard and gently remove the ribbon cable as to not damage it when removing the motherboard from the case.

  9. RetroMini Miyoo Mini Plus Case Replacement: 手順 9、 2の画像 1 RetroMini Miyoo Mini Plus Case Replacement: 手順 9、 2の画像 2
    • Use an opening tool to lift the motherboard from the chassis.

  10. RetroMini Miyoo Mini Plus Case Replacement: 手順 10、 3の画像 1 RetroMini Miyoo Mini Plus Case Replacement: 手順 10、 3の画像 2 RetroMini Miyoo Mini Plus Case Replacement: 手順 10、 3の画像 3
    • Gently set the motherboard to the side.

    • Remove the rubber button gasket.

  11. RetroMini Miyoo Mini Plus Case Replacement: 手順 11、 1の画像 1
    • Remove the button(s) you want to replace.

  12. RetroMini Miyoo Mini Plus Case Replacement, Screen: 手順 12、 1の画像 1
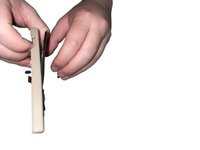
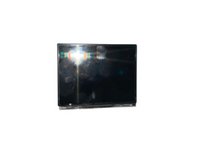
    • Heat an iOpener according to the instructions here.

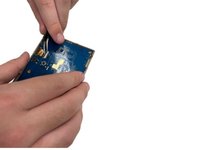
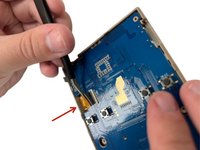
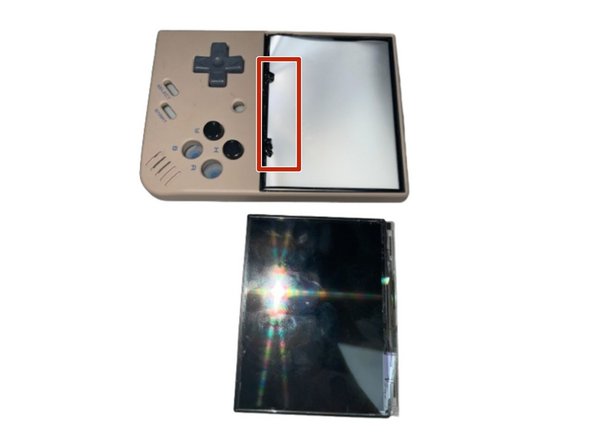
    • Rest the iOpener Gel Bag on the screen for a minute.

    • Alternatively, use a hair dryer to gently heat the screen to loosen the adhesive that secures it.

  13. RetroMini Miyoo Mini Plus Case Replacement: 手順 13、 2の画像 1 RetroMini Miyoo Mini Plus Case Replacement: 手順 13、 2の画像 2
    • Gently apply pressure to the highlighted area on the front cover of the device.

    • While applying the pressure gently peel the screen off of the device.

    • Take care not to flex the screen. If the screen feels stubborn, apply more heat.

  14. RetroMini Miyoo Mini Plus Case Replacement: 手順 14、 3の画像 1 RetroMini Miyoo Mini Plus Case Replacement: 手順 14、 3の画像 2 RetroMini Miyoo Mini Plus Case Replacement: 手順 14、 3の画像 3
    • Set the new screen gently into the ridges (boxed in red) on the front of the backlit screen

  15. RetroMini Miyoo Mini Plus Case Replacement, Case: 手順 15、 1の画像 1
    • Remove the power and volume buttons and put them off to the side.

  16. RetroMini Miyoo Mini Plus Case Replacement: 手順 16、 3の画像 1 RetroMini Miyoo Mini Plus Case Replacement: 手順 16、 3の画像 2 RetroMini Miyoo Mini Plus Case Replacement: 手順 16、 3の画像 3
    • Heat up the IFixit IOpener Gel Bag for 30 seconds once again.

    • Once heated, rest the IFixit IOpener Gel Bag on the bottom of the device for a minute.

    • Repeat this step if the glue holding the speakers on has not melted.

  17. RetroMini Miyoo Mini Plus Case Replacement: 手順 17、 1の画像 1
    • Gently wedge an opening between the shell and the speakers and lift up.

    • Place the speakers off to the side once both are removed.

  18. RetroMini Miyoo Mini Plus Case Replacement: 手順 18、 2の画像 1 RetroMini Miyoo Mini Plus Case Replacement: 手順 18、 2の画像 2
    • Dispose the old shell once all of the internal parts are removed.

終わりに

To reassemble your device, follow these instructions in reverse order.

作成者

3人の作成者と共同で作成されました。

Kaden

メンバー登録日: 08/28/24

578 ポイント

4のガイドは作成済み

チーム

University of North Texas, Team 5-2, Kilpatrick Fall 2024 University of North Texas, Team 5-2, Kilpatrick Fall 2024人のメンバー

UNT-KILPATRICK-F24S5G2

4 メンバー

4のガイドは作成済み

0件のガイドコメント

コメントを追加

統計データ:

過去 24時間: 3

過去 7 日: 17

過去 30 日: 81

今までの合計 678