この翻訳は、ソースガイドの最新の更新を反映していない可能性があります。 翻訳の更新に協力してください。 または ソースガイドを参照してください。
はじめに
このガイドを使用して、お手持ちのRetina MacBook 2017のRetinaトラックパッドアセンブリを交換します。このアセンブリには、トラックパッドとHaptic Engineが含まれています。
誤動作しているトラックパッドは、交換するのではなく、単に調整する必要がある場合があります。 残念ながら、キャリブレーションソフトウェアはApple社以外では利用できません。
ロジックボードの損傷を避けるため、MacBookの修理が完了したら(ただし電源を入れる前に)、5ワットのiPhone充電器とUSB-C to USB-Aケーブルを使用して、低電圧電源に接続します。これらのアクセサリはMacBookに含まれていないため、作業前に準備ができていることを確認してください。
必要な工具と部品
ビデオの概要
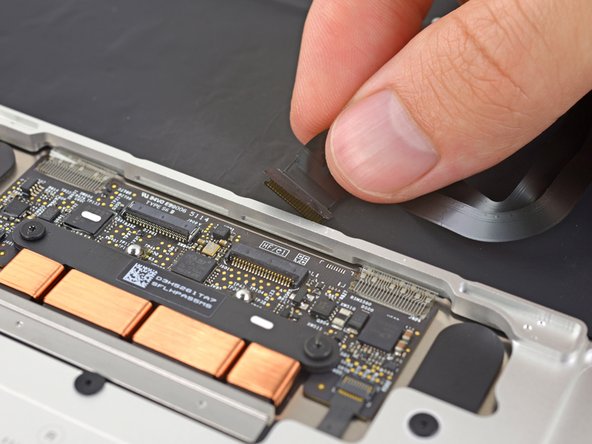
-
-
下部ケースを固定している次の8本のネジを取り外します:
-
2本の1.8 mm P5ペンタローブネジ
-
4本の2.9 mm P5ペンタローブネジ
-
2本の6.1 mm P5ペンタローブネジ
-
-
-
-
追加の予防策として、ロジックボードとバッテリーコネクタの間にバッテリー絶縁ピックを挿入して、バッテリーを物理的に外すことができます。
-


デバイスを再組み立てする際は、これらの手順を逆の順番に従って作業を進めてください。ロジックボードの損傷を避けるため、MacBookの修理が完了した後、電源を入れる前に、5ワットのiPhone充電器とUSB-C to USB-Aケーブルを使用して低電圧電源に接続します。
デバイスを再組み立てする際は、これらの手順を逆の順番に従って作業を進めてください。ロジックボードの損傷を避けるため、MacBookの修理が完了した後、電源を入れる前に、5ワットのiPhone充電器とUSB-C to USB-Aケーブルを使用して低電圧電源に接続します。
12 の人々がこのガイドを完成させました。
以下の翻訳者の皆さんにお礼を申し上げます:
88%


これらの翻訳者の方々は世界を修理する私たちのサポートをしてくれています。 あなたも貢献してみませんか?
翻訳を始める ›


2 件のコメント
Excellent instructions, a big thanks to the author. After completing them the MACBOOK worked OK and then I started to get intermittent problems with the power button and the system bringing the shutdown dialogue without pressing the power button. On closer examination and second removal of the trackpad IPD flex ribbon cable (which also routes keyboard signals to the logic board) the cable came apart at the fold half way along the cable. This cable is very fragile and as mentioned in step 7 you need to be very careful on handling them. In my case I think the cable was fatigued or mechanically damaged where the fold was during manufacture . A replacement cable has been installed and the laptop now works ok.
Mark Timms - 返信
Hi. I've replaced the trackpad after the old one got damaged and started heating up. Macbook turns on perfectly without any trackpad connected, but doesn't even boot when the new trackpad is connected. The motherboard's LED near the battery connector is blinking. Is there something im missing?