このバージョンは誤った内容を含んでいる可能性があります。最新の承認済みスナップショットに切り替えてください。
必要な工具と部品
-
-
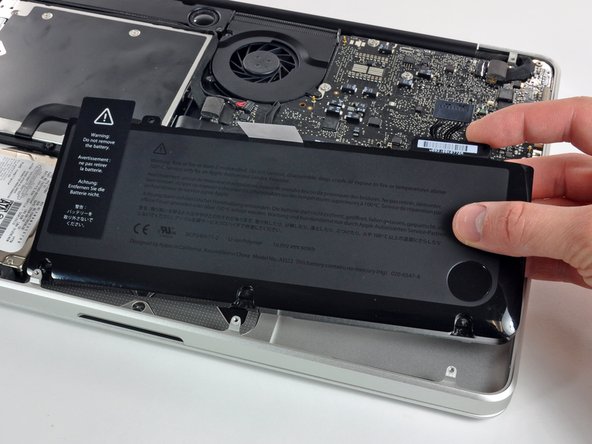
上部ケースからバッテリーを持ち上げます。
-
100%になるまで充電します。充電後も最低2時間はプラグを繋げたままにします。それからプラグを外して、通常通り使用しながら、自然に放電させます。バッテリー残量小のサインが表示されたら、これまでの作業を保存して、スリープ状態になるまで放置してください。スリープ状態に入ったら、少なくとも5時間置きます。それから一気に100%まで充電します。
-
新しいバッテリーを装着後、通常通り作動しない場合は、MacBook ProのSMCをリセットしなければならない可能性があります。
-
-
-
この手順は未翻訳です。 翻訳を手伝う。
-
Using a small X-Acto knife or pin, carefully lift the tape. Peel it back to lift the top of the contact switch.
-
NOTE: Do not completely remove the tape. Leave the other side attached as shown in the next step. This will allow you to easily align the top contact with the bottom after cleaning.
-


17 の人々がこのガイドを完成させました。
15 件のコメント
In the other trackpad replacement guide, it doesn't have this tip, to take off the clicker and clean it. I did just that thanks to this guide and the clicker is now working reliably again.
Neil Snape - 返信
That's great. The one I repaired this way has been working great. The original replacement guide is just that. It's meant to remove the trackpad and replace it with a new one. I figured I had nothing to lose by digging a little deeper to fix the one I had and this guide is the result. Glad it was helpful.
Scott
Awesome guide! it was very helpfull and acurate ! Thanks, my trackpad came back to life!