はじめに
In this repair guide, I show how to clean the fans and heatsink, and replace the thermal paste on the RAZER BLADE 15''.
The operating temperature of this laptop is normally high. The CPU temperature idles around the 55 degress celsius mark. When gaming, the temperature can rise up to >95 degrees.
For my particular case this Razer is around 18 months old and regularly experienced thermal throttling hitting core temps above 100*C. As you will see below the fan and heatsink were very dirty. Following the instructions of this guide, we managed to lower the running temperature to around 85*C. So, it's well worth to do it!
----
You can check your laptop's temperature entering the BIOS. Otherwise, the free and open source Core Temp's (https://www.alcpu.com/CoreTemp/) will show you the readings from the BIOS.
必要な工具と部品
-
-
You will need
-
A torx and philips screwdriver
-
A dust blower and a brush
-
A spudger
-
An opening pick
-
A magnetic board
-
Microfibre cloth and alcohol
-
new thermal paste
-
-
-
Position the laptop as it’s shown in pic 1.
-
Remove 6 torx screws and put them on the magnetic mat
-
Insert an opening pick and slide it around the two shorter sides to unlock the pins
-
Slide the case towards you. The goal is that the 3 inserts on the case slide out (see pic2. Yellow marks)
-
-
-
Use a spudger to disconnect the battery. It is the pop up connector with the orange cable
-
-
-
Disconnect the display port and the ZIF. Here Jeff and team show you how ケーブルコネクタの識別と接続の外し方
-
Remove the tape of the cable
-
-
-
-
There are two Philips screws in each fan. Remove them
-
One is easily visible.
-
The other one is under the black plastic cover (see orange markers)
-
Do this on both fans
-
If you want, you can carefully remove the connection to the motherboard (yellow circle). XetThe tested this and could be removed, (See comment below)
-
-
-
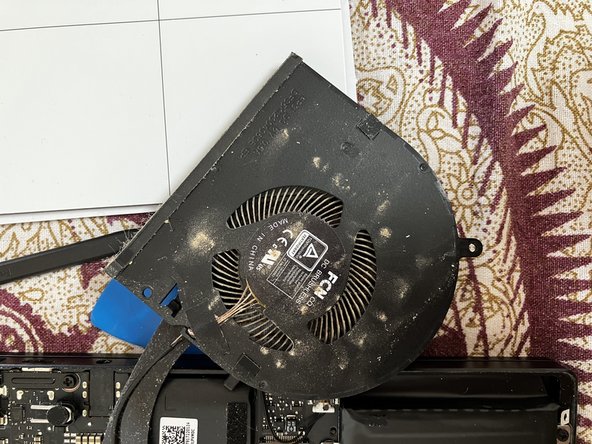
Use the brush and dust blower to clean the fans
-
You might also use the tweezers to remove debris
-
-
-
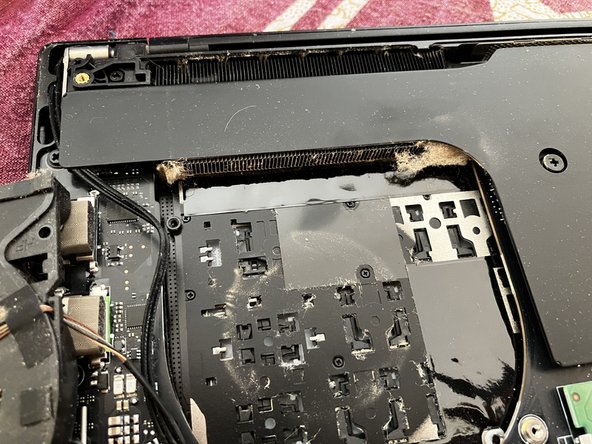
There are 10 Philips screws with a spring. Unfasten them
-
Now lift the heatsink carefully. The thermal paste offers more resistance than normal.
-
The heatsink is a heavy, copper metal component.
-
-
-
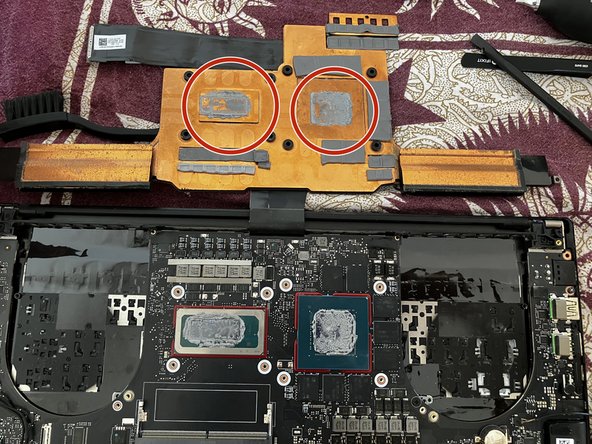
Use a micro fibre cloth with alcohol to remove the thermal paste on the GPU, CPU and the heatsink
-
-
-
Put the heatsink back and fasten it
-
Put the fans back and fasten them
-
Reconnect the display ports and put the tape back
-
Reconnect the battery
-
Close the case
-
And it’s done! Test the working temperature now it should be much lower.
-


To reassemble your device, follow these instructions in reverse order.
To reassemble your device, follow these instructions in reverse order.
2 の人々がこのガイドを完成させました。

2 件のコメント
It seems to be soldered (see image on step 7) but I would need to reopen the laptop to confirm.