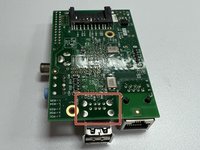
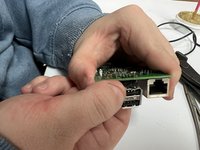
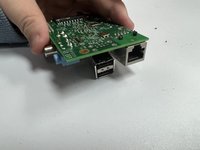
メインコンテンツにスキップ

Raspberry Pi Model B Revision 2.0 USB Port Replacement

必要な工具と部品

  1. Raspberry Pi Model B Revision 2.0 USB Port Replacement, USB Port: 手順 1、 1の画像 1
    この手順で使用する道具:
    Microfiber Cleaning Cloths
    $3.99
    購入する
    • Ensure that your workspace has adequate ventilation.

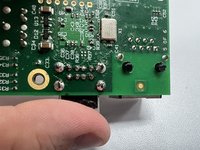
    • Clean your work area with a lint-resistant wipe.

    • A microfiber cloth is recommended, but not one you love! It will be used to clean flux later.

  2. Raspberry Pi Model B Revision 2.0 USB Port Replacement: 手順 2、 2の画像 1 Raspberry Pi Model B Revision 2.0 USB Port Replacement: 手順 2、 2の画像 2
    • Preheat your soldering iron.

    • Preheating will take 2-4 minutes, depending on your model.

    • Wet a heat-resistant cleaning sponge and have it nearby.

  3. Raspberry Pi Model B Revision 2.0 USB Port Replacement: 手順 3、 2の画像 1 Raspberry Pi Model B Revision 2.0 USB Port Replacement: 手順 3、 2の画像 2
    • Orient the Raspberry Pi so that the port-covered side faces downwards, and the opening of the USB port is visible.

    • Identify the 12 silver USB pins on the lower-middle section of the board.

  4. Raspberry Pi Model B Revision 2.0 USB Port Replacement: 手順 4、 3の画像 1 Raspberry Pi Model B Revision 2.0 USB Port Replacement: 手順 4、 3の画像 2 Raspberry Pi Model B Revision 2.0 USB Port Replacement: 手順 4、 3の画像 3
    • Use an inexpensive paint brush, or the applicator that came with the flux, to apply flux around the 12 pins on the printed circuit board (PCB).

    • Be sure to coat flux on what you don’t want to be covered in solder.

  5. Raspberry Pi Model B Revision 2.0 USB Port Replacement: 手順 5、 2の画像 1 Raspberry Pi Model B Revision 2.0 USB Port Replacement: 手順 5、 2の画像 2
    • Soldering/desoldering presents potential for device damage and burns.

    • Starting with the largest pins first, but individually, use the soldering iron to carefully melt the solder on each of the pins, with care not to damage the PCB.

    • You will need to keep the solder liquid throughout the next two steps. It's alright if it solidifies, but solder will not wick if it is not liquid.

  6. Raspberry Pi Model B Revision 2.0 USB Port Replacement: 手順 6、 3の画像 1 Raspberry Pi Model B Revision 2.0 USB Port Replacement: 手順 6、 3の画像 2 Raspberry Pi Model B Revision 2.0 USB Port Replacement: 手順 6、 3の画像 3
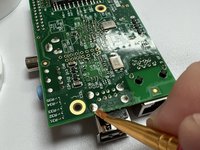
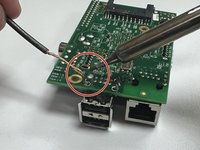
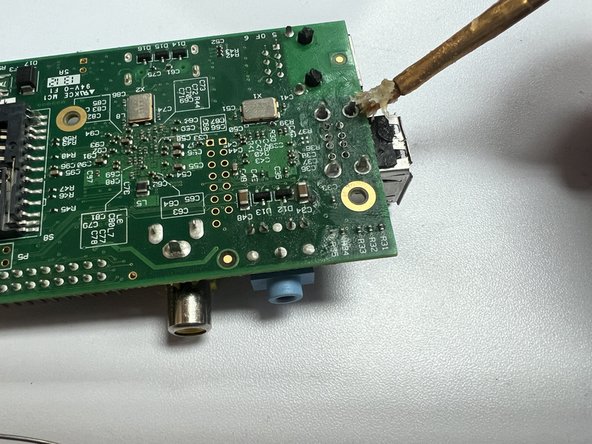
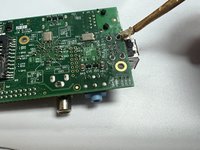
    • Make a wire loop out of the desoldering braid to "soak up" the solder on the smaller pins. Hook the pin and place the soldering iron tip on the loop and pin simultaneously.

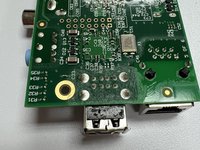
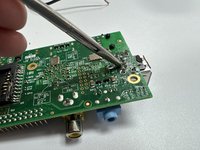
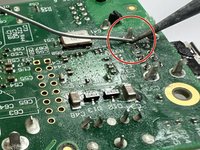
    • Use the desoldering braid to “soak up" the melted solder. If the braid will not catch more solder, cut off the end and continue to the smaller pins.

    • This will be the most time-consuming step and may take some practice to refine a technique that works for you. Keep pushing!

  7. Raspberry Pi Model B Revision 2.0 USB Port Replacement: 手順 7、 3の画像 1 Raspberry Pi Model B Revision 2.0 USB Port Replacement: 手順 7、 3の画像 2 Raspberry Pi Model B Revision 2.0 USB Port Replacement: 手順 7、 3の画像 3
    • After all the solder securing the pins is removed, lightly heat each silver pin. Use a hemostat or needle-nose pliers to disconnect the smaller pins from the board.

    • Remove the faulty port with a gentle pull if necessary.

    • The metal casing of the port might be hot.

  8. Raspberry Pi Model B Revision 2.0 USB Port Replacement: 手順 8、 1の画像 1
    • Clean the excess flux off the PCB with a microfiber cloth.

  9. Raspberry Pi Model B Revision 2.0 USB Port Replacement: 手順 9、 1の画像 1
    • Insert the replacement port with the open side facing outwards.

    • The replacement part's pins might need a little jostling to be fully seated on the PCB.

  10. Raspberry Pi Model B Revision 2.0 USB Port Replacement: 手順 10、 2の画像 1 Raspberry Pi Model B Revision 2.0 USB Port Replacement: 手順 10、 2の画像 2
    • Apply flux around the 12 USB pins on the PCB.

  11. Raspberry Pi Model B Revision 2.0 USB Port Replacement: 手順 11、 2の画像 1 Raspberry Pi Model B Revision 2.0 USB Port Replacement: 手順 11、 2の画像 2
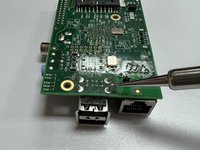
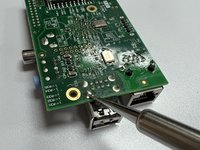
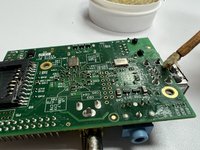
    • Melt a few millimeters of lead-free solder on the tip of the iron.

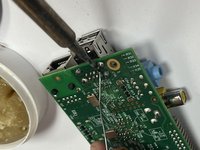
    • Bring the soldering iron with the melted solder close to the pin and its respective base. Slowly apply solder to a combination of the pin, pin-base, and the iron tip until the solder collects into a “bubble,” encapsulating the pin and base.

  12. Raspberry Pi Model B Revision 2.0 USB Port Replacement: 手順 12、 2の画像 1 Raspberry Pi Model B Revision 2.0 USB Port Replacement: 手順 12、 2の画像 2
    • Repeat the previous step for the remaining pins.

終わりに

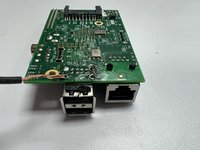
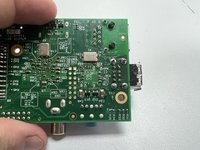
Your new USB port should be fully functional!

4 の人々がこのガイドを完成させました。

作成者

2人の作成者と共同で作成されました。

Tamren Lenn

メンバー登録日: 02/28/22

268 ポイント

1ガイドが承認済み

チーム

University of Memphis, Team 2-8, Willis Spring 2022 University of Memphis, Team 2-8, Willis Spring 2022人のメンバー

UM-WILLIS-S22S2G8

1 メンバー

1のガイドは作成済み

0 件のコメント

コメントを追加

統計データ:

過去 24時間: 0

過去 7 日: 11

過去 30 日: 56

今までの合計 1,922