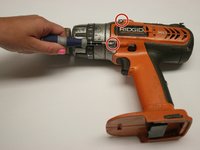
メインコンテンツにスキップ

RIDGID R84015 X2 Speed Switch Replacement

必要な工具と部品

  1. RIDGID R84015 X2 Speed Switch Replacement, RIDGID R84015 X2 Case Removal: 手順 1、 2の画像 1 RIDGID R84015 X2 Speed Switch Replacement, RIDGID R84015 X2 Case Removal: 手順 1、 2の画像 2
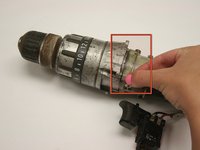
    • Remove the backplate.

    • Using a Torx T20 screwdriver, remove the four screws attaching the back plate.

  2. RIDGID R84015 X2 Speed Switch Replacement: 手順 2、 1の画像 1
    • Remove the drill handle.

    • Using the Phillips #2 screwdriver, remove the five screws attaching the drill handle to the body.

  3. RIDGID R84015 X2 Speed Switch Replacement: 手順 3、 2の画像 1 RIDGID R84015 X2 Speed Switch Replacement: 手順 3、 2の画像 2
    • Remove the gear casing from the body.

    • Using the Philips #2 screwdriver, remove the four screws attaching the gear casing to the body.

  4. RIDGID R84015 X2 Speed Switch Replacement, Speed Switch: 手順 4、 1の画像 1
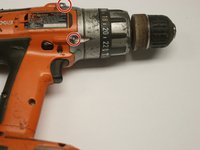
    • Locate small metal bar above plastic part of drill.

    • Attempt to move bar back and forth. If it wont move, try to move it while rotating the chuck. If it still will not move, there is a problem with the gears. For help see the Planetary Gear Replacement Guide

  5. RIDGID R84015 X2 Speed Switch Replacement: 手順 5、 2の画像 1 RIDGID R84015 X2 Speed Switch Replacement: 手順 5、 2の画像 2
    • If the bar moves, next check the small plastic switch that is numbered 1 and 2.

    • Make sure the small tabs on the underside of the switch that move the bar are intact.

    • Replace switch as needed.

終わりに

To reassemble your device, follow these instructions in reverse order.

2 の人々がこのガイドを完成させました。

作成者

6人の作成者と共同で作成されました。

Evan Long

メンバー登録日: 04/15/10

262 ポイント

4のガイドは作成済み

チーム

Cal Poly, Team 15-48, Garner Spring 2010 Cal Poly, Team 15-48, Garner Spring 2010人のメンバー

CPSU-GARNER-S10S15G48

6 メンバー

10のガイドは作成済み

0 件のコメント

コメントを追加

統計データ:

過去 24時間: 0

過去 7 日: 0

過去 30 日: 8

今までの合計 3,604