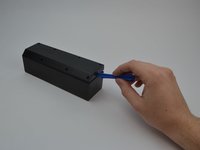
メインコンテンツにスキップ

Photive Hydra USB Connector Replacement

必要な工具と部品

  1. Photive Hydra USB Connector Replacement, Face Plate and Back Plate: 手順 1、 1の画像 1
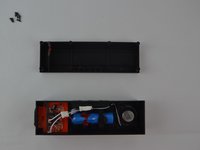
    • Unscrew all twelve Hex Head 1.5 (Length-3/8", Head- 1/8") screws using a 1.5mm hex screwdriver.

  2. Photive Hydra USB Connector Replacement: 手順 2、 2の画像 1 Photive Hydra USB Connector Replacement: 手順 2、 2の画像 2
    • Use a plastic opening tool to pry off the face plate.

  3. Photive Hydra USB Connector Replacement: 手順 3、 1の画像 1
    • Remove the rubber casing by using your fingers to pull off. Be sure not tear or rip rubber casing.

  4. Photive Hydra USB Connector Replacement: 手順 4、 1の画像 1
    • Flip the device upside down and remove all eight Phillips (Length-3/8", Head-1/8") Screws using a standard #1 Phillips screwdriver.

  5. Photive Hydra USB Connector Replacement: 手順 5、 2の画像 1 Photive Hydra USB Connector Replacement: 手順 5、 2の画像 2
    • Use plastic opening tool to pry off back plate.

    • Move the plastic opening tool along the the device to further pry open the device.

    • Be careful when taking this plate off. You may accidentally damage the water proof seal.

  6. Photive Hydra USB Connector Replacement, Battery (Prerequisite): 手順 6、 2の画像 1 Photive Hydra USB Connector Replacement, Battery (Prerequisite): 手順 6、 2の画像 2
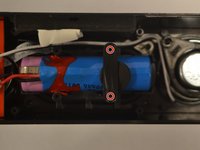
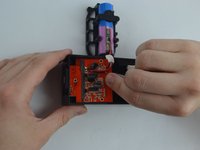
    • Identify the two Phillips (Length-5/16", Head-1/8") screws holding the battery in place and remove them using a #1 screwdriver.

  7. Photive Hydra USB Connector Replacement: 手順 7、 1の画像 1
    • Remove the ICR18650-26M battery from its position by pulling upwards and out of the casing.

  8. Photive Hydra USB Connector Replacement, USB Connector: 手順 8、 2の画像 1 Photive Hydra USB Connector Replacement, USB Connector: 手順 8、 2の画像 2
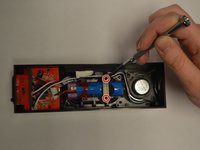
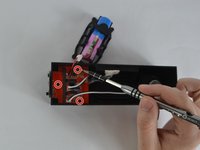
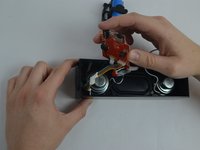
    • Identify the motherboard and three Phillips (Length-1/8", Head-1/8") screws and remove them using a #1 screwdriver.
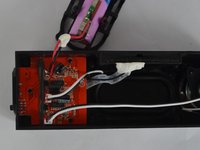
  9. Photive Hydra USB Connector Replacement: 手順 9、 2の画像 1 Photive Hydra USB Connector Replacement: 手順 9、 2の画像 2
    • Pull the motherboard up and out to remove.

  10. Photive Hydra USB Connector Replacement: 手順 10、 1の画像 1
終わりに

To reassemble your device, follow these instructions in reverse order.

作成者

3人の作成者と共同で作成されました。

Jose Muzaurieta

メンバー登録日: 02/09/16

120 ポイント

1ガイドが承認済み

チーム

USF Tampa, Team 11-3, Cheng Spring 2016 USF Tampa, Team 11-3, Cheng Spring 2016人のメンバー

USFT-CHENG-S16S11G3

5 メンバー

6のガイドは作成済み

3 件のコメント

Any way to buy the entire motherboard? Any suggestion where can I buy it?

Abraham Hernandez - 返信

Where can I purchase the usb

Sonia Lance - 返信

Where can I purchase the usb. There are so meany I don't know how to tell the correct one. Thank

Sonia Lance - 返信

コメントを追加

統計データ:

過去 24時間: 0

過去 7 日: 5

過去 30 日: 11

今までの合計 759