メインコンテンツにスキップ

Pentax Optio WG-2 Battery Compartment Door Replacement

必要な工具と部品

  1. 注意: 手順 1-6 は、作業進行中としてマークされている ガイド から引用されています。

    Pentax Optio WG-2 Battery Compartment Door Replacement, Back Case: 手順 1、 2の画像 1 Pentax Optio WG-2 Battery Compartment Door Replacement, Back Case: 手順 1、 2の画像 2
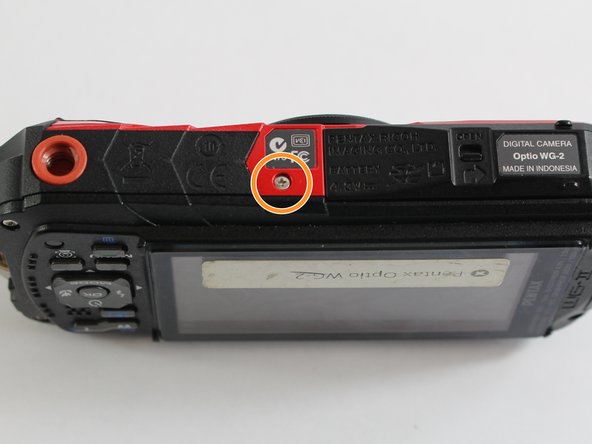
    • Remove all four 1 mm JIS #00 screws from the back of the camera.

  2. Pentax Optio WG-2 Battery Compartment Door Replacement: 手順 2、 1の画像 1
    • Use your finger to peel the grip off the top of the camera.

    • For best results, start from the right side of the camera, opposite the buttons.

    • Once the grip is removed, you will most likely lose the water-tight seal.

  3. Pentax Optio WG-2 Battery Compartment Door Replacement: 手順 3、 1の画像 1
    • Use the tweezers to remove the two buttons from the top of the camera.

    • The buttons may fall out while removing the grip.

  4. Pentax Optio WG-2 Battery Compartment Door Replacement: 手順 4、 3の画像 1 Pentax Optio WG-2 Battery Compartment Door Replacement: 手順 4、 3の画像 2 Pentax Optio WG-2 Battery Compartment Door Replacement: 手順 4、 3の画像 3
    • Remove the three 1 mm JIS #000 screws from the top.

    • Remove the 1 mm JIS #000 screw from the bottom.

  5. Pentax Optio WG-2 Battery Compartment Door Replacement: 手順 5、 1の画像 1
    • Carefully separate the back and the front of the camera.

    • There are three ribbon cables connecting the two boards. Be careful not to tear them.

  6. Pentax Optio WG-2 Battery Compartment Door Replacement: 手順 6、 1の画像 1
    • Use the tip of a spudger to flip up the small retaining flaps on the ribbon cable ZIF connectors.

    • Carefully pull the ribbon cables out of their sockets.

  7. Pentax Optio WG-2 Battery Compartment Door Replacement, Battery Compartment Door: 手順 7、 3の画像 1 Pentax Optio WG-2 Battery Compartment Door Replacement, Battery Compartment Door: 手順 7、 3の画像 2 Pentax Optio WG-2 Battery Compartment Door Replacement, Battery Compartment Door: 手順 7、 3の画像 3
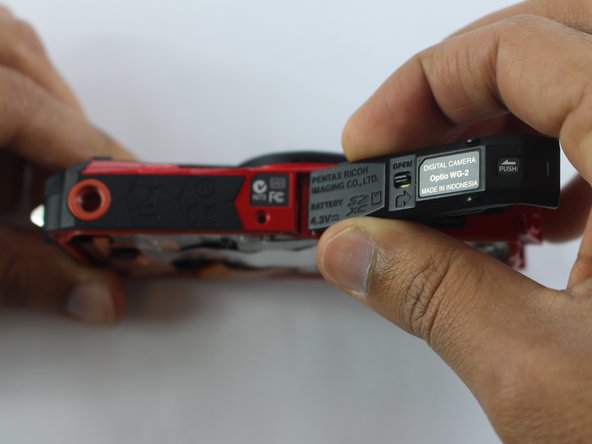
    • Lift the cover as you normally would if replacing battery.

    • Holding the camera with the lens facing away from you and the battery slot upward slide the cover towards the back of the camera.

    • There is a pin (3/4 of an inch long) that attaches the cover to the camera and it will come loose when the cover is removed.

終わりに

To reassemble your device, follow these instructions in reverse order.

作成者

7人の作成者と共同で作成されました。

Matthew Bessette

メンバー登録日: 03/04/16

658 ポイント

6のガイドは作成済み

チーム

UMass Dartmouth, Team 6-7, Bhusal Spring 2016 UMass Dartmouth, Team 6-7, Bhusal Spring 2016人のメンバー

UMASSD-BHUSAL-S16S6G7

3 メンバー

6のガイドは作成済み

0 件のコメント

コメントを追加

統計データ:

過去 24時間: 1

過去 7 日: 7

過去 30 日: 12

今までの合計 765