はじめに
Hey folks! Just thought I'd write something up here, since there doesn't seem to be much in the way of explaining a battery replacement on a Time Steel, and the differences between the Time etc.
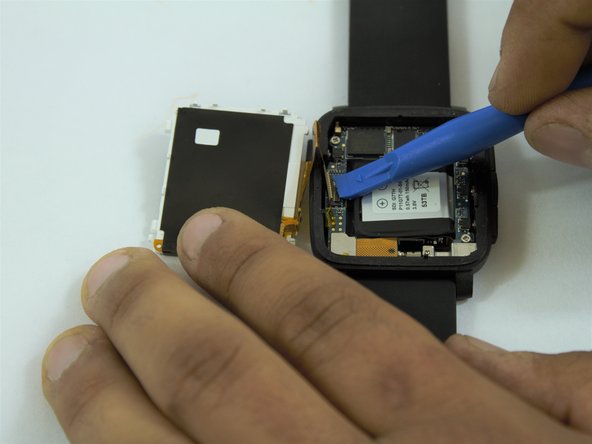
So the first question - you can use the Pebble Time Battery Replacement Guide (linked here), the main difference however is that the LCD on the Time Steel is bonded to the front cover, so definitely avoid separating those if you can.
The most useful information I've found on the web is actually in this Reddit Thread here: https://www.reddit.com/r/pebble/comments..., where they talk about what batteries fit etc and what to do/what not to do - it's tight, and there are a few ways to make it work, but definitely worth pre-reading and having an idea what you're getting yourself into. I would recommend grabbing a 3.8v battery rather than a 3.7v one, so that the capacity % works properly post-installation.
Finally, I've also just posted some pictures up of the replacement I just did with a few notes, photos here: https://imgur.com/gallery/V4SUvbz.
Also, be careful if you haven't taken anything apart before, as this one is a tid-bit fiddly. If you've taken a few phones apart you'll be familiar with the niggles and things moving around and small screws that aren't magnetic etc, otherwise if it's your first repair just be weary that the soldering is fiddly and it's very easy to drop screws especially since they aren't magnetic.
Hopefully this helps someone!
必要な工具と部品
-
-
-
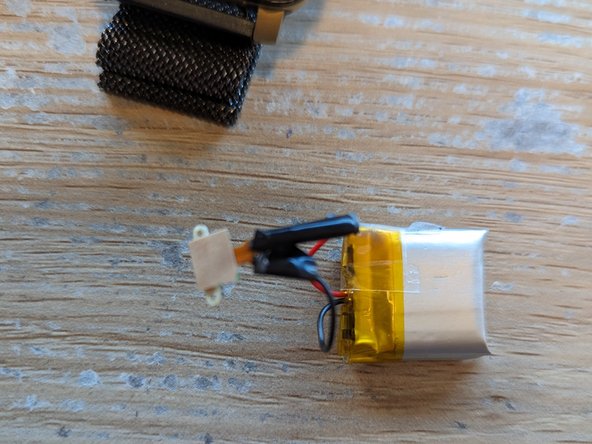
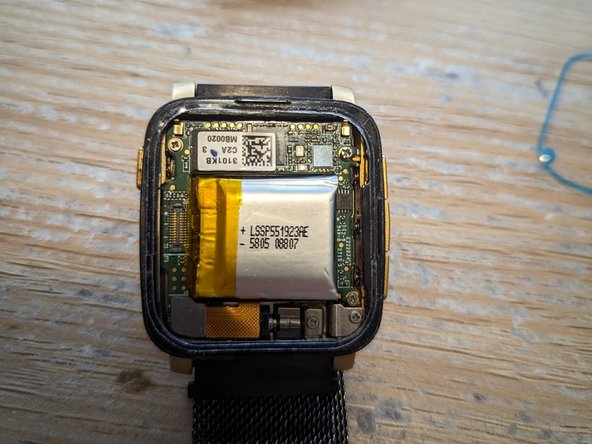
The original battery (note my lovely swollen one here) has a special flex cable attached to it that's soldered onto the battery - if you're up for it, desoldering this cable is probably the cleanest/easiest way to install.
-
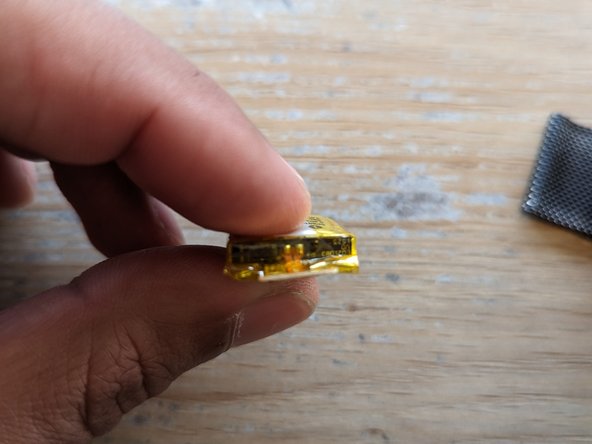
There are two contact points (second photo) in the middle that need to be de-soldered and re-soldered, and as you can see they are quite small and fiddly, and you don't want to bridge the two because they're connected to a live battery unfortunately.
-
-
-
Something that I didn't do originally is to trim the battery leads - comparing the photos, you can see how much excess there is. This makes re-assembling the watch easier as there is less excess wire to tuck away and find space for.
-
I also didn't get a photo of the battery just on its own, to show just how long the leads are, but they're about 3 or 4cm I'd say. In terms of the length I ended up trimming them to, it was approximately 1 length of the top of the battery (the yellow taped portion in the last photo).
-
-
-
Once you've soldered the battery flex on, make sure to insulate your solder points else they'll ground out on the case, which wouldn't be good. Also, as you can probably see electrical tape is a bit too stiff for this application, so Kapton Tape is much better if you have it (or can get it).
-
Unfortunately when I re-did my battery due to this one failing, I forgot to grab a photo showing how it's supposed to be done!
-
-
-
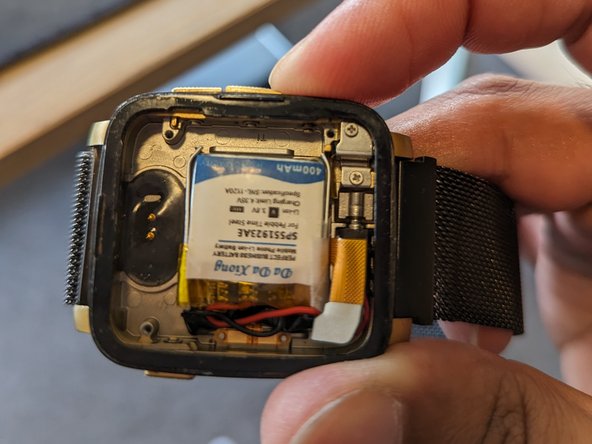
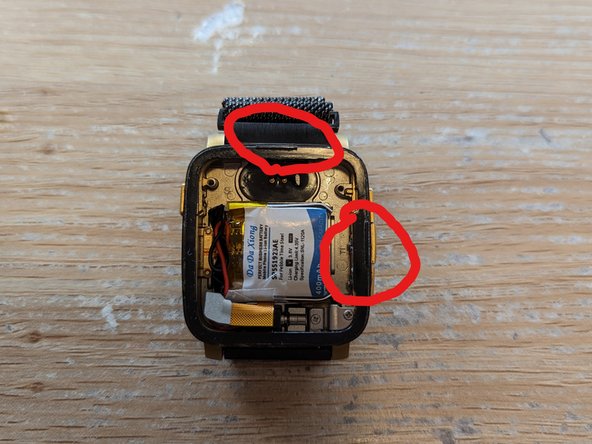
If you haven't already, now is a really good time to check your buttons and clean them, to make sure they work properly whilst you're in there (before you put the board in preferably, I happened to only take the photos afterwards - writing guides is hard!)
-
You'll see on each of the buttons on the casing that there is a little circlip on each, that should sit in a detent - double check/verify that it's where it should be, as otherwise this can make the button hard to press and not return to its normal position as well. There's also a write up here on iFixit that's great for the buttons.
-
-
-
Now it's time to put it all together - for the most part, you can go back up this guide and use the steps in the reverse order as standard, however since I had excess lead length, I found it easier to install the Battery Flex Cable, then to install the Motherboard, and finally to tuck away all the excess lead and install the battery.
-
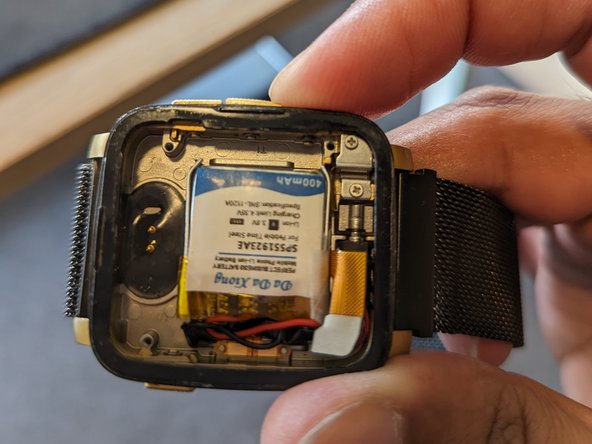
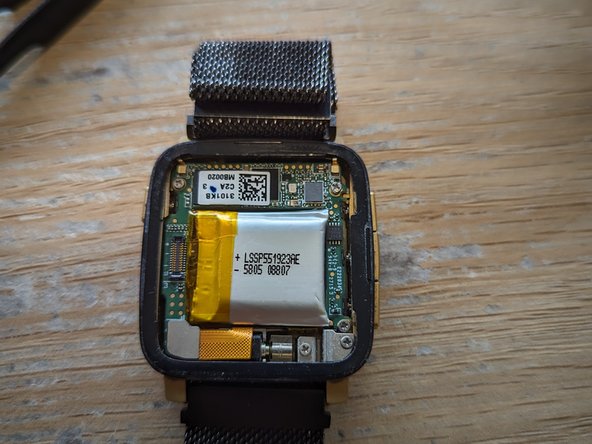
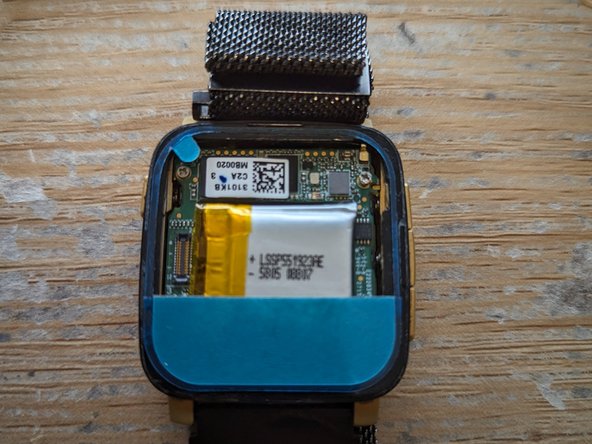
With the excess lead, I tucked this in slightly underneath and parallel to the inner left edge of the motherboard (where the two ribbon connectors are). The battery still fits reasonably well, but as you can see there is quite a lot of excess to store. The other battery I installed (last photo) is much better in this respect, with thinner wires.
-
-
-
Before you adhesive everything back together, now is a good time to test that everything works as it should, and that your Pebble boots/vibrates etc. You can also see me reusing photos here, since I wasn't planning on making this guide when I replaced the battery in my watch - this just sort of happened later!
-
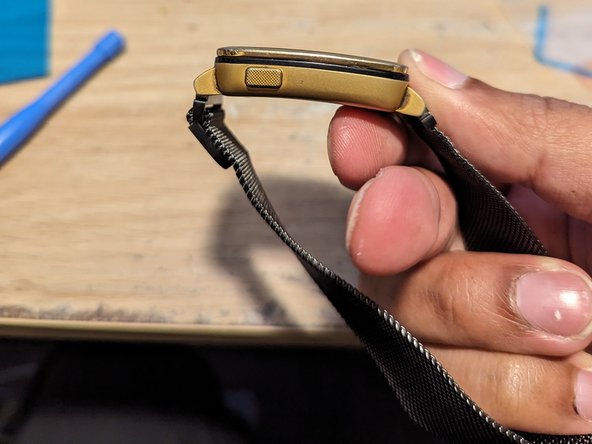
Also, installing that LCD Ribbon cable is a pain. Be prepared for that, and take your time as always. Use a spudger to press down and seat the connector. I found it easier to get the connector seated by moving the display to the right (2nd photo), and you can also get a side on view of the connector to check if the pins are lining up as well.
-
-
-
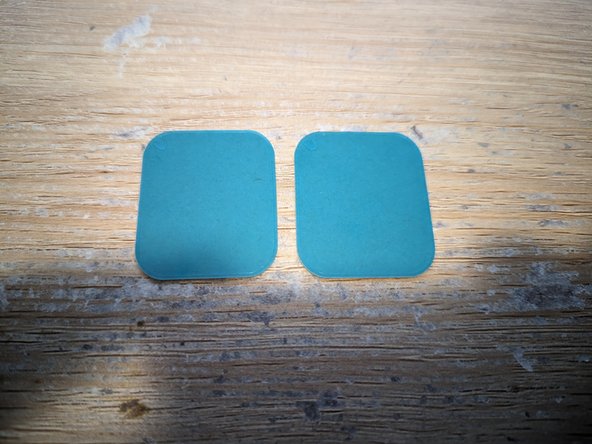
This seems to be something most people struggle with - what to attach the screen back on with. Tesa Tape is a good option, otherwise in my first replacement I actually used a spare LCD Adhesive set I had lying around (refer to next step). My best idea was to use some Apple Watch Series 5 (44mm) adhesive, and cut it down.
-
-
-
Here's what I ended up using on my last re-assembly (30 mins ago as of writing this). This Apple Watch S5 (44mm) adhesive is pre-cut, and fits the corners of the PTS reasonably well. It is however a bit long, so I cut it about 3/4 down, applied the top half, and then cut the bottom half to size and applied it to meet flush.
-
It's also worth noting that this adhesive is quite thin, and needs to be triple-stacked to make contact with the top frame. I found two was too thin, whilst four was too thick! Fortunately, they come in packs of 5.
-
-
-
Here's me having installed the adhesive. On the DIY Tesa Method (first photo), the fit wasn't quite perfect, but Tesa Tape is quite flexible, and so can be curved slightly once the backing is removed so that it fits in the channel. Tweezers are quite helpful for this however!
-
The 2nd photo is the results of the Apple Watch Adhesive Method, which I'm really happy with overall - this is with the adhesive applied (3 layers), and the backing on both sides removed. You can see it just fits the PTS, but you do have to be accurate with the placement.
-
-
-
Re-test the LCD once you've attached the adhesive and before you seal it up, and then you're good to go! Once it's back together, I also like to heat up the Tesa Tape/device slightly and apply light pressure so that the tape gets tacky and does begin to stick both sides together consistently.
-
You can also see from the 2nd picture that the LCD/Cover do sit quite flush with Tesa Tape (DIY Method), and seem to seat/seal well, so hence why it's my preferred option (aside from the Pebble being designed for similar stuff). The 4th photo shows the results after the Apple Watch Adhesive Method, which seems to sit even more flush.
-
But otherwise, you're done! Enjoy your new watch battery - also, a shameless Pebble Nav Me plug in there as well!
-


To reassemble your device, follow these instructions in reverse order (ish). In theory, if you've made is this far, you should be give or take done - enjoy your new(ish) Pebble!
To reassemble your device, follow these instructions in reverse order (ish). In theory, if you've made is this far, you should be give or take done - enjoy your new(ish) Pebble!
ある他の人がこのガイドを完成しました。

2 件のコメント
Thanks for the helpful guide! Managed to use the official ifixit battery replacement for the pebble time steel, and also managed to attach it directly to the battery PCB and fanangle it to fit. I’m not super proud of the bend in the flex PCB for the battery, but it’s working again so can’t complain.
Raymond Tu - 返信
No worries! Glad you managed to get it to work, as the photos really don't do it justice as to just how tight it is when you're trying to fit it all in there :D