はじめに
Is your Pebble Steel not turning on and you've tried all other troubleshooting options? The battery may need to be replaced. If so, this guide can help!
Replacing the battery in this device requires soldering. To learn more about soldering, check out iFixit's soldering technique guide!
必要な工具と部品
-
-
Use a Torx T3 screwdriver to unscrew the four 3.5 mm Torx T3 screws holding the back plate.
-
Remove the back plate.
 FixBotに聞いてみる
-
-
この手順で使用する道具:Tweezers$4.99
-
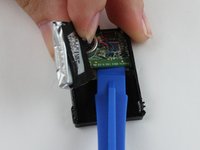
The plastic frame is clipped inside the steel body with four clips, two each on the left and the right side of the watch, near the corners. You can stick a small screwdriver into the cutouts right above the clips and gently lever the plastic frame up, corner by corner.
-
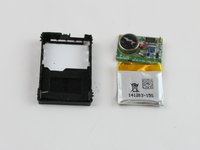
Once the clips are released, use a pair of tweezers to grab onto the black plastic frame and remove the internal hardware.
-
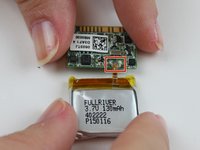
Use tweezers or a plastic opening tool to disconnect the ribbon cable from the motherboard.
-
-
-
-
Flip the internal components over, and use a plastic opening tool to pry the battery out of the black plastic frame.
-
-
-
Use a plastic opening tool to remove the motherboard from the black plastic frame.
-
The frame has integrated clips above the 4 corners of the motherboard. You can flex the frame gently to release these clips while lifting gently from below.
-
-
-
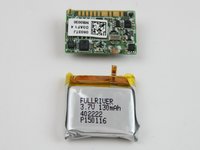
Turn the battery and motherboard to the opposite side to expose where they are connected.
-
Desolder the two battery connections to remove it from the motherboard.
-


To reassemble your device, follow these instructions in reverse order.
31 の人々がこのガイドを完成させました。
チーム

USF Tampa, Team 1-7, Leahy Fall 2015 USF Tampa, Team 1-7, Leahy Fall 2015人のメンバー
USFT-LEAHY-F15S1G7
3 メンバー
7のガイドは作成済み
27件のガイドコメント
And how do you connect the new battery to the motherboard?
What kind of connection is used between the two?
yvesyernaux - 返信 共有
Instead of desoldering the old battery, I clip the ribbon cable that connects the battery to the motherboard. Trim the ribbon cable as short as possible to the motherboard. The replacement batteries I’ve found have braided wire instead of a ribbon cable, so they can be resoldered to the pads that the remnant of the ribbon cable is attached to. Pebble used enough solder that I’ve never had to add any - just melt the solder that’s already there and drop in the new wires. You can tin the wire ends before attaching them to make a better connection, but you get a good solder connection even with the bare wires. Make sure you get the polarity right - the positive (red) battery wire attaches to the pad closer to the center of the motherboard. If you look carefully there are tiny + and - symbols silkscreened into the motherboard just outboard of the pads.
Farely certain battery ribbon conector is soldered to the circuit board. Gently pulling on it will seperate it but results in tearing. Two other things not mentioned is when removing the rear cover note the round disc object that looks like a button cell, it is glued to the back plate. Care must be taken when removing or one can pull out the red and blue wire from the circuit board. Second thing is a ribbon connector that needs to be disconnected from the cicuit board before the board can be removed. The plastic spudger or tweezers should do he trick. Its easy to miss as a piece of foam hides the connection point.