はじめに
This repair guide is to remove/replace the entire optical assembly, including the lens, of your Panasonic DMC-ZS19 camera. For this repair, you will need a PH00 screwdriver and a plastic opening tool. Ensure that you remove the battery before beginning this repair, as you will be interacting with electrical components.
必要な工具と部品
-
-
Locate the pair (2) of screws on each side of the camera and remove them. Then locate the pair (2) of screws on the bottom of the camera, located on each side of the tripod screw-in area, and remove them.
-
-
-
-
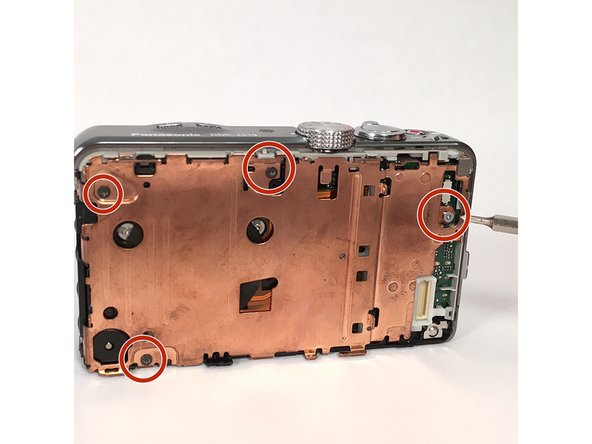
After the screen has been removed, the main motherboard is directly underneath it. There is a bronze, metal separation piece that separates the main motherboard from the one connected to the lens. This metal piece is held in with 3 screws. Remove these 3 screws and the metal piece will be free.
-
-
-
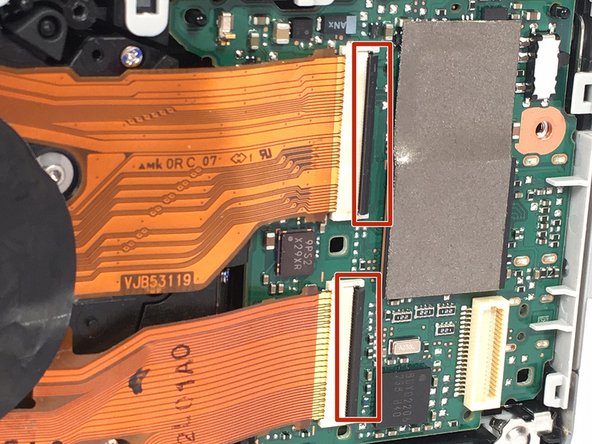
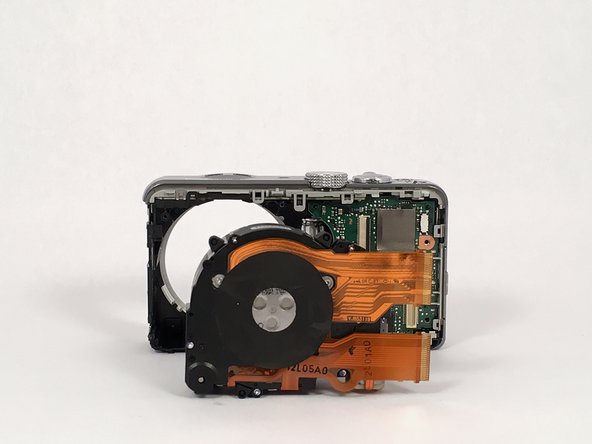
Once the plastic riser is removed, it is time to remove the lens. To do this, simply follow the data strips (2) that connect the lens to the main motherboard and unclip them by turning the black bar into a position that is perpendicular to the motherboard. Once these clips are open, the data strips and the lens should simply slide out.
-


To reassemble your device, follow these instructions in reverse order.
To reassemble your device, follow these instructions in reverse order.
2 の人々がこのガイドを完成させました。
チーム

USF Tampa, Team 14-1, Meier Fall 2015 USF Tampa, Team 14-1, Meier Fall 2015人のメンバー
USFT-MEIER-F15S14G1
4 メンバー
10のガイドは作成済み
3 件のコメント
I want to replace the lens but the description is for the motherboard??
Looks like an honest mistake; I updated the introduction to remove the reference to the motherboard. Sorry for the confusion!